
-
6th February 2008, 22:58
#1
 Not exactly a profile... LOL!
I was testing out GIMP 2.4, and I realized that I have not painted anything in so long I cannot remember when or what my last work was!
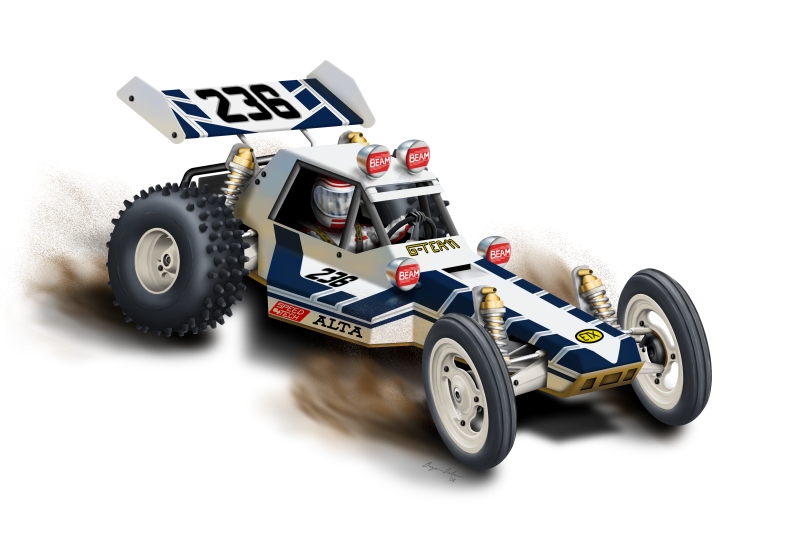
So, just to be sure I haven't forgotten how to ride the bicycle, I decided I'd create something new. I wanted to recreate the style of the old Tamiya R/C car boxart, with a dune buggy which is a blend of the old Associated RC10, some Kyosho stuff, and just my own recollections of these things.
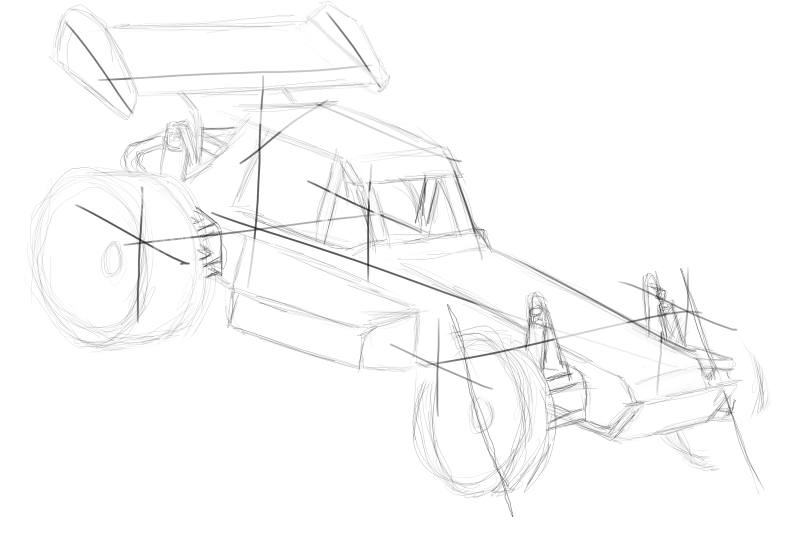
So first my pen sketch at 3000x2000 pixels. Started with the perspective lines, then fleshed out the basic idea.
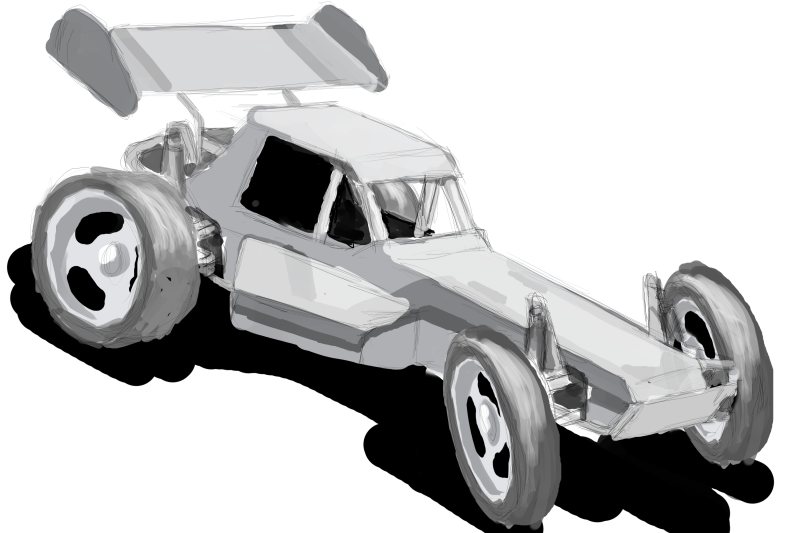
Then I filled in with some grays to figure out my lighting and shapes better.
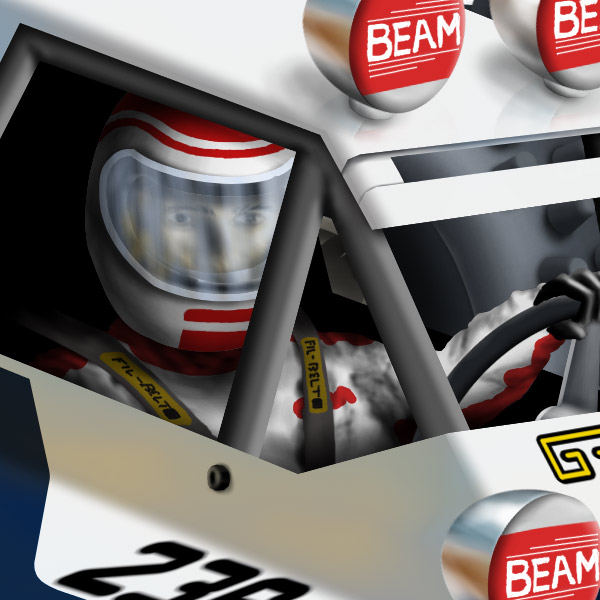
For the final work, I over painted everything. I used lots of masks, airbrushing, copy/paste, etc. I expanded the canvas to 3800 pixels wide to fit the dirt and shadows better. I had a lot of fun adding details until I was really happy with things.
-
8th February 2008, 10:32
#2
Re: Not exactly a profile... LOL!
Interesting. Can you tell some techniques you used there?
-
8th February 2008, 19:40
#3
Re: Not exactly a profile... LOL!
Very cool!!! 
 FAST AND BULBOUS!
-
10th February 2008, 01:47
#4
Re: Not exactly a profile... LOL!
Thanks guys.
For the sketching, I just use a 1 or 2px paintbrush. I prefer to scribble my lines as you can see. That way I can make changes without too much erasing, I just scribble more towards what change I want to make. You can see that my sketch doesn't quite match my perspective lines, but it still works OK. I just eyeballed the perspective anyway so there were bound to be changes as I went.
Doing the gray fill in paint is something I really enjoy. I use the paintbrush for this too, just a bigger tip, maybe 10 to 20 px. I start with the darker grays first, then move to lighter. Black for dark shadows goes on last, after I've got the shapes the way I like them.
I then saved a merged file of my sketch, and used it for the backdrop of my painting. I used paths to mask off an area, then filled it with the bucket or paintbrush with a large tip. After I had blocked up some areas, I went back with the airbrush tool, and applied highlights and shadows to create a 3D effect. I save and reuse my masks repeatedly during this work. GIMPs selection resizing was a big help for making small adjustments.
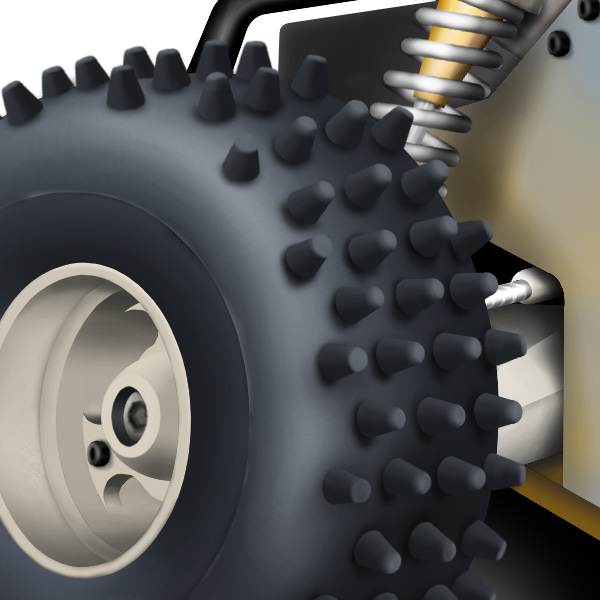
So just alot of that same thing, over and over. The most intensive part was the rear tires, with the spikes. I created a central row that had a decent shape, then painted them to give the appearance of the proper perspective. Then I copy/pasted each individually, adjusting the rotation to suit, and then airbrushing each one to look in correct perspective as I went. I think it was about 4 hours work on the rear tire. Fronts were simple, just airbrushing with oval masking and were done in about 30 minutes.
One tip with the masks, remember that you can get nice results by painting inside and outside of the mask. Just invert it. So I'd spray some white highlights inside the mask, then invert and spray some dark shadows right next to the highlights to help create the dimensional effects.
So to finish, I created a sporty paint layout and masked it off. Also hand painted all the text and numbers, as you can probably tell. Blocked in a shadow with more masks, and then gaussian blurred. Dirt was some airbrushing for the cloud effect, and then a speckled effect for the flying dirt particles.
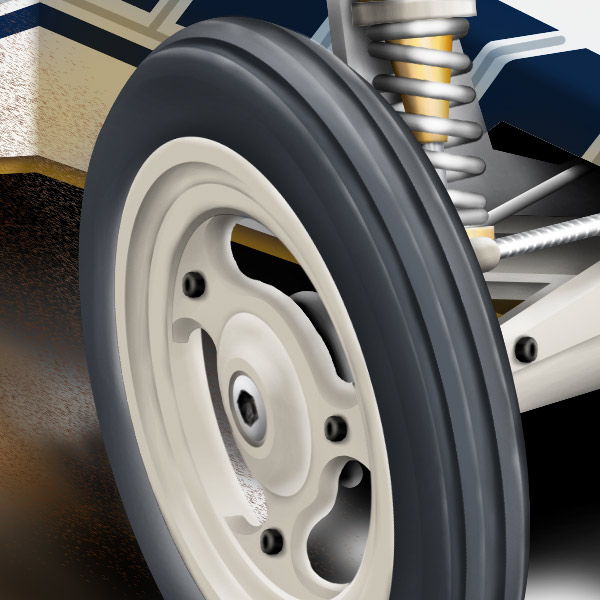
I'll attach a couple detail shots below. They are 100% crops. Plenty of mistakes, and I could've done better with using the text tool, or other tools. But I wanted a 'painted' kind of result, and resisted the temptation.
Front Tire and suspension:
Driver:
Rear Tire:
 Posting Permissions
- You may not post new threads
- You may not post replies
- You may not post attachments
- You may not edit your posts
-
Forum Rules


 Reply With Quote
 Forum Guy


