
 Forum Guy

I've put together a brief demo outlining how I painted my B-25J profile, and in this demo, I'll paint a completely new profile. Doing this project isn't nearly as hard as skinning a plane in Forgotten Battles, at least for me. Perhaps this is because most of my past experience is in 2D works.
Tools
For this project, I used two different software packages, Serif Draw Plus 5 and Photoshop 5.0LE. Serif Draw Plus is alot like Adobe Illustrator, and costs under $100 US. Any paint program is usable for this kind of project, with Photoshop and Paint Shop Pro being two popular choices. I also used a WACOM Graphire2 pen tablet in Photoshop to nicely feather my strokes.
(UPDATE July 2006 - With todays software, you can use the built in "paths" tool to easily create lineart, exactly like I did with DrawPlus for this article.)
Resources
In production of this or any profile, you need as much photographic and/or artist renderings as possible of the plane being modelled. Sometimes, when I have little evidence during a project, I'll just go ahead and make assumptions as best I can. For this profile, my only resource was the book B-25 MITCHELL: The Magnificent Medium by N.L. Avery, who also did design work on the B-25, P-51, F-86 and others.
Step One
The first order of business is to get hold of a good side view, be it a photo or painting, or even another profile. In my case the book I refered to had a side outline of the plane that was drawn similar to a blueprint, so I photographed it, and loaded the photo as a reference into Draw Plus. I matched the outline of the plane exacly, but for many of the lines that weren't in the source drawing, I had to refer to other diagrams in the book, checking up on where each panel or compontent was, then drawing it in on the screen, as close as possible to the correct location. After about 3 hours of looking at blueprints and drawing, I had this:
Of course your milage may vary depending on what sources you have on hand. Don't be afraid to improvise if you find yourself at a dead end. Nothing is perfect, so don't get hung trying to make a perfect outline, if you were to compare my drawing above with a proper blueprint, probably half of those line would be a little out of place, but they LOOK 90% right, so I'm happy.
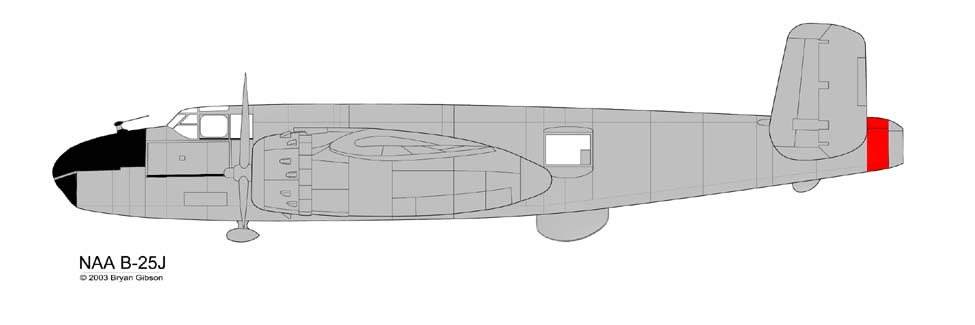
Step Two
Next up is a very simple step, just blocking in the different areas of the plane. But this isn't always the easiest step, since you'll have to make serious decisions about proper colors, which avaliable source materials may not show. I had only a single B&W photo of the plane I'm profiling, so I did my best. This plane is the last B-25J built, #4390 on October 15, 1945. I painted it as it appears at the factory, in silver, with a black nose cowl. I had to guess that the band on the tail was red.
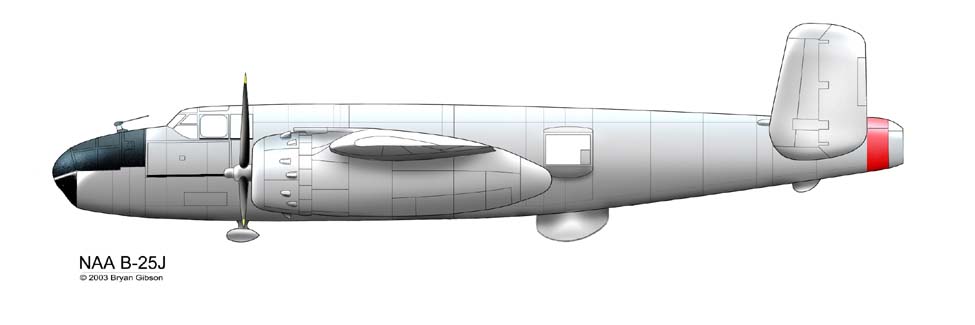
Step Three
Now that the basic colors are in place you can decide what type of profile you want to paint. Many that I've see around the web look much like the finished step two above. I chose to shade mine because I like it that way, and I can give the plane some character, even if some would call it inaccurate. Shading can be done with the dodge and burn tools, and with the airbrush tool. Just move around each section of the plane, and try to recreate what the light in your source photos does. Shadows on the bottom, highlights on the sides or bottom. I have placed my fuelage, engine, prop, and rudder on separate layers, so that I could control the paint flow a little better.
Every thing you see above is done with the dodge and burn tools. Since this plane is slightly reflective, I airbrushed a bit of light blue along the top of the plane, so simulate sky. Take your time here, and get a nice balance of shadow and highlight, and take care to feather well.
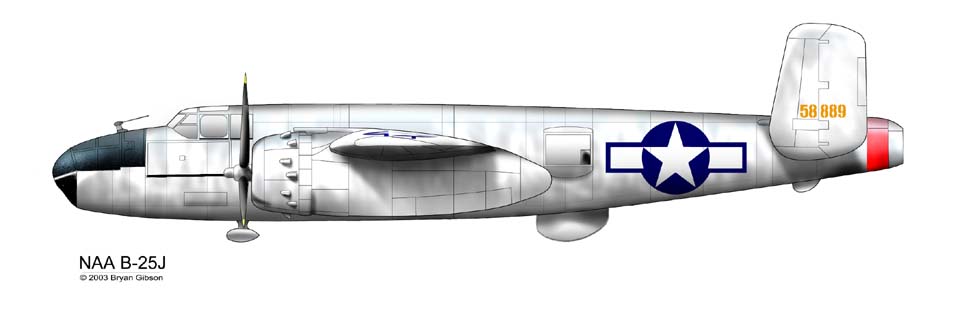
Step Four
In this final step, were going to use more of the airbrush tool, spraying black and white paint to create shadows and highlights that are not possible by modifying the paint with dodge or burn. Select the work area very precisely to get a nice shadow line. The most important advice here is to look at photos, and do what they show. Place shadows so that the light all comes from the same direction, and try to get the highlights in the proper place, which is not always the top!
Add any national markings and numbers on a separate layer, on the top of the rest. Fill the windows with a gradient like shown, or try to be more detailed if you like. Weatheringthe plane is up to you, but be sure to do it on a new layer above everything else, so nothing is left unworn. Of course, put a title area somewhere out of the way.
Thats it! Good Luck in your projects!
-adlabs6
Last edited by Serval; 18th November 2015 at 15:45.
 Posting Permissions


 Reply With Quote