


 Reply With Quote
Nice tut. I also use this technique when applying textures to my 3D models instead of cutting into meshes. Besides this is a lot easier,

 Senior Member

In this tutorial we create a hatch as you sometimes find them on aircraft.
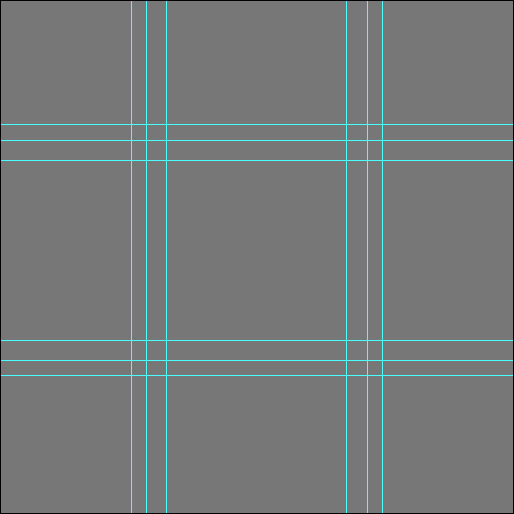
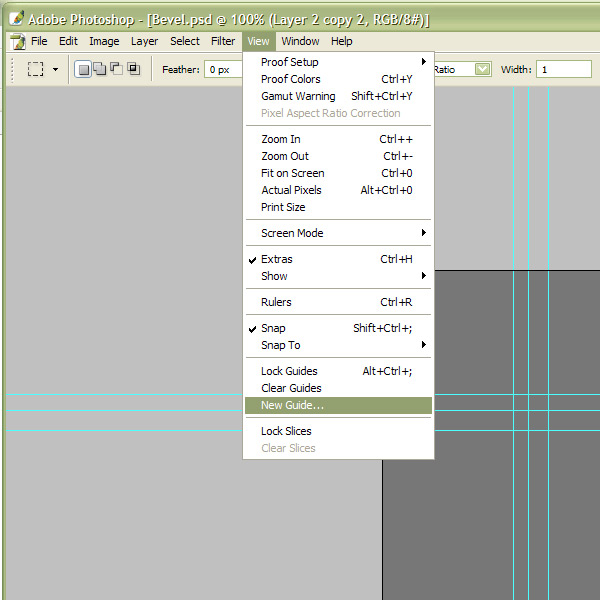
Start with placing guides to make drawing the objects easier.
You can add a guide from the menu Window - New Guide
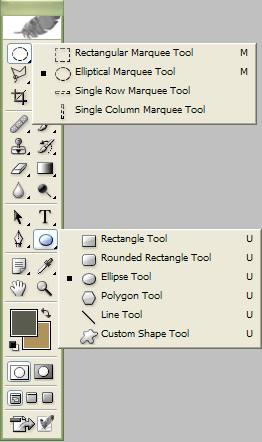
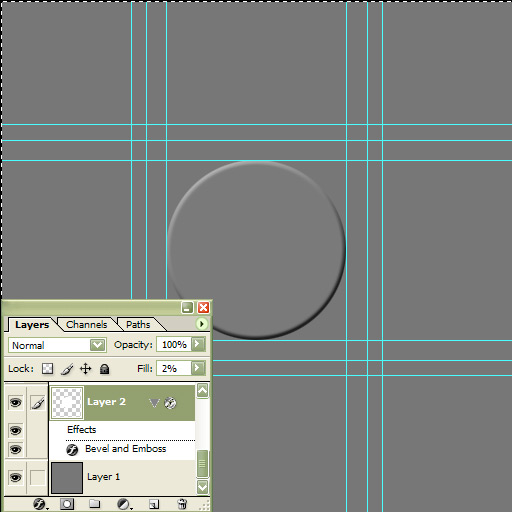
We start with a white circle. The guides help to make it perfect round.
There are two ways to create a circle. You can use the Elliptical marguee tool to make a selection and fill it, or you can use the Ellipse shape and fill that.
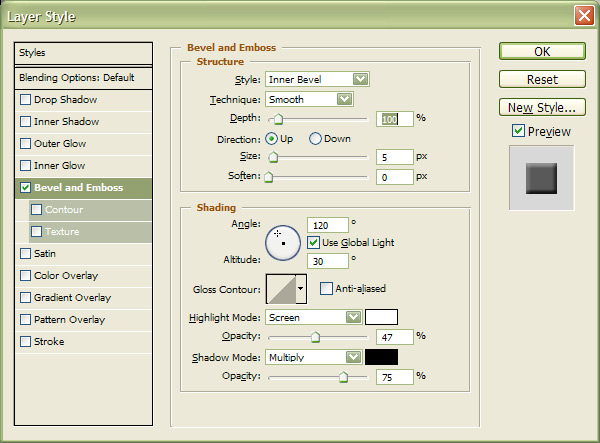
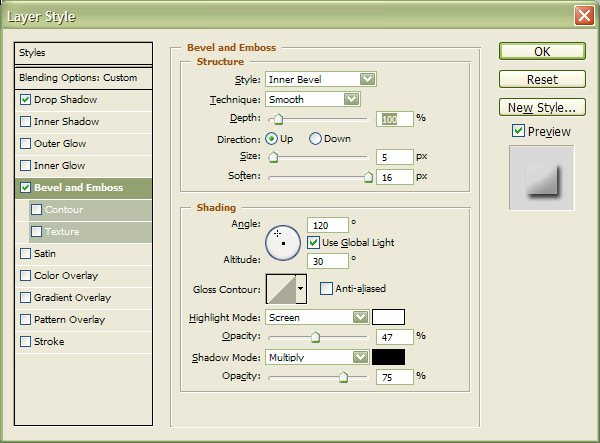
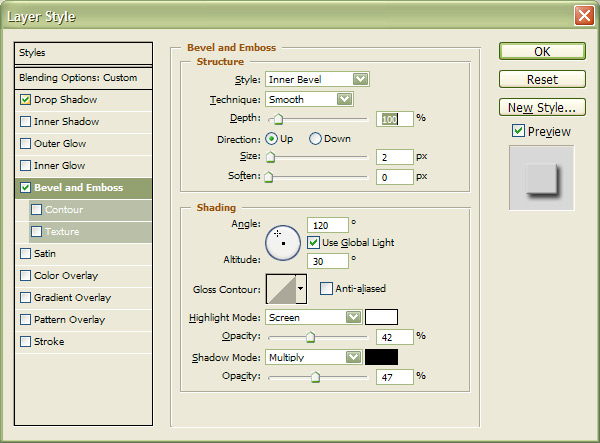
After we have set the fill of the layer too 2% in the layer window we open the Layerstyle Bevel and Emboss from the layer menu.
Select an Inner Bevel and choose the directio Up.
Set the Depth, Size and Soften sliders as you wish them.
For more special effects you can play with the light angle and other options in the bottom half of this window.
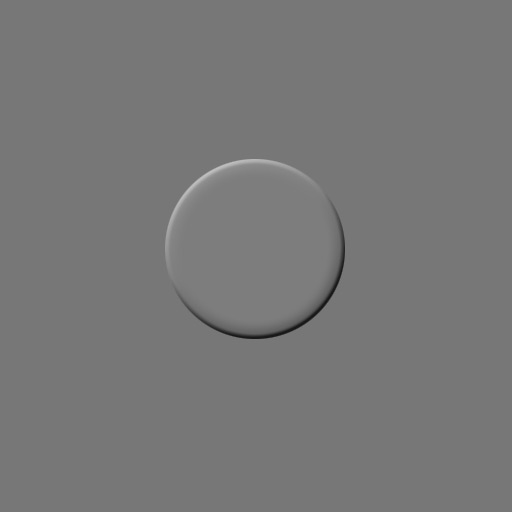
Now our image looks as shown below.
To create a slight rounded effect we copy our white circle to a new layer. This layer we also set to a Fill of 2%
Again we apply the Bevel and Emboss effect and use the settings as shown below.
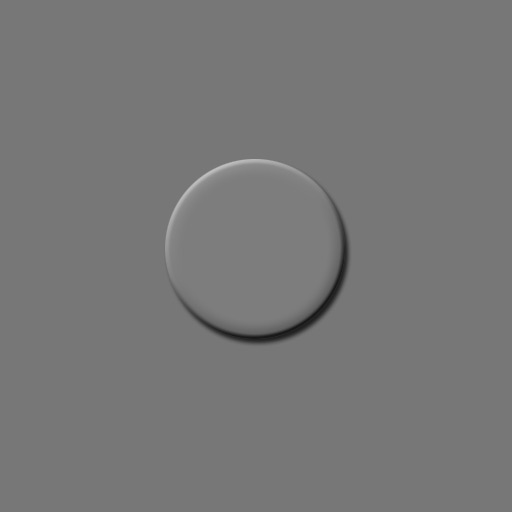
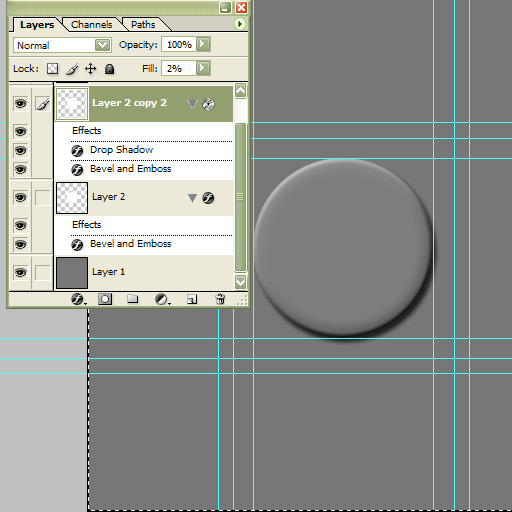
This will give the following effect. Note you see both the effect applied on the first circle and that applied to the second circle. By making the first circle invisible you wll see how the bevel effect of the second circle alone.
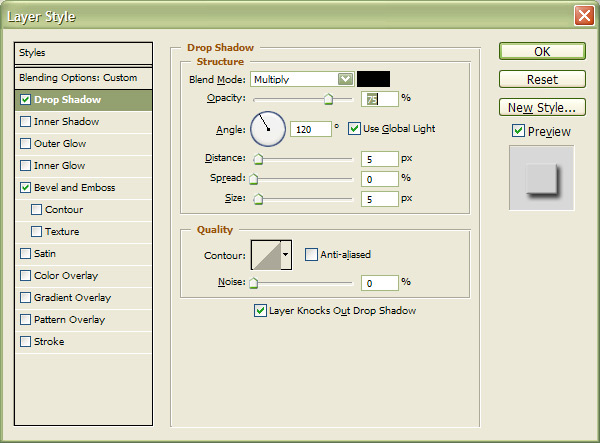
To make it more realistic, we add a drop shadow. This effect is also found in the Layer styles.
Again there are many options to manipulate the effect. Our settings are shown below.
With the dropdown shadow applied our image looks like this
And below you see the layers used and which effects are applied to each of them.
Next we draw a white ring like shown below
Set the Fill to 4%. This because the circle is made of two circles with fill set to 2%.
Then apply a Beval again with the settings as shown below.
Next apply a drop shadow
Now our hatch is ready to be added to our artwork.

Last edited by Serval; 18th November 2015 at 15:26.
Member
Nice tut. I also use this technique when applying textures to my 3D models instead of cutting into meshes. Besides this is a lot easier,
 Posting Permissions


