
 Bug creator

Below I will describe how to apply exhaust stains:
1. It is best to use a template with various layers to create the exhaust effect.
2. Create a new layer under the layer with fixed items, but above the layers with paint and other effects
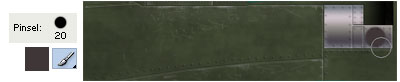
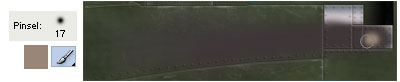
With a brush with a good fitting size I apply a dot or small line near the exhaust. This will be the background color which is Dark grey-brown of color.
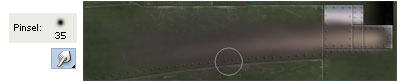
3. With the "Smudge tool" you smudge the line in the trailing direction, like the wind would do along the fuselage. To do this I use a bigger soft edged brush then I used to make the dot or line.
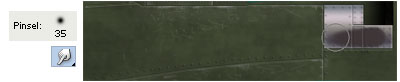
4. On many aircraft you see bright exhaust stains. These are made by a well tuned engine. To get this effect add another layer on top of the previous layer. Apply a fot with a bright brownish color. Use a smaller brush than you did for the dark stains.
5. Use the "Smudge Tool" again to create the trailing effect along the fuselage.
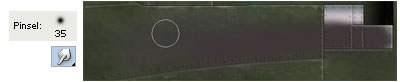
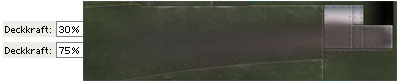
6. Now it is time to play with the opacity of both new layers to get a realistic effect. The bright layer needs a lower opacity setting then the dark one.
7. With a light grey and a black layer you can check wether it looks good in both situations.
When you are really sure that your layers are good you can merge them.
Then you can copy the layer and mirror it to use it on the other side of the aircraft.
Last edited by Serval; 7th December 2006 at 14:59.
 Posting Permissions


 Reply With Quote