


 Reply With Quote
The steps shared here for enhancing the screen shot is good enough for me now to try this on myself!

 Junior Member

Here you can download two Basic Photoshop video tutorials ,that will show you how you can edit your screen shots with Photoshop.
Video Tutorial 1 >DOWNLOAD< 32MB
This tutorial takes 17 minutes.
Be aware that there is no voice-over and i use a German layout of Photoshop , but it is really basic and self explaining and you can easily identify the tools I'm using by looking at the toolbar.
And if you are still confused you can find a German-English translation of Photoshop here: Oliver Weiss Design: ARTICLES > Photoshop-Lexikon englisch / deutsch
There are four steps.
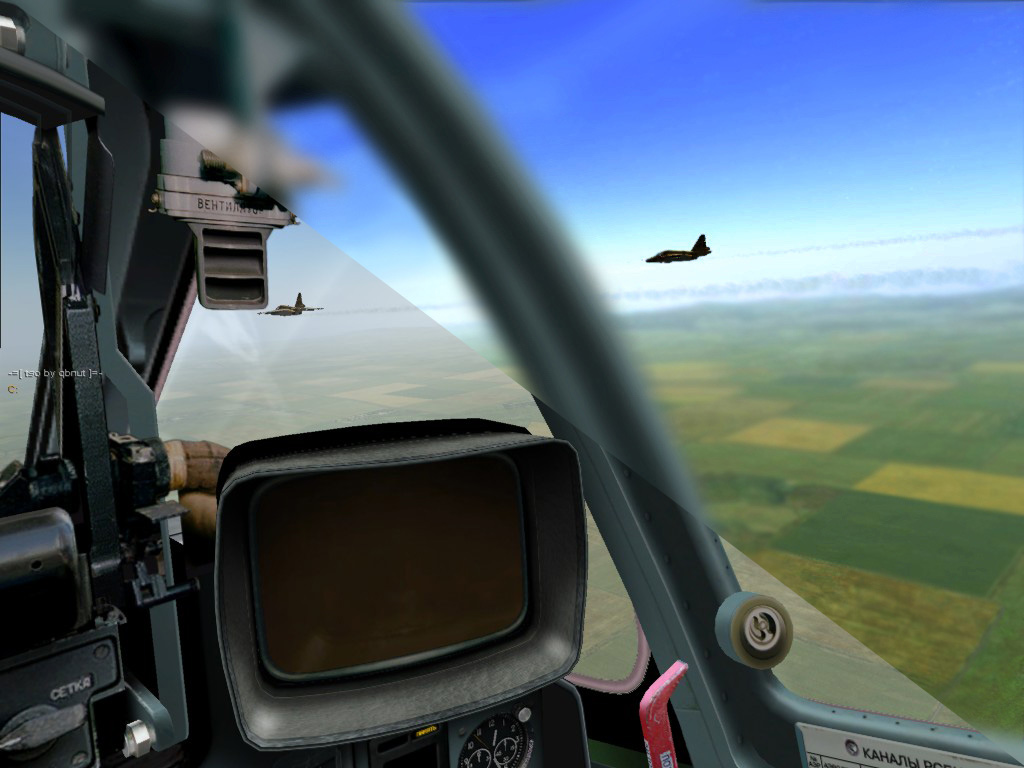
1. Separate the Different fields of depth from each other, in this example its the interior of the cockpit and the outer environment.
I used the"Magic Wand/Zauberstab" (play with the values of it to get the best results) and the
"Polygon Lasso/Polyagon-Lasso" for this task (press "shift" to grow your selection and "alt" to reduce it, while you are using the tools).
Place separate regions on different layers by copy and paste.
2. Use the Filter "Gaussian Blur/Gauscher Weichzeichner" on the first layer/inner environment to simulate a focus outside the cockpit.
Add missing regions at the second layer/outer environment with the"Clone Stamp/Kopierstempel".
3. Use the"Smudge/Wischfinger" and
"Blur/Weichzeichner" to remove sharpness from the more distance parts of the background and reflections of the canopy.
4. Change the color settings. Therefor go to menu "Image-> Adjust-> Levels/Bild-> Einstellen-> Tonwertkorektur" and also rise the saturation "Image> Adjust-> Hue/Saturation / Bild-> Einstellen-> Farbton/S?ttigung".
Video tutorial 2 >DOWNLOAD< 60MB
This tutorial takes 32 minutes.
Be aware that there is no voice-over and i used a German layout of Photoshop , but it is really basic and self explaining and you can easily identify the tools I'm using by looking at the toolbar. So you can turn on any music you like.
There are four steps:
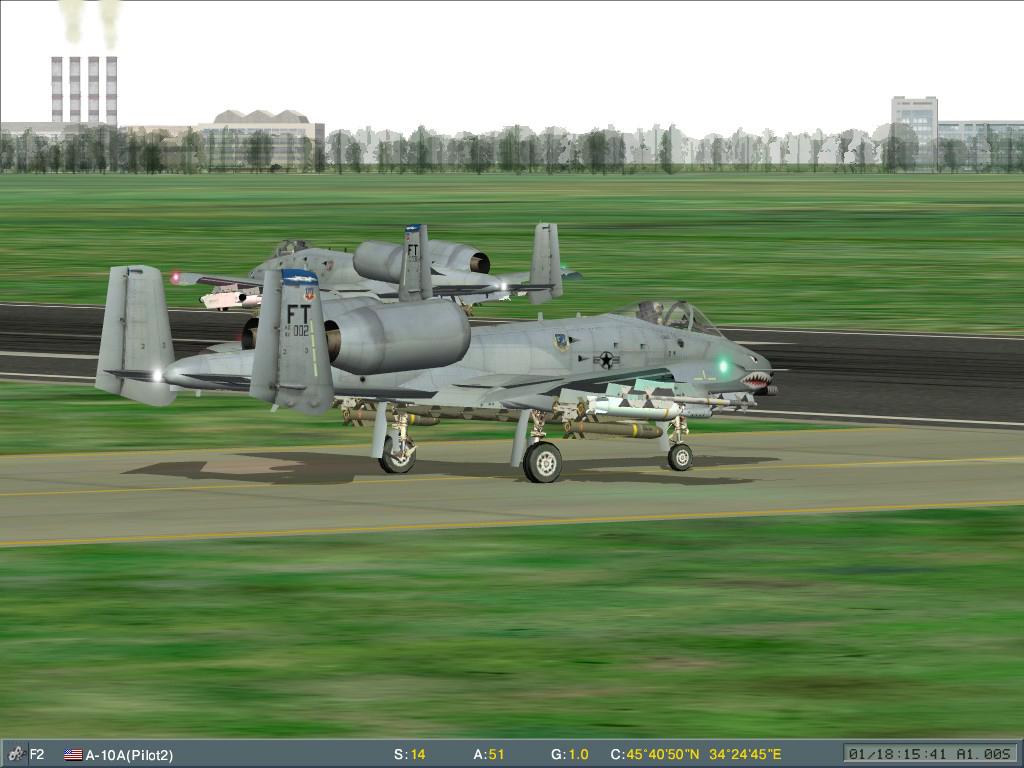
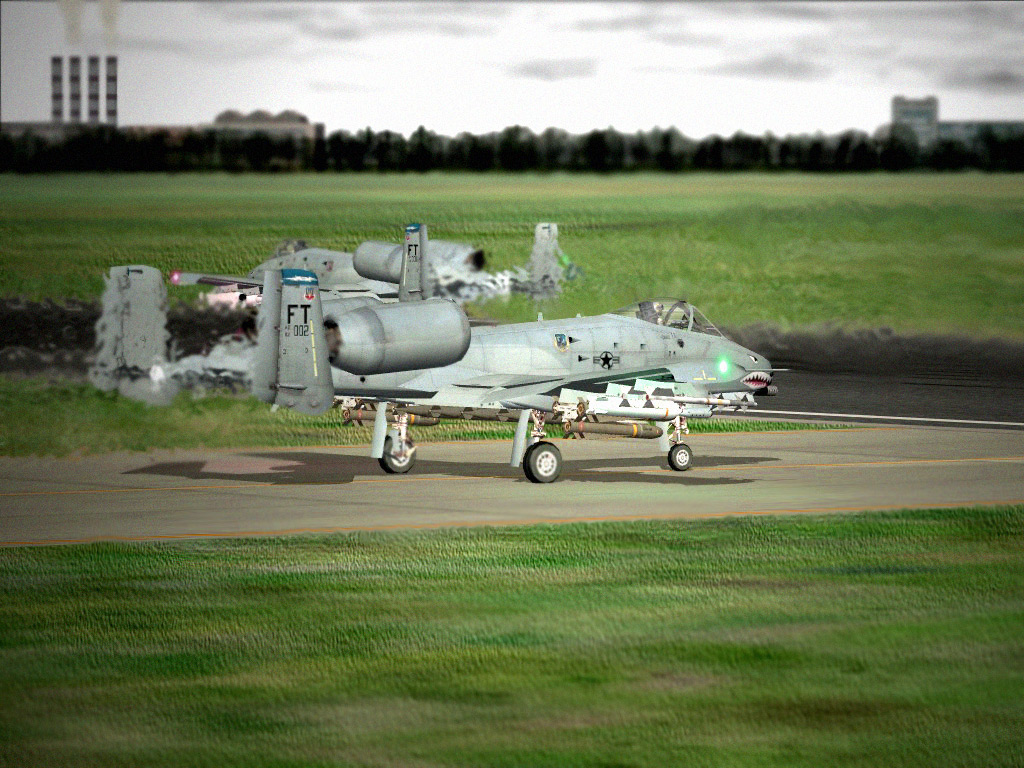
1.Enhancing the environment
Add clouds with theBurn/Nachbelichter and edit it with the
Edit The background (trees and buildings).
Select them and edit the color with Hue-Saturation/Farbton-S?ttigung and Levels/Tonwertkorrektur and also with the
2.Enhancing the grass
First select all areas and give a simple structure to it with Filter> Texture/Strukturierungsfilter> Texturizer/Mit Struktur versehen.
If you are ready, use the Filter> Blur/Weichzeichnungsfilter>
Motion Blur/Bewegungsunsch?rfe (only a little to 90 degrees).
3.Adding heat blur
First select regions that are not affected by the heat blur (the cockpit of the A-10 in the front) and place them on a second layer with copy and paste. Go back to the layer you want to modify. Select areas that would probably be affected by the heat of the engines.
(I often use the menue Select/Auswahl> Feather/Weiche Auswahlkante. So I don't have to rework the borders so much.)
Than use Filter> Distort/Verzerrungsfilter> OceanRipple/Ozeanwellen.
Adjust the values to your needs.
Finish it with your 'good friends'
Unite both layers into one.
4.Light and finish
I used Render/Renderingfilter> Lightning Effects/Beleuchtungseffekte> Soft spot/Weicher Strahler.
Adjust the color with Adjust> Levels/Tonwertkorrektur and/or Adjust> Hue-Saturation/Farbton-S?ttigung.
Add blur where it is needed with your 'good ol' friend'.
As a last step I added some graining to get away from a clean look with Filter> Noise/St?rungsfilter.
There are many ways to Rome, everyone has his own techniques and likings , this shows just mine.
Comments are welcome.
Last edited by Serval; 15th April 2007 at 16:43.
Member
The steps shared here for enhancing the screen shot is good enough for me now to try this on myself!
 Posting Permissions

