
 Forum Guy

by adlabs6 08/28/08
This short tutorial demonstrates how to created outlined path stroking in the Gimp.
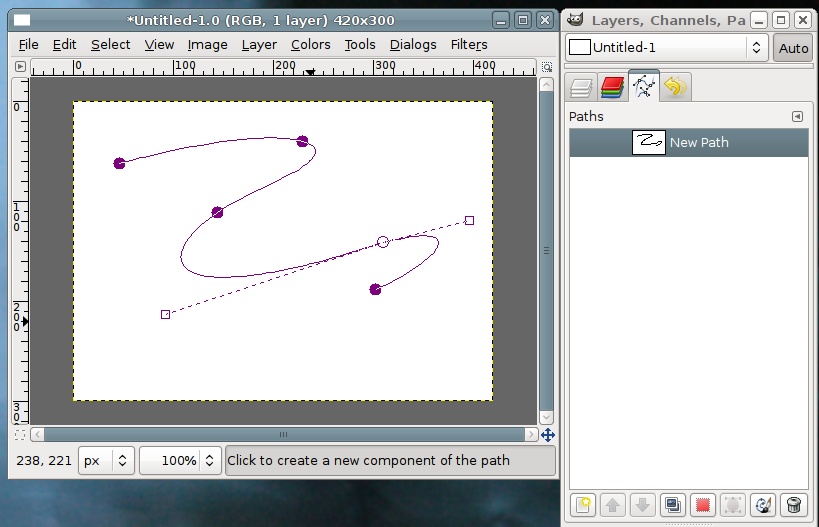
Firstly, I have created a new path which I will use for the stroke operation.
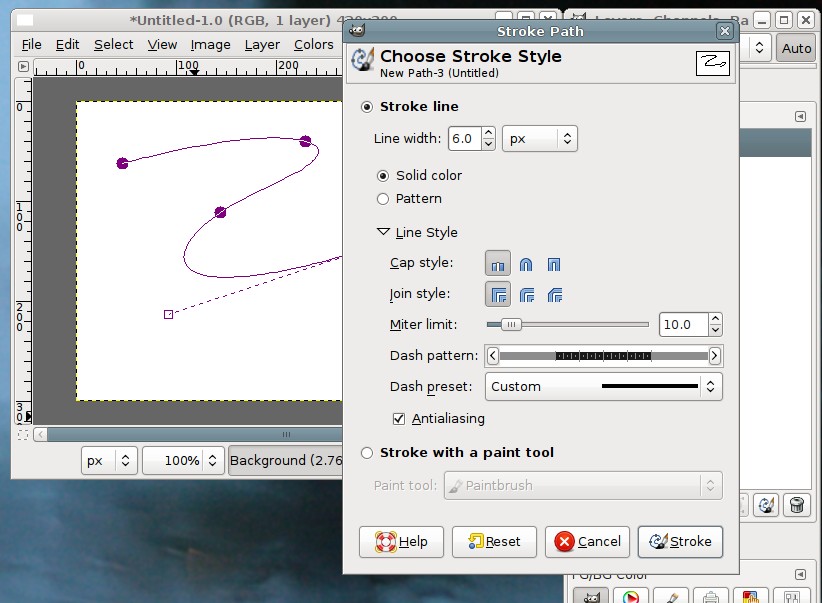
A view of the stroke path dialog. For my example, I changed the 'Cap Style' to 'Round', used a line size of 10, and black as my starting color.
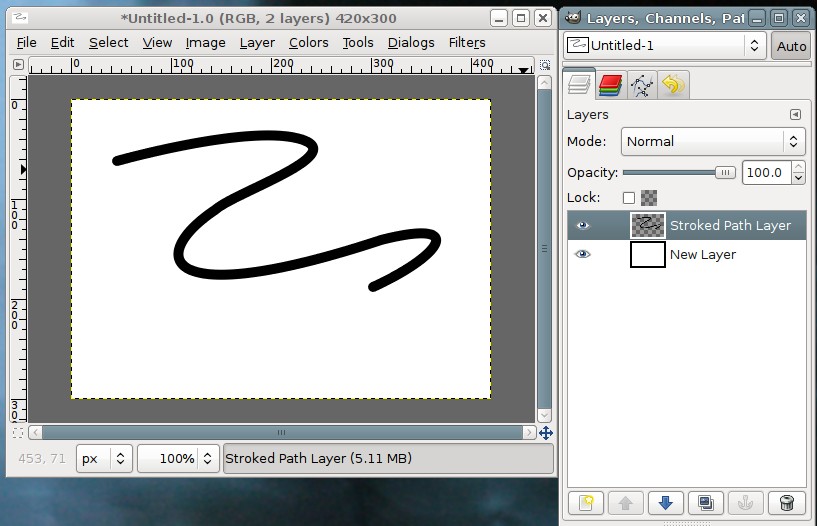
Below is the result on a new transparent raster layer.
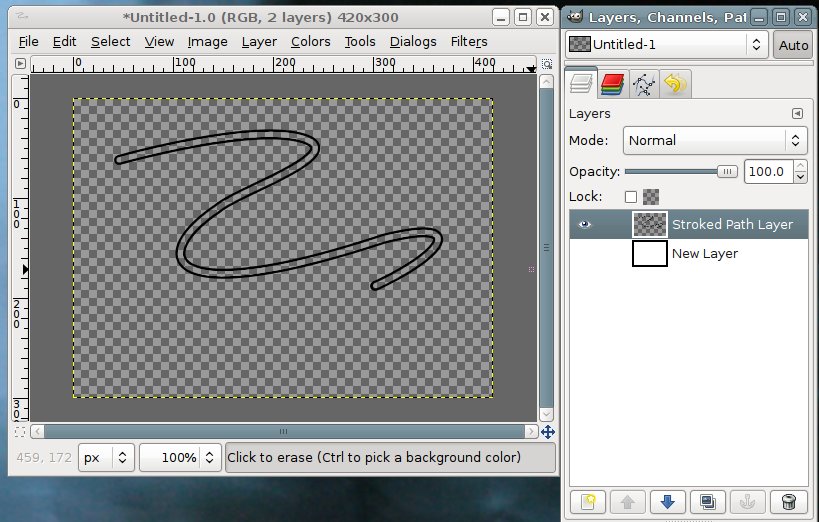
Finally, I need to create the outline effect. I do this by repeating the stroke path dialog, this time changing from a line stroke, to using the 'Eraser' tool brush (which I have set the brush size to 5px), which will erase some of the center of the previously created black line, while leaving a thin border. Here is the final result.
Experiment with the different cap style options to find the result you need for your project. You can also vary the outline thickness by making the erased portion a larger or smaller brush in proportion to the original brush you used to create the stroked line.
 Posting Permissions


 Reply With Quote