Reply With Quote
aha, very interesting! new to me, but seems to be very easy with flowers!

 Forum Guy

I use flowers.Originally Posted by Baron

Well, yes I have on some projects. Check out here:
http://www.simmerspaintshop.com/foru...e-effects.html
Senior Member
aha, very interesting! new to me, but seems to be very easy with flowers!
Retired member
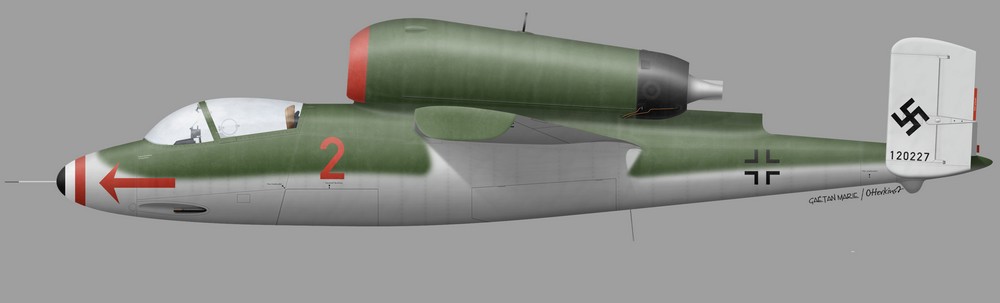
Gaetain, I must confess that I had to make an educated guess on the canopy lock. Although several of the photos I sent you show the lock it is pretty fuzzy and indistinct. In one case it seems to be broken and dangling down and in another instance the canopy is held in place by a chain attached to the mounting bracket. The lack of photos on this detail is one reason why 95% of the profilers out there don't show it at all even though it is quite visible through the canopy. Otherwise, it's a fine looking render mon ami!
Cheers!!!
Otter
Senior Member
Thanks, Otter. I'm glad you like it.BTW, I think one thing you should also look into to complete the line drawing is the riveting on the engine nacelle. It doesn't show up on most photographs, but it's probably there as there are 8 frames that constitute it. That's one of the last things I've added here.
I think (I hope) I'm finished now. I've learned a few valuable lessons doing this model (mostly by screwing up good and having to rework so much stuff). The file was initially small but now my computer thinks it's Duffy and keeps singing "I'm begging you for mercy":
Any comments before I close this case? Here goes:
@Simon: my weathering/texturing techniques are not a secret. I replied yesterday on that topic but for some reason (maybe time-out) my reply was not posted. Right now I'm off to bed but I'll write about that again tomorrow.
Retired member
Hi Gaetan,
I knew there were rivets on the nacelle somewhere, but in all the photos I looked at I couldn't see them. Rather than place them incorrectly, I chose to omit them entirely until such time as I run across that info. A line of rivets usually leaves a very noticeable ripple in the surface even when filled, but I'll be damned if I could see anything. Maybe it has something to do with plywood as opposed to aluminium skin. Again, fine job. Hope I get to see the printed piece.
Cheers!!!
Otter
Senior Member
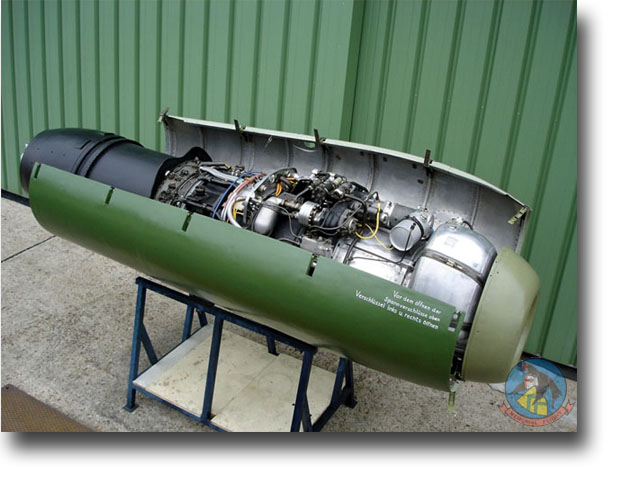
@Otters: I had to make an educated guess myself. I used one of the pics you sent me that shows the inside of the engine hood. (I don't think it's made of wood BTW).
Anyway, if you look at the pic you can see that there are 9 "frames" that shape it. That would be the place were you'd find the rivets. Probably the reason the riveting is not very visible is that that surface tends to be quite distorted with bumps in the first place, so the riveting ripples would not be as obvious.
@Simon: about the weathering/texturing. Mostly what you should look for are scratch brushes (I assume you're using Photoshop). I found quite a few free ones on the net, you don't need to buy anything. After that, just play with the settings: make the brushes change size, intensity, with a rather random pattern. Also, use several brushes. If you only use one or two weathering effects, there tends to be a noticeable pattern which doesn't look very good IMO.
These are the tools I use (although my techniques keep changing and hopefully improving). After that, you just need to recreate all of the little things that make an airplane weathered: scratces, chips, riveting ripples, bumps, mud, paint wear, oil streaks, fuel leaks, etc. The more the better.
I hope this helps.
Senior Member
Hi Ga?tan!
Thank you for the tipps regarding the brushes! I found some intersting at PS. Easy to handle with a graphic tablet.
Cheers, Simon
BTW: very nice He 162!
 Posting Permissions