Results 1 to 3 of 3
  1. #1

    Skinning In LOMAC

    With the arrival of LOMAC (though it has been awhile), it's again open season on skinning for it, well sort of. If you are new to LOMAC, but not to Flanker, there is one major difference. Unlike Flanker, LOMAC has .cdds files, which are basically big files that contain the textures for the sim. It presents a problem to those who don't have the tools. However, tools are available, such as the "CDDS Browser", which by far has been the tool to (only one I know of) to insert/extract skins.
    I'm not going to go in depth on the process of this aspect of skinning, but the aspect I'm going to talk about is the meat and potatos, skinning.

    Why?
    Why do we skin? Because as an artist, and someone with taste, I like things to look how I want them sim-wise. This is not to say the artists at Eagle Dynamics didn't do a bad job, but you can't please everybody, and therefore we take the amount of time to do this. Plain and simple.

    Tools of the trade
    Simply put, you need to spend a good chunk of money to get quality. JASC produces the nice Paint Shop Pro 8, which is one of the industry standards. Next up is Adobe Photoshop, which in my opinion is one of the best, along side Paint Shop Pro, for skinning. I mention these two programs because it's what most people use, and quality is important when skinning. Sure anybody can use Windows Paintbrush, but the more experienced people will look at it and say, "that sucks". Other tools of the trade are other myriad programs around on the internet. But the main reason these are used, is the concept of layers. Layers, simply put is just that, layers. For the most part, a layer consists of data which "compressed" together, make the skin up. So, we'll go over some tips, strategies, etc.

    "Just wot is a PSD?"
    "PSD" stands for "Photoshop Document", which starts with, hehe, Adobe Photoshop. This is the file format that JASC Paint Shop pro can use, and is pretty much the industry standard for image files of the skinning kind. A PSD contains all the layers information that is necessary for the image to compress to a usable form, that Windows or Mac can recognize, such as .bmp, .jpg, etc. Note you can edit other images and create layers, but when saved, will compress to the native file format.

    Layer Pallette
    Before we start, let's understand the Layers Pallete:
    Name:  ps.jpg
Views: 5525
Size:  47.3 KB
    Photoshop

    Name:  psp.jpg
Views: 5419
Size:  43.7 KB
    Paintshop Pro

    Between the two, there really isn't much difference, only format. The Adobe one on the left shows an "eye", or "view". Clicking on that turns it "on" or "off". Sometimes it's necessary, as it can get quite in the way of something you are trying to do. Same thing with PSP, only that the icon is glasses. Not much difference in function. As you can also see, Adobe provides a very small window, or preview window to mark the different layers. It helps end the confusion a little bit. You will also notice one thing that's common between the two of them. The highlighted boxes "Potert" on the Adobe, and "Background" on the PSP version. This shows that anything you do will affect that layer and that layer only. YOU MUST try and not get confused. After a long hard day of working on a skin, you can be working, and realize "uh oh, wrong layer!". Keep in mind Paint Shop Pro has the best Undo function (up to 20 times), while Adobe.... One. Be careful with Photoshop. If all else fails, and you haven't saved the mess up, close it, don't save it as is, and reopen it. Better than having to really redo a skin....
    Another function that will be not mentioned below is the merging of layers. You can make another layer to do one thing, then merge it with another to "flatten" or combine the effect you desire. Keep in mind that Photoshop resets a layer from Multiply to Normal. "Multiply" is a neat effect to use in most cases, as it makes that layer pretty much more transparent. Normal is just that, normal. These are selectable between different layers, and recommended in some cases. The "New Camo Pattern" is a multiplied effect, and I had to erase portions of another layer to get the effect below.
    Opacity determines how much of a layer is transparent. At 100%, you really can't "see" through it, so reducing the opacity (either Normal or Multiply) changes the whole layer, not portions of it. This is another experimentation issue that you have to take the time and figure out.
    Another thing to keep in mind is that the top layer takes precedence over the other layers. On the right, on the PSP Pallette, I have lines at the very top, at 20% opacity. This has been a good opacity for panel lines, and keeps them visible, but not "out there" like something cheap. Camouflage is at the bottom. Therefore the lines aren't affected by the pattern. If I reversed the order, then you would be looking at some camo splotches, instead of panel lines. Changing the camo to multiply would also bring out the lines, but sometimes that's just not needed.

    The -L and the -R
    Unlike Flanker, LOMAC also has two files for some skins, a "-L" and a "-R" file. This helps in allowing much more resolution than a single canvas a la Flanker. What's bad? It's sometimes twice the work doing one skin for one aircraft. Not much more can be said than well, it's something quite interesting. Note most player flyables have a "-L" and a "-R" skin file, all accessible from the CDDS Browser.

    Resolution
    Resolution is another issue within LOMAC, as the enhanced rendering engine has allowed for some high levels. Consider the MIG/F-15 skins. Both are all 2048 x 2048. That's alot of stuff, and between two files? Yots of detail. And if you took the time to create a blank template PSD, you know it's quite an experience, and took alot of time. But this allows detail that makes it almost like the Real Thing, and no one can complain about that.
    The downside is that it also translates on the lower end machines a severe drop in fps (frames per second) at higher resolutions. But if you don't mind the tradeoff, then higher res is for you. But on another perspective, resolution is only important if you really want it. For example, I stick to the Su-33 512 x 512 because I can get what I want at that resolution rather than spending time at a higher one, so it also boils down to personal preference.
    Another thing to consider when going from smaller to bigger is the lines themselves. When doing this, the lines may become more blurred and basically look pretty bad. Doubling sometimes doesn't really affect it, but then again, it may just need it. Especially when going from 512 x 512 to 2048 x 2048. Again, take the time to figure it out, then start with it...

    Without further ado, let's start.

    1. Lines
    "Lines" is a generic term that applies to the panel lines of the actual aircraft. This defines the aircraft as something, rather than a 3D geometric model with paint all over it. Since the Su-33 has an -L and -R file, we'll deal with the -L side. Heres a basic lines shot:
    Name:  Lines.jpg
Views: 5478
Size:  67.6 KB

    As you can see the lines just somewhat visible. This is pretty much a good opacity (20%) where you can have the lines visible amongst the camouflage, and other markings. Note that some other textures are missing as well. Intake, wheel struts/doors, wing fold joint texture. This is what most of the files contain, and should be aware of. Also of course the front half of the fuselage has no texture, as well as the wings, and tails.
    Quality of lines is by program. Paint Shop Pro? I wouldn't consider it. Even with anti-aliasing checked on, it doesn't produce good lines like Photoshop, and yes Kovy, I have seen the light! Making lines is pretty much 1 pixel width. And while creating a skin, if you are making your own PSD, tracing is something you need to do. If you have a problem with it, then get out of the business. Simply put. Someone will say "Nice skin" but it will look like crap. Simply put. It should be noted that the "Lines" is actually two layers in this case. I use a light grey as a base color, and have the lines on top. The base color helps the effect of the skin greatly, and so I just keep it at the bottom.

    2. Details
    "Details" is my catchall term for the "other textures" such as the inside of wheel wells, engine textures, the other stuff (but necessary!) that is included with the 3D model:
    Name:  Details.jpg
Views: 5444
Size:  53.6 KB

    As you can see, the wing fold joint texture is there, and on the above part of the picture, the gun texture. All can be modified, but some time with the program is required. Anybody experienced or knowledgeable of the Su-33 skin can tell that somethings are not standard. That's the beauty of layering. You can add/mofify portions of the skin, without directly affecting the image itself.

    3. Base Camouflage Layers
    Basically, my skin has two basic camo layers, both greyish, with the second layer portions erased. I erased them since different base colors will affect a certain pattern when adjusted. Keep this in mind when creating custom skins of a complex sort, such as mine :
    Name:  Base.jpg
Views: 5404
Size:  59.3 KB

    But for one thing, this portion takes some time to get right, and requires time to get the "right" effect.

    4. Camo
    Camo can and will be one of the most annoying things to do. In some cases, the model is mapped a certain way, or more exactly, the texture that is applied to the 3D model. It takes time to get it right, and in most cases, be absolutely frustrating. This mainly appies to "Splinter" camos, or the more common "Tiger" schemes. Overall, this requires precision when applying it to your skin. Time is another thing, and really makes you knowledgeable about how a skin works:
    Name:  Camo.jpg
Views: 5396
Size:  66.6 KB

    As you can see, this camo scheme is a wraparound one. Now, with the Su-33 skin, there are certain condiserations. First the engine pod sides are mapped differently, and the canvas only has one side for the inside and outside. Consider this when making "Ferris" style schemes. Generally, "Ferris" schemes require some manipulation and imagination for it to work. The MIG-29A skin however, has everything mapped out, so you could concievably make one, though the exercise in frustration just may not be worth it. But if you do decide to make such a scheme, here's an easier way. First, instead of making the pattern, make the outline of the pattern. This helps you align it, and saves the trouble of deleting, and just getting generally getting mad. This can apply to other schemes as well, but Splinter schemes require some attention (major) to detail, and placement.
    However, the easiest are Russian skins, and some US skins:
    Name:  Russian.jpg
Views: 5344
Size:  57.4 KB

    As you can see, the camo is on the top, and a general overall color is on the bottom. Easy stuff, all you have to worry about is the top.... and in some cases, that would make me happy. Note that some skins however, don't give you that luxury, particularly the F-14 skin. It's annoying, but you just have to deal with it.
    And to go off topic, but I'm sure you noticed some differences in the Splinter scheme picture above, and the other one:
    Name:  Intakes.jpg
Views: 5341
Size:  18.6 KB

    This what I talk about modifying base textures to suit your own needs. As you can see, the one on the left (base Su-27 skin) and my skin is darkness. There are certain layers with certain opacities that can adjust the brightness and darkness of a particular area. For simplicities sake, this is the "Navy Layer 2 Weathered" layer that is above the "Details" layer. It's opacity affects the other.

    5. Weathering
    This is perhaps the most difficult of skinning. Even I have some problems with it, but here goes. First off, weathering adds to the texture, in adding stuff like highlights, paint chips, dirt, oil, rust, etc. For the most part, weathering should be done in seperate layers with different opacities. For this picture incorporates four layers. One a line highlight layer to "highlight" lines. What this does is create a 3D effect among panel lines on a 2D area. Yes it's a 3D model, but it's still 2D when looking up close. To create this effect, create another layer, then trace the line with a white, or grey lines. This takes some adjusting, as brighter skins will ruin the effect, while more darker skins it will work. Adjust the opacity to suit you, and that is that. Next is line darkening. This also brings out certain areas, and I use it mainly along the flaps, ailerons to bring out the fact that they move, as when viewed without them, you wouldn't know they were there. Another effect I used to use was creating another layer by tracing the lines, then blurring them to further highlight them. This is a technique used by modellers, and may work for some skins as well:
    Name:  Weather.jpg
Views: 5358
Size:  51.7 KB

    Another bit of interest is the rust. Rust is more prevalent on shipboard planes due to the salt air mixing with the paint, and just normal wear and tear. It takes some experimentation to get the right effect. You'll note in the "Base Camo Layer" section, that some areas are already dirty, which is why one of my camo layers is already "dirty". Using a Burn tool liberally spread around the texture with the right adjustment, produces the "dirty" effect of people's oil from the skin, real oil smudging on the airframe, etc. In most cases, this shouldn't be applied to the wheel wells, etc. Reason being is that while some aircraft need a good washdown, the wells are important to keep clean because of oil and hydraulic leaks. You can't tell if something is leaking if there are plenty of other stains in which to miss them.
    Last is the white smudges (somewhat subtle) around the area of the aircraft. This is good to simulate paint being weathered out from the sun's rays. This can also come about through people walking in those areas, etc. Paint chipping can be simulated by simple 1 pixel marks, with the color somewhat close to the base layer. But then again, what works is what works too.
    Adding weathering is a "hit or miss" proposition, and varies from skin to skin. To get some general effects, I create a seperate layer, and then adjust the opacity until it works out right. Finding the right color takes some time and practice too, as you can't just do it, you have to figure it out. However, tools to use in Photoshop is the Blur/Smudge tool. You simply take a paintbrush, paint a little area, then blur it until you get the effect you want, while Smudge "pulls" it in the direction you want it. Like I said, it takes some experimentation first before you get a handle of it. Note that the "Burn" tool can work out, as you have seen. You have to be careful on how much you apply as it can look pretty bad if not done right. But then again, it's all up to you anyways.

    6. Stickers

    This is another aspect of aircraft that sometimes cannot be left out, especially with real world/historical skins, or if you just feel like adding them. Not much to explain here:
    Name:  Stickers.jpg
Views: 5335
Size:  52.9 KB


    Opacity of a Stickers layer is dependent on the type of camouflage. I personally tend to go with what type of camo is present. Subdued camo, subdued stickers. It's more of a personal preference. As you've seen, what can be subdued on my plane, it will be. Wheel wells are an exception since most of the time, you won't see them while an aircraft is flying. Flashy, or bright camos may get more of a "non-subdued" sticker layer just because it's visible anyways, why try and hide them?

    7. Personal Markings

    More of a "me" topic, but everybody loves to add or "personalize" thier aircraft, and as you can see I'm no exception:
    Name:  Fini.jpg
Views: 5273
Size:  41.0 KB


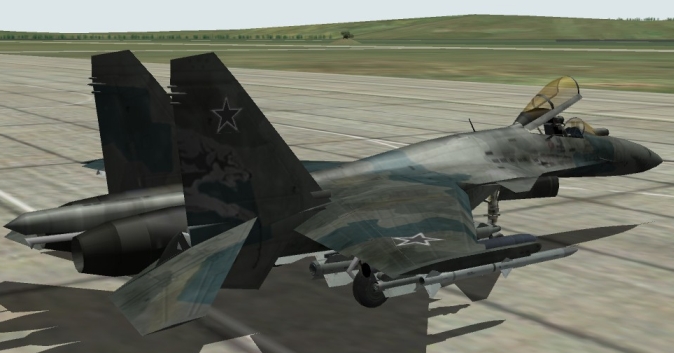
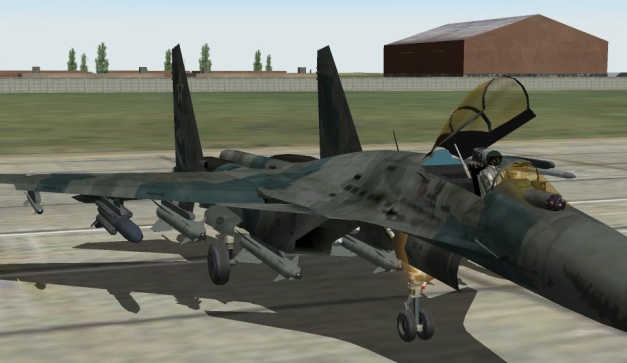
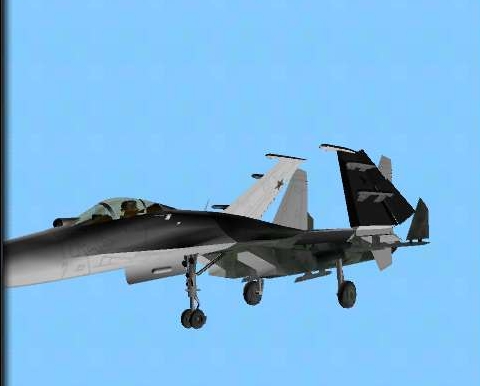
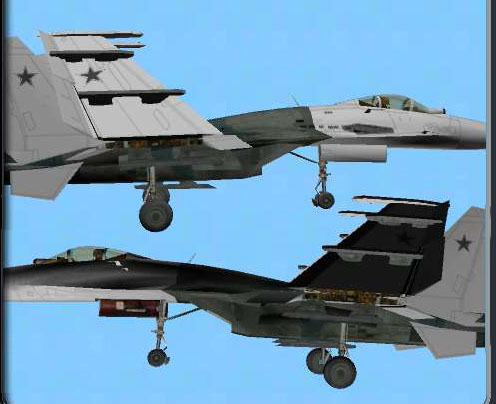
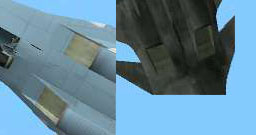
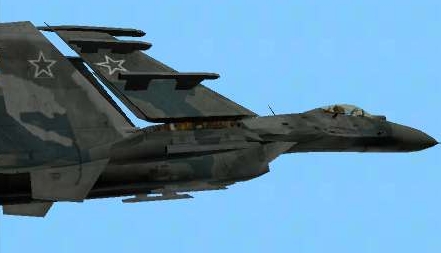
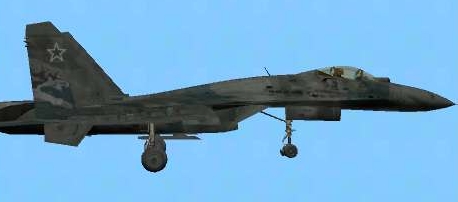
    As you can tell from the previous images, some portions were filled, while others were not. This is where it's finished for me anyways. I tend to change the look weekly, but it also takes some modification of the other layers. This is by far a complex skin, and rarely do I mess with it extensively. But being my personal skin, it's also a test skin in which I apply it to others. If your skin looks good, then the rest should to. And here's a couple in-game shots:

    Name:  Ingame.jpg
Views: 5332
Size:  134.0 KB

    Name:  Ingame2.jpg
Views: 5333
Size:  126.3 KB

    Viewing your Skin
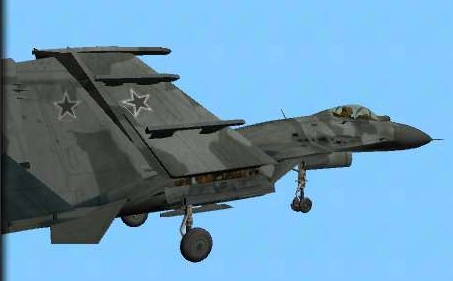
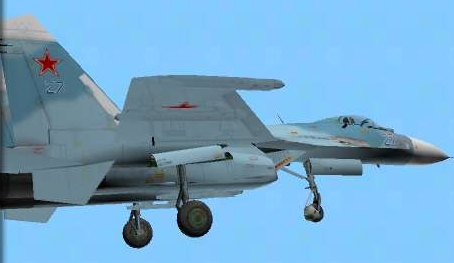
    This has been a couple topics discussed on the General Forum on the Ubi Soft boards, but it makes a difference in filename which skins are selected. For example, the one above has been the "279th KIAP 1st Squad" scheme. It should be noted that different aircraft have different skin assignments. One example is the Su-27 and Su-25 skins. Both are used by Ukraine, but have different country skins. The Eagle Dynamics people figured it out quite simply one country should have that countrie's skins. In Flanker it really didn't matter, you could have a Russian Ukrainian splinter camo skin, and noone would really care. However, in LOMAC, only a Ukrainian aircraft can have a Splinter skin. It doesn't stop anybody from changing it. For the most part, this can be also accomplished by placing the appropriately named skin in the "Lock On/Bazar/TempTextures" directory. This overwrites but does not replace the skin in the .cdds file. This is handy for skins such as mine, where I don't have to go through the trouble of constantly inserting the skin, I just simply modify it, save it, then I'm good to fly with what I've wanted.
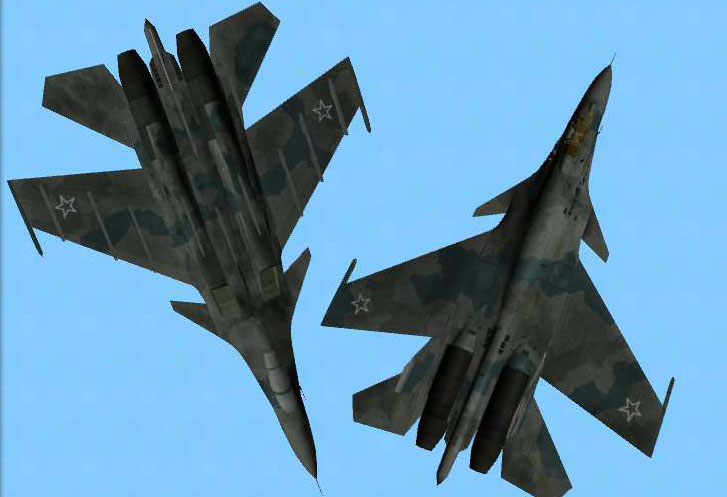
    A quicker way, which I've been using here, is to view it through the Encyclopedia. If you know the base skin name, then you can easily view it here. It doesn't require that much of a loading time, but isn't the best, as you can't get as close, and sometimes you won't be able to see what you're looking for.

    Saving
    This is a "no-brainer" topic, but you must save it in 24-bit bitmap, or whatever the bit rate for .dds files. I prefer .bmp since that's worked for me. A general note though. You can save as 32 bit and it will show up in-game. Be warned however, you cannot insert a 32 bit file into the CDDS Browser. I found out one time, and unless they fix it, just keep it in mind.

    Time
    No serious discussion about skinning can not forget the time factor. This is what makes or breaks you. If you spend ten minutes on a skin, and only that, then depending on what it is, it may look like crap. Seriously think about this issue before you put it on the Internet. Most people like me, who have spent some time on skinning, can look at it once, and say it's crap. The more effort, the better it looks. This is one aspect of art that shows how much you put into your skin. One skin took me more than half a day (Cat, it was yours!) to complete. It was a MIG-29A skin that I will forever remember as the most frustrating and after it was completed, proud of doing. Take the time, make it worth the while for someone to waste the hard drive space and time to get, not just a "quickie" skin. Anybody can skin, but the more effort puts you in a different league than most people.

    Creating your own PSD
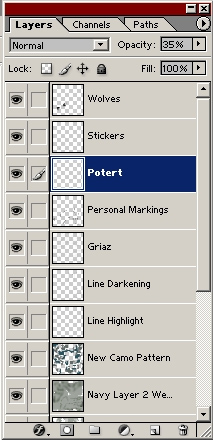
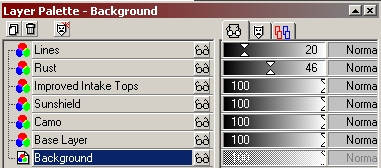
    One thing that helps a community (and you) is a template PSD. Be prepared to spend some quality time tracing, erasing, and modifying. You see, the level of detail reflects on how long it will take. Among the PSD templates for LOMAC is the MIG-29A skin. I will not let it go. It is HIGHLY detailed, and deserves a mention. But I also love it for the excruciating detail it has, but also curse it. You see, making a skin from a base template is easy. But you're talking about lines, which isn't too hard. But think about every little rivet, and you get the picture. It's quite simply just one of those things that really make you think. Though second place goes to the IL-76/78M-A-50 skin. Next up is a "Details" layer. I like to seperate it as another layer, because sometimes you want to modify that, without the lines interfering with it, and allows you to turn it off when you are creating a custom skin, allowing you to complete a camo layer. You create this layer by erasing carefully everthing that would be considered a detail. Though I like to make a copy of the base skin so I can erase from that. Stickers layer is also a must, and as well with the MIG-29 skins, Ukrainian and Russian symbols. It's pretty much it.
    Again, this will eat up quite a bit of time, so expect to be staring at a screen for a bit. This goes in hand and hand with catching everything. It's possible to be zoomed in to miss things, and generally you get tired, and distracted, etc. Rome wasn't built in a day, and making a template shouldn't be yours either. Take occasional breaks, rest the eyes, etc. And just remember to save it as a PSD.....

    Creating Skins for other people
    This is a topic in which I'm personally aware of. First off, be professional when dealing with "clients" Though skinning itself is not a business, your work shown to others could be. Things to consider when doing custom skins:
    • Do you have the right resources (files, web, books) to do the skin?
    • How much time do you have personally to finish it?
    • Can you do it?
    • Do you want to do it?
    I will admit a few skins I've never liked doing, and probably consider doing them alot less than others. Everybody has a bias, and most people see I'm geared toward mainly Russian a/c. I fly one, so yeah, I'll probably jump on one more than another. You have to then again maybe say no, because of real life commitments, etc. Nobody says you have to do one, but then again, do you really want to?
    On the flip side is the person who wants you to do the skin. First off, I've had tremendous resources at hand, so in some cases it isn't too hard. Plus I know some people who may have what I'm looking for. But then again, help is always good. One thing that gets me is that somebody asks for help, but then again, says "Good Luck." That's personal. Don't leave your skinner hanging in the wind, forced to sometimes waste precious time searching for something that even on the Internet, may not exist. It basically boils down to communication between the two of you. "Client" wants this on his/her skin, and you have to deliver. In some cases take some liberties, but make sure you can remove it if the person doesn't like it, and always ask "Is this cool". That person may like it, so that's good right? In the skinner's position, make sure he/she sees your progress. That lets him/her know what to add/remove, and saves some valuable time. Plus it builds a desire for it. You are basically selling your skills, and even I'm looking for a possible digital artist job. It's not only helping somebody else out, but you're looking out for yourself too. If the "client" doesn't understand a concept, explain, not condescend because he/she doesn't want to do it themselves. That's their perogative, and let it be. Some people just don't have the skills, and treating them like crap doesn't help you.
    Naturally the time factor is a play. Give the "client" a lead time (time expected to be completed) of a few days, based on your schedule, what exactly has to be done, and nobody complains if done early. But if it's going to be late, let them know. I'd rather be honest, than lie. It's just not about skills, it's about personal relations. Oh yeah, you may be the Skinmeister, but why would I want things done by you? Get the point? Your skills will spread word of mouth, or as they say, "a picture is a thousand words", by showing your work. Note you should always reference somebody else if you know them. This helps because the person may have the skills to do the job you know you can't. There is nothing wrong with this, as again, be honest, and don't lie. Plus it gives them exposure too, as they might be wanting to do the same thing.
    Another thing is while being professional, I would possibly deny a job if it was ethically questionable. If you're asking to put swastikas on your a/c, don't ask me, that's for sure. Or anything that might be really bad. The fact in this day and age of instant communication can ruin you. But if that's your ocean, float your boat how you see fit. If for some reason you don't think this helps, look for "Eric Johnson" in the About section of LOMAC. It's definitely not the singer.

  2. #2
    Join Date
    Nov 2010
    Posts
    1
    Downloads
    0
    Uploads
    0

    Question Re: Skinning In LOMAC

    Hi.
    Thank you for the wonderful tutorial you made.
    I do have a considerable working knowledge of both Photoshop as well as Corel Paint Shop Pro.
    I would like to re-skin my F-15 in LOMAC/FC but the problem is which CDDS file will I open and modify?
    As you can see here (see image) there is nowhere I can find the -L & -R files needed for the procedure.


    Can you tell where to find these files first?
    Thank you very much.
  3. #3

    Re: Skinning In LOMAC

    Man... there should be a CDDS Browser on LockOnFiles, or google that and you will be able to access the files.

Similar Threads

  1. LOMAC Su-30
    By goonybird in forum General skinning and repainting
    Replies: 6
    Last Post: 4th November 2006, 05:09
  2. Skinning for SOW:BoB - Repost
    By adlabs6 in forum General Discussion
    Replies: 0
    Last Post: 6th October 2006, 21:52
  3. Bf 109G6 skinning problem
    By RAF_Loke in forum IL-2 Series: FB / PF / 1946
    Replies: 2
    Last Post: 11th December 2005, 19:31
  4. You might want to give this a try for skinning
    By Aero_Shodanjo in forum General Discussion
    Replies: 4
    Last Post: 24th November 2005, 22:34
  5. If you start skinning for a new sim, ...
    By Osram in forum General skinning and repainting
    Replies: 8
    Last Post: 15th October 2005, 14:52

Posting Permissions

  • You may not post new threads
  • You may not post replies
  • You may not post attachments
  • You may not edit your posts
  •