Photoshop offers many possabilities to make selections. Here you will find a small introduction on how to use them.
The traditional way of making a selection
This is the easiest and most well known method. But it offers many options
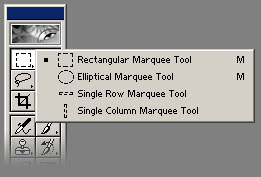
By default a rectangualar selectionshape is suggested. But by clicking and holding the mousebutton down on the icon you can select other shapes When the shape has been selected you can simply click and drag to select the area you want.
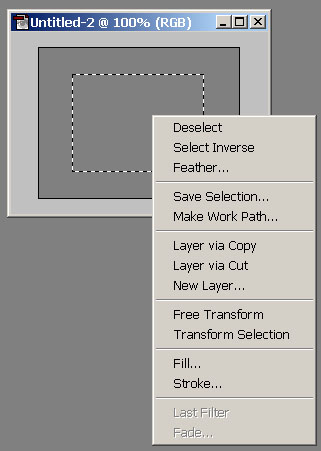
Rightclicking in the selected area opens a contextmenu which offers you several options.
The option "Fill" enables you to fill the selected area with a color. The option "Stroke" draws a line over the selection line.
The other functions are also available in the menu in the topbar of the program
Some Short-cuts:
- Ctrl+A selects the whole image
- Ctrl+D unselects all
- Left Shift and dragging helps you to make a perfect square or circle.
- You can select additional areas to an allready selected area by holding the Shift-key while selecting the new area.
- You can unselect a part of an allready selected area by holding the Alt-key while selecting area you want to unselect.
- Shift+Ctrl+I Inverts the selection
- It is possible to move a selection around whithout moving it's contents by holding the left mouse-button while moving the mouse around
- Holding Ctrl while clicking on the thumbnail a a layer will select it's contents.
In the options bar on top of the window you can select between "normal"selection "Contrained Aspect Ratio" and "Fixed size".
The Lasso selection tool
The Lasso tool allows selections of complicated shapes. The normal Lasso selection lets you draw a line by hand, the Polygonal Lasso enables you to draw small straight lines and the Magnetic Lasso helps you to follow a shape in the image.
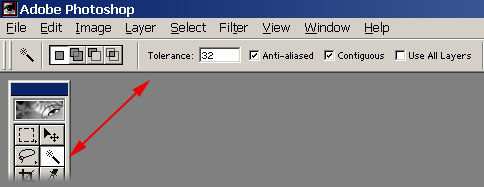
The Magic Wand
With this tool you can select all pixels that have the same color. For example all red pixels in the image.
Several parameters are available:
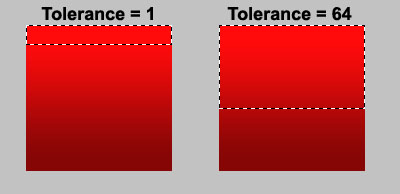
The tolerance lets you select just pixels with exactly the same color or more pixels with identical colors. In the example you see the difference between the tolerance set to "1" or to "64".
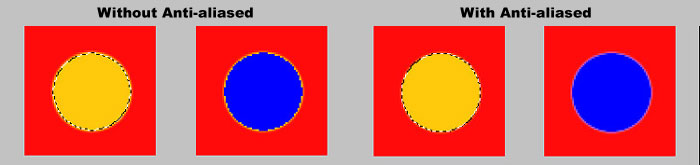
Anti-aliased will make selections with soft edges. Below you see the diffence when you make a selection with anti-alias and without and then fill the selected area with a color.
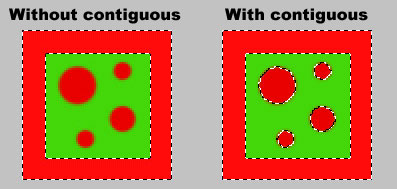
The option Contiguous will let you select all pixels of the selected color that lay next to eachother. When the option is not selected all pixels with the selected color in the whole image will be selected.
Most options and short-cuts that work for the traditional selection tool, will also work with the lasso-tool and 'Magic wand'.
The Quickmask mode
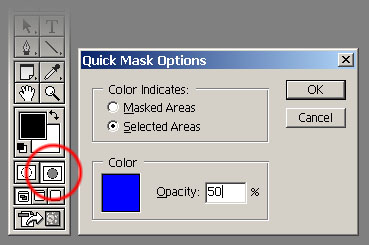
This mode makes it possible to "draw" the selection by using the various tools of Photoshop. To do so click on the icon "Edit in quick mask mode". A double click on the icon will bring up the options. You can define the "color" of the zones selected or not-selected as well as the opacity of the mask of selection. A value of 50% is interesting, because you see both the image and the selection well. To return in normal mode, click on the icon "Edit in Standard Mode" located on the left of the icon "Edit in quick mask mode".
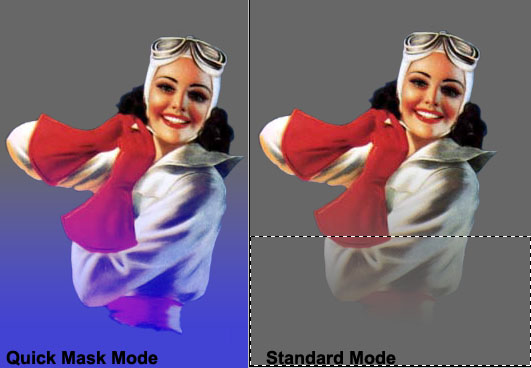
Below some examples of mask selections
Below a selection of a mask using a gradiant, I made the contents of the selection invisible to make the effect of gradiant more visible.
It is also possible to make a selection in the traditional way and use a wide range of tools to reach the same effect.
Translated from the French tutorials by Daniel Roger

 Bug creator

 Posting Permissions


 Reply With Quote