-
Scratchbuilding in 1/160th using paper
I've been thinking more and more about working on some scale models, but haven't really been motivated enough. Then I started looking at N scale model railroads, and remembered the little 2x3 foot N scale layout I had as child.
From there, I thought it might be interesting to scratch the scale modeling itch by scratchbuilding some N scale (around 1/160th) scenery. I imagined a small warehouse, with some loading areas for trucks, a few semi trailers parked for loading.
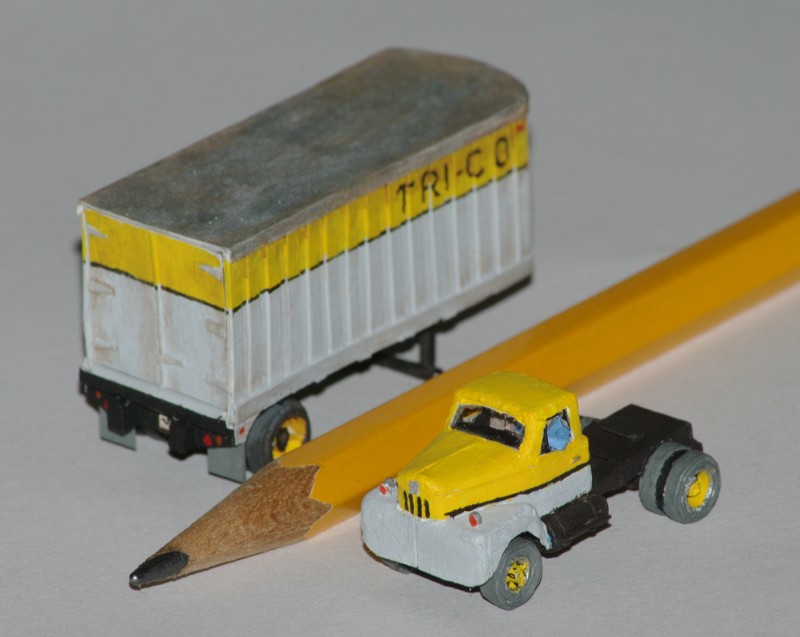
I decided to start with one of the semi truck and trailers, and gathered some photos on what was common in the years between 1940 and 1960. The trailer was chosen as a Fruehauf 24' rib side from the mid 1940s. The semi tractor chosen was an IH R190.
I'm taking photos at intervals. Construction has been ongoing for a while, as I have a half hour or hour available... though I forgot to take any photos during building the trailer. I decided I really should document the project, and why not post it too. I'll post photos as I can, though actual progress may advance beyond what the photos show due to my tardiness in messing with photography.
These shots were after the trailer was built up. I'm working with Georgia Pacific 110lb card stock, and some copier paper.
I'm not working from any plans, no measured drawings. I'm just using some average sizes, and looking at proportions in old photographs from the era. My measurement calculations are being done with a slide rule I built from cardboard. Why? I just became interested in slide rules, wanted to learn about them, built one, and am using it.
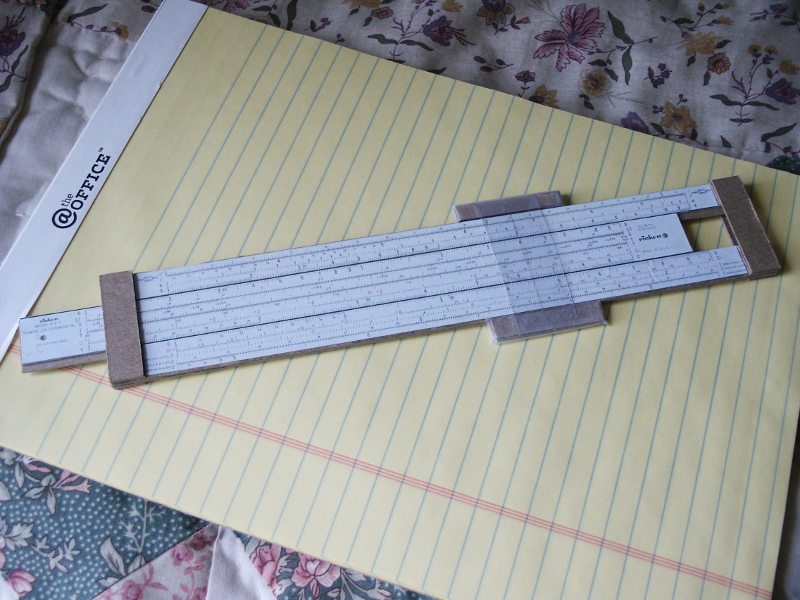
Slide rule, build using cardboard from a yellow legal pad, scales printed from a scan of the real thing. Slide is tongue and groove construction. Double sided, with aligned hairline on both sides.
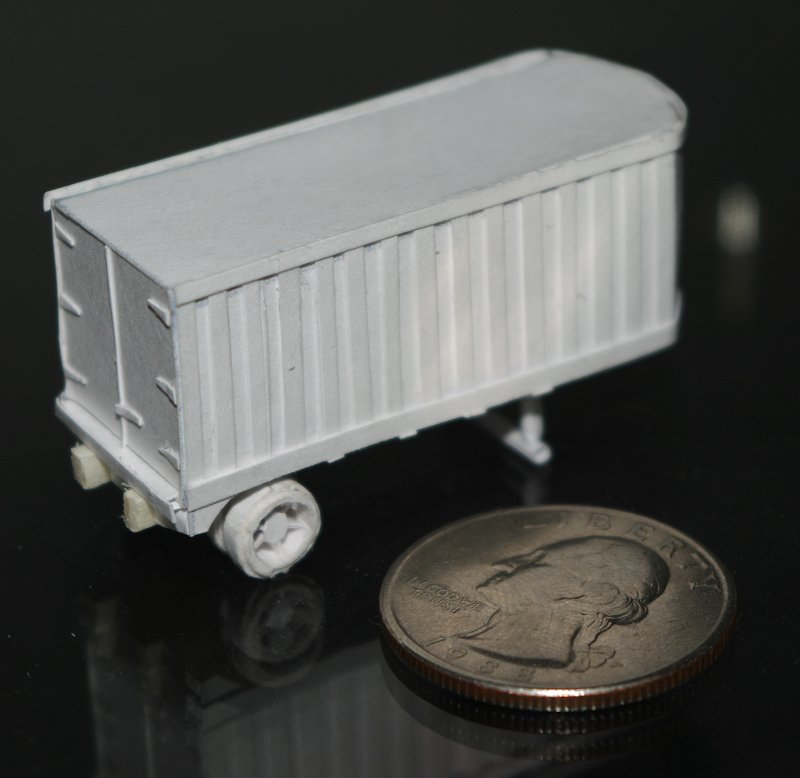
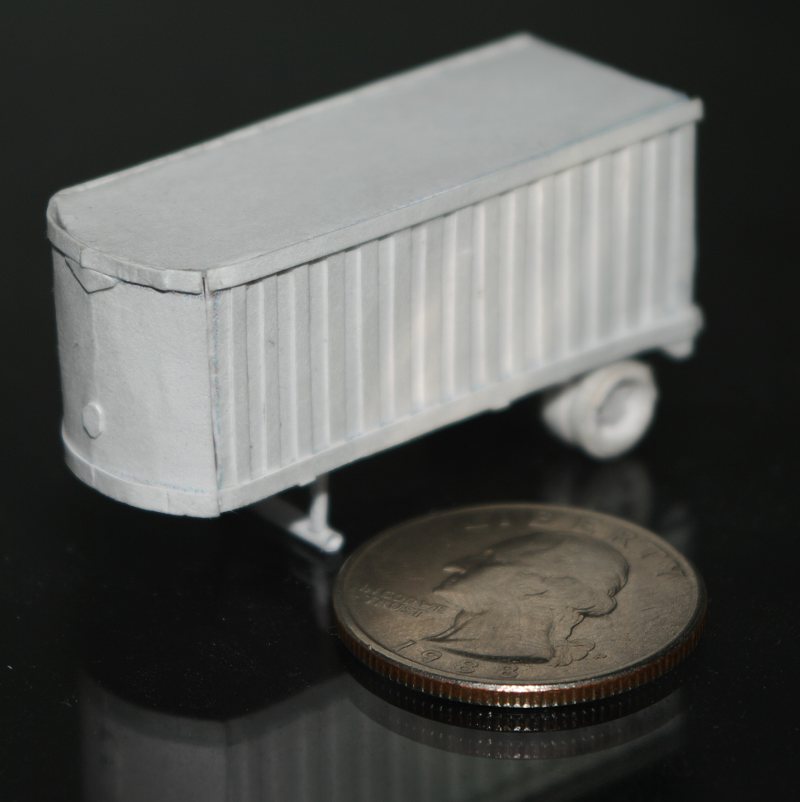
The built up trailer, with a quarter for scale.
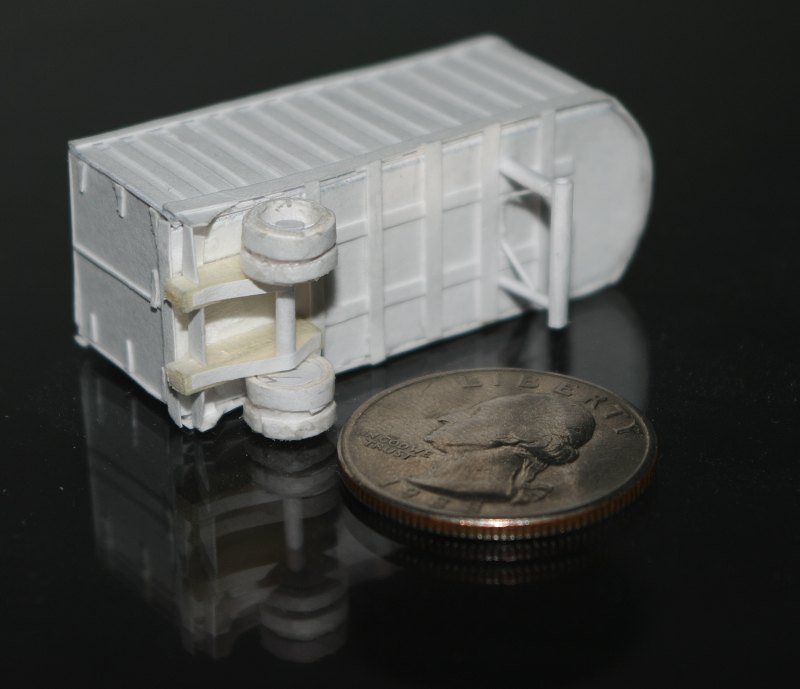
In this photo, you can see the two small pieces of wood I used to save time on the frame elements. I wish now I'd used paper instead, but it's too late for that.
-
Re: Scratchbuilding in 1/160th using paper
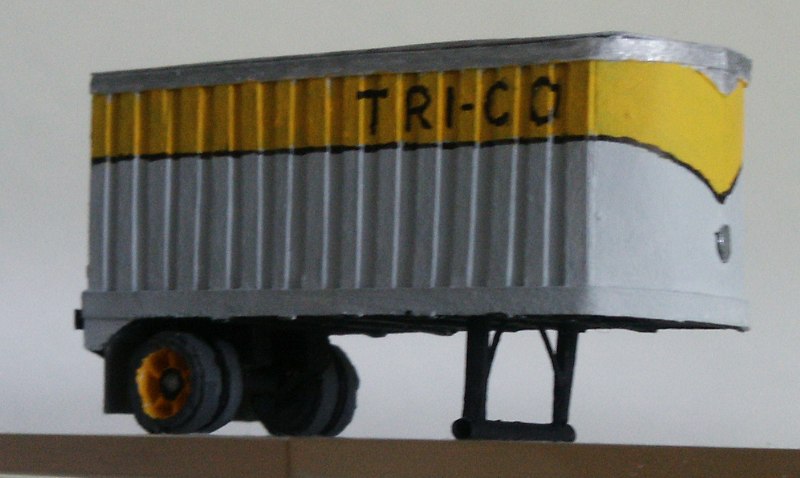
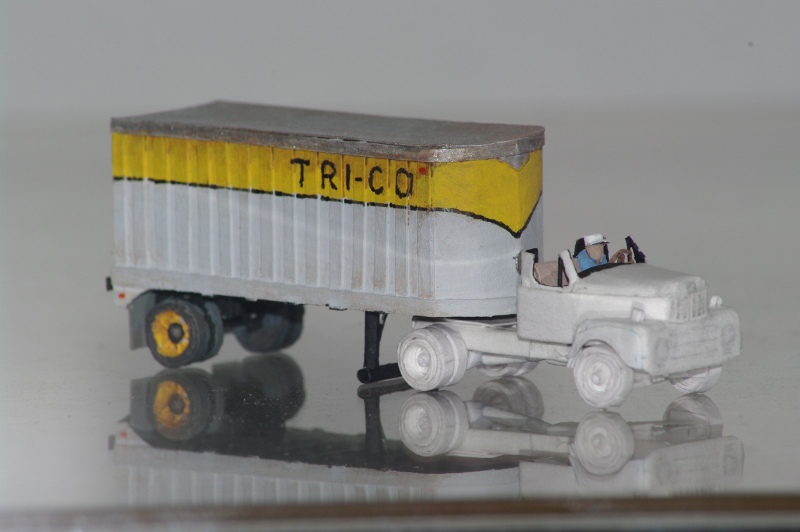
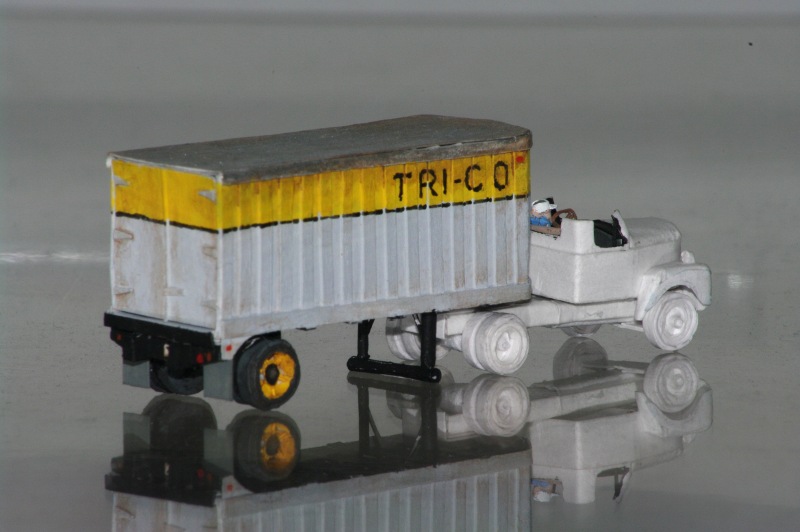
After adding mud flaps, I painted the trailer using acrylics and brush. The lettering and black stripe were done with an india ink pen. The silver roof is a metallic acrylic paint. Company name and markings were something I just made up.

-
Re: Scratchbuilding in 1/160th using paper
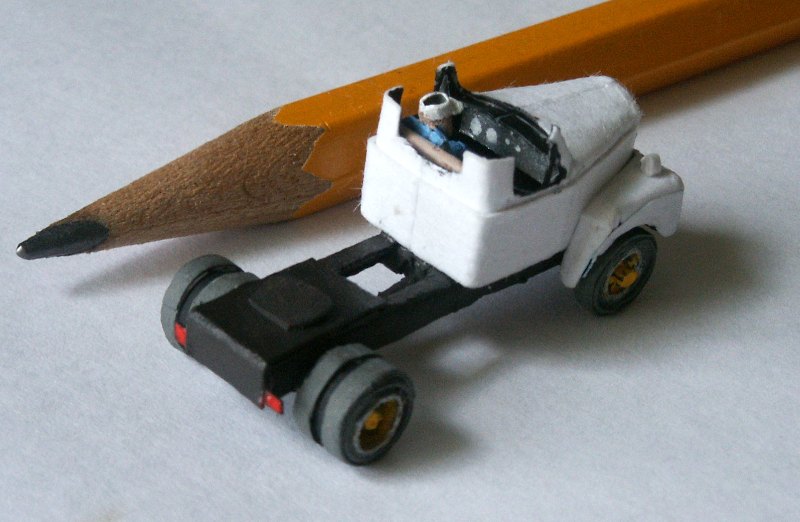
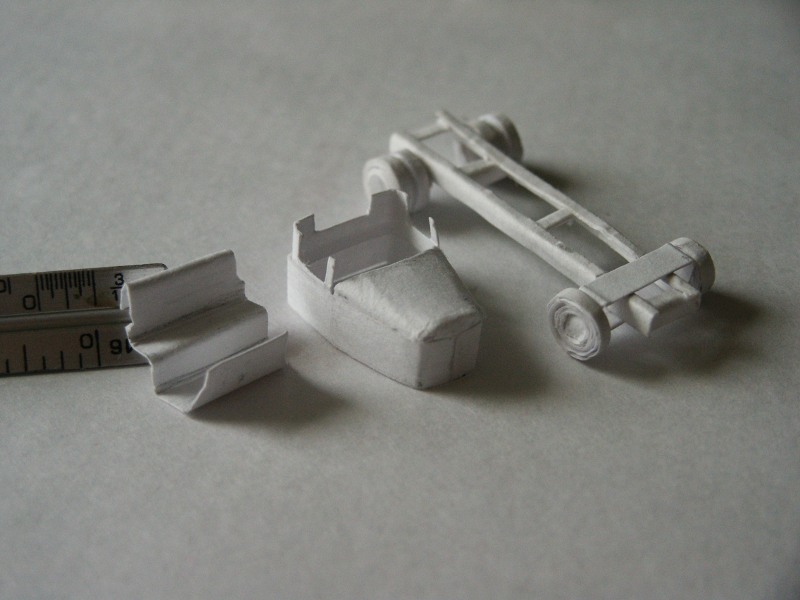
Beginning work on the truck. This time I used paper for the frame. The folded element resting on the ruler is the one-piece cockpit. Seat, floor board, and firewall.
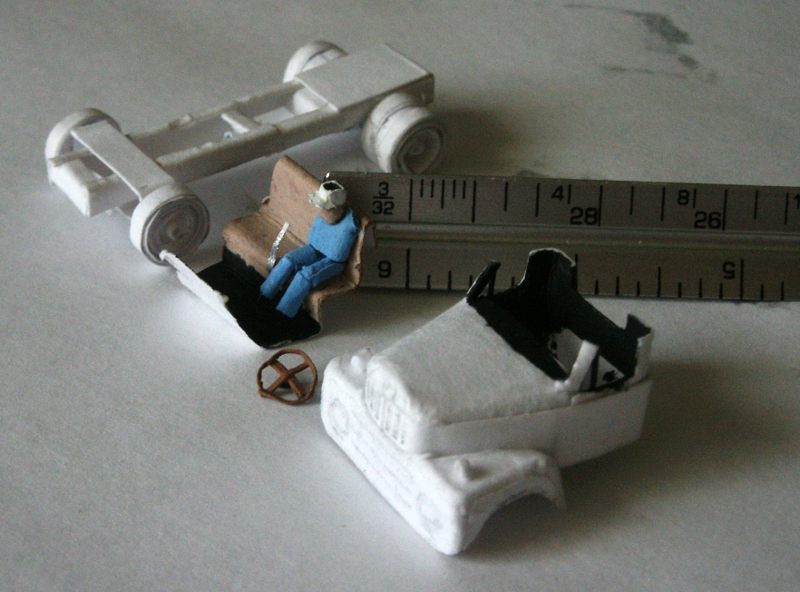
And here we see some further work on the truck. Now I've added the fenders, with blinkers on top. Replaced the forward pillars and added the wing-window vertical.
The interior has been painted, and the driver and gear shift are added. Steering wheel is rough. Still considering rebuilding it. The frame has tiny wheel hubs, undercarriage added, and beginnings of the fifth wheel.
Oh yes... I decided to shorten the truck frame by about 30 scale inches. You can see the seam where I made the cut and reglued the paper end on end.
-
Re: Scratchbuilding in 1/160th using paper
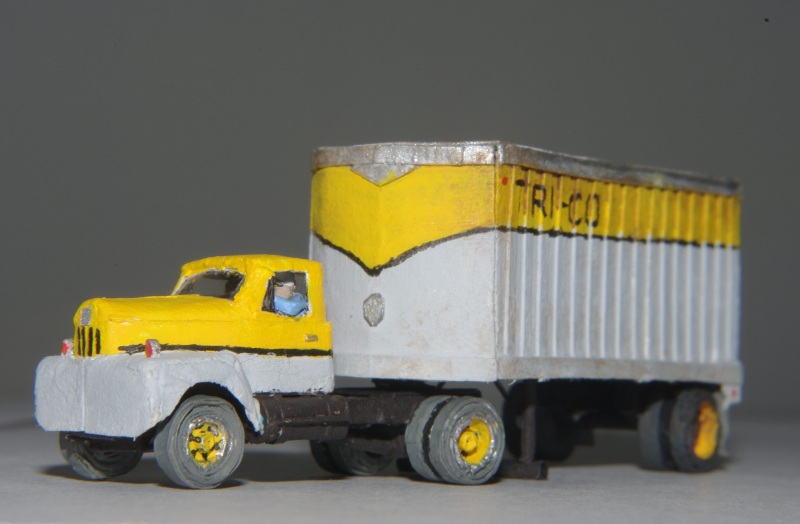
And here is a test fitting of the truck (sub assemblies not glued) with the trailer. You can see a bit of the truck undercarriage reflecting off the lid of my record player.
Oh, and I've done some weathering (or tried to!) on the trailer. Also added the running lights, and a license plate.
-
-
Re: Scratchbuilding in 1/160th using paper
Well like I said, I'm thinking some sort of little scenery element... a warehouse with 3 or so trailers, and maybe a pickup. Maybe 8 inches square or so? We'll have to see about that.
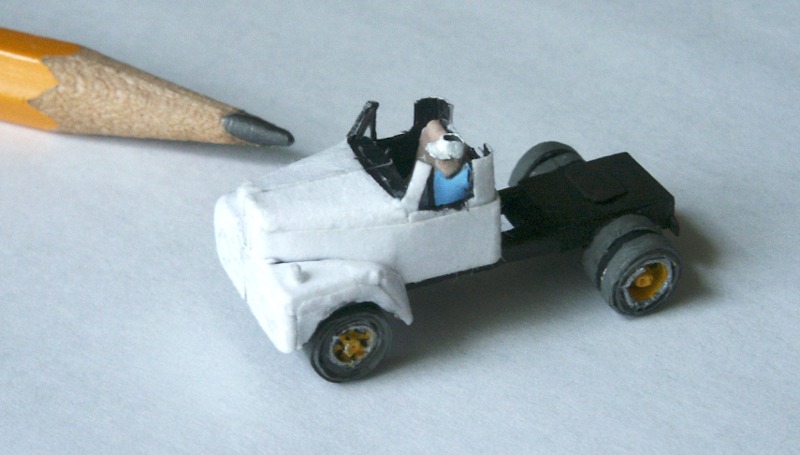
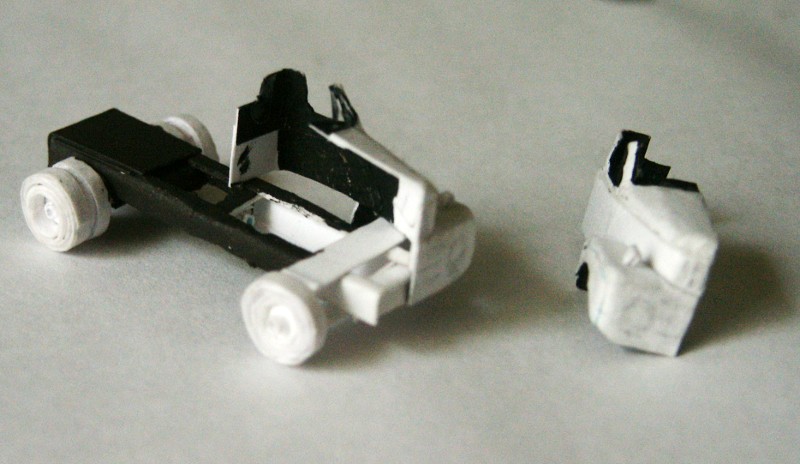
Anyway, after showing this project to someone, they gifted me a little diecast delivery truck for N scale train sets. It's a box van, but the cab is the same model (or looks to be) an R190.
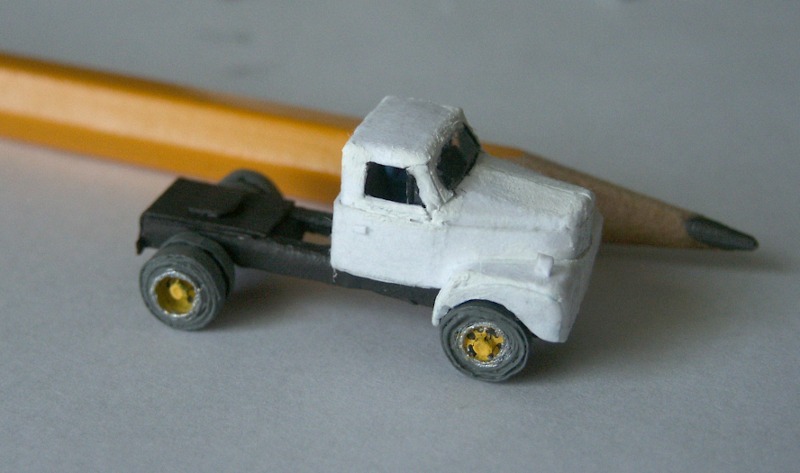
Comparing my work to the die cast, I was close in the scale... but my cab is too wide. My cab is a scale 6.2 feet wide (!), while the die cast is around 5 feet. (BTW in this pic, I've got the windows installed.)
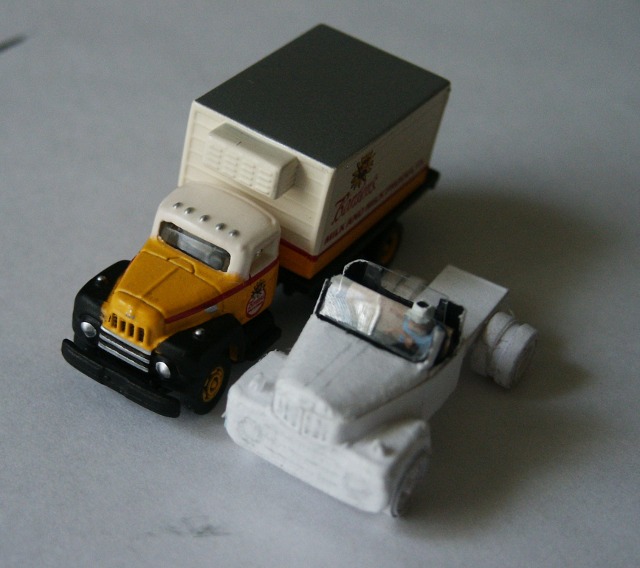
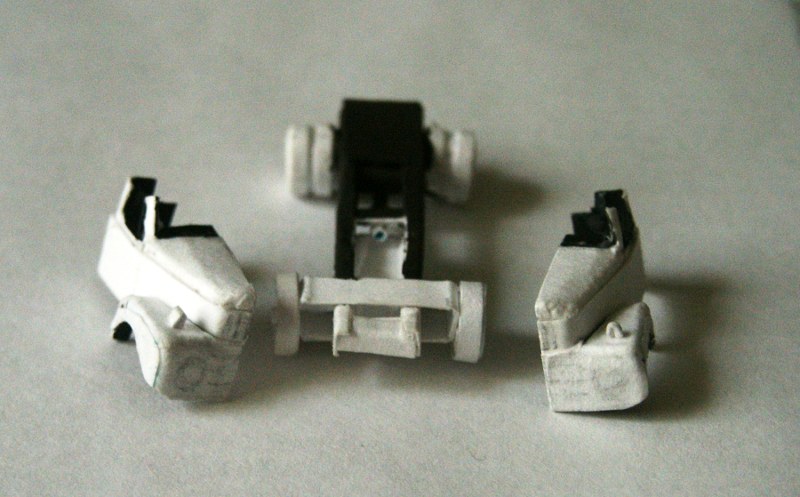
For several days I have contemplated the unthinkable... chopping my cab in half and removing a section. I don't have any plans or drawings, but 6.2 feet is inexcusably wide IMO. So I really had to cut it down.
Tonight, I invested an hour and completed the job. It's late and I can't get a good photo without the window light, but the finished cab is nicely sectioned. I removed about 1ft in width, or so. I also had to narrow the front suspension track (which was as wide as the outside pair of rear tires). Interior and dashboard have also been adjusted.
You can also see that I've begun painting the frame in "not black"... a mix of black, rusty color, and dark gray. I mixed this up after becoming dissatisfied with the real "black" on the trailer.
At this point I considered switching to a cutaway model... 
Last edited by adlabs6; 19th July 2010 at 07:13.
-
Re: Scratchbuilding in 1/160th using paper
Very nice, adlabs.
I´ve pointed someone here who might be interested in this technique as well.
-
-
-
25th July 2010, 07:21
#10
 Posting Permissions
- You may not post new threads
- You may not post replies
- You may not post attachments
- You may not edit your posts
-
Forum Rules


 Reply With Quote
 Forum Guy