Reply With Quote
Well, got a decent bit done on the bed. Poor lighting but you can see what you need to...

 Forum Guy

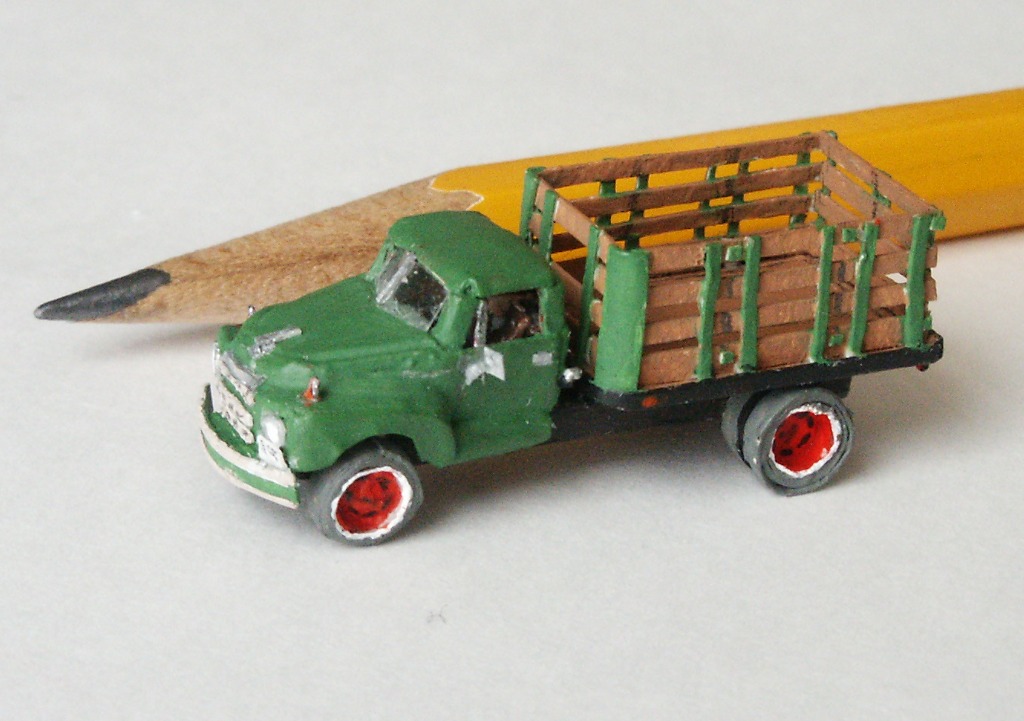
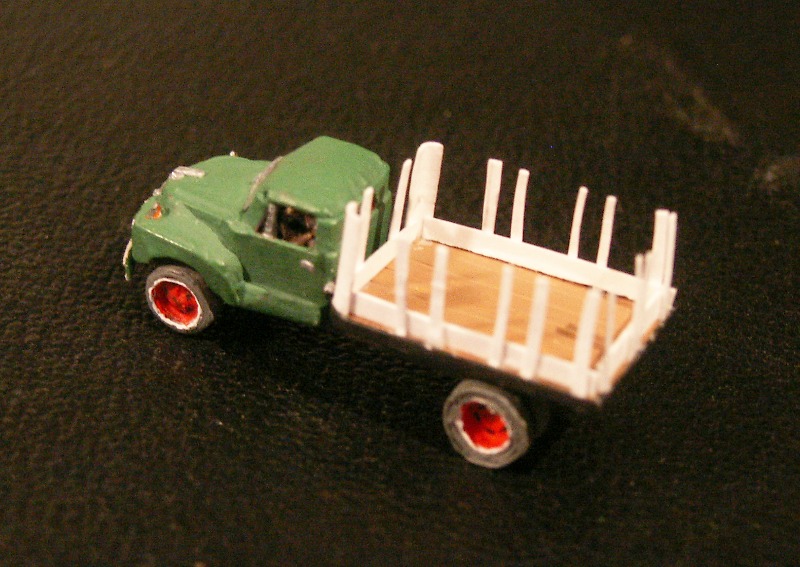
Before I call this one done, I'm going to build a stake bed. I forgot to mention it, but I already rebuilt the bed floor, adding rounded front corners to match the type of bed I am seeing in some of my photos.
I'm hoping to get a start on that this afternoon.
Beyond this truck itself, no idea. If I'm keeping with the idea of building a 'warehouse' kind of diorama, then one more semi-trailer (without a cab) is probably in order. I should also start doing some overall layout on the diorama itself before long.
Forum Guy
Well, got a decent bit done on the bed. Poor lighting but you can see what you need to...
Forum Guy
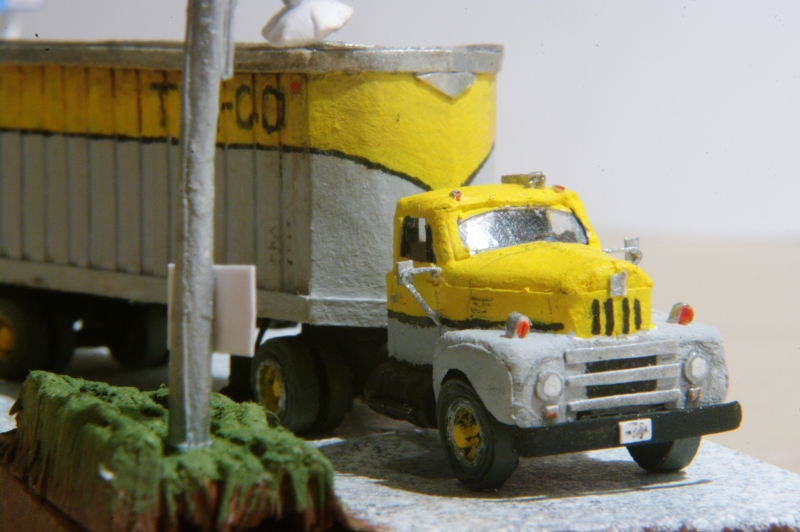
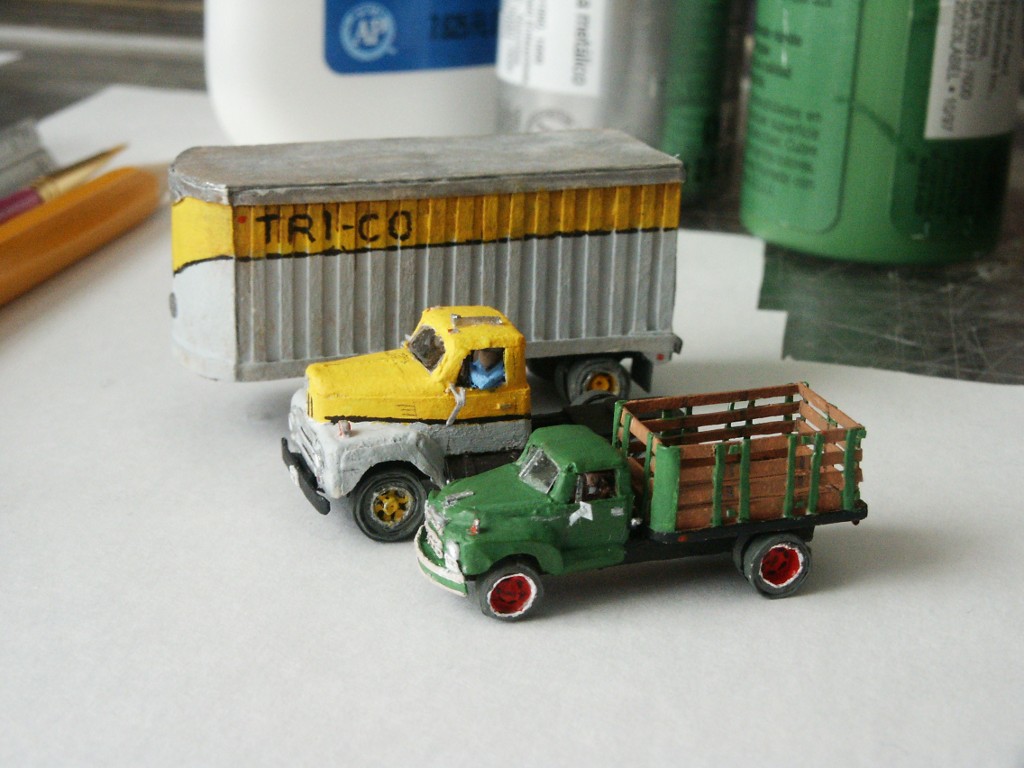
I'm happy now to call the 2R complete. I've finished the stake bed, and added the final details like hinges on the bed doors, license plates, running lights, and the mirror.
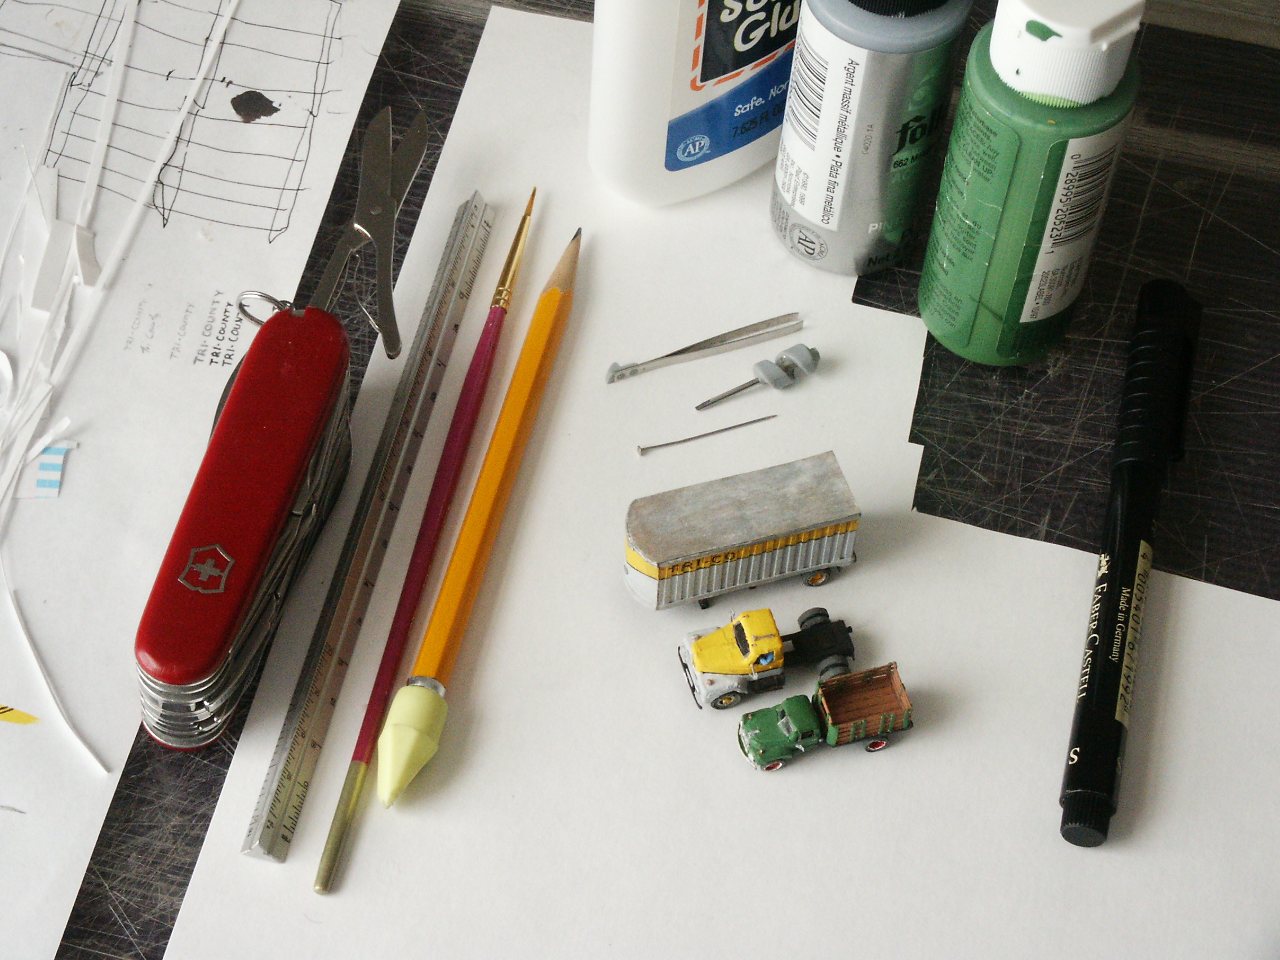
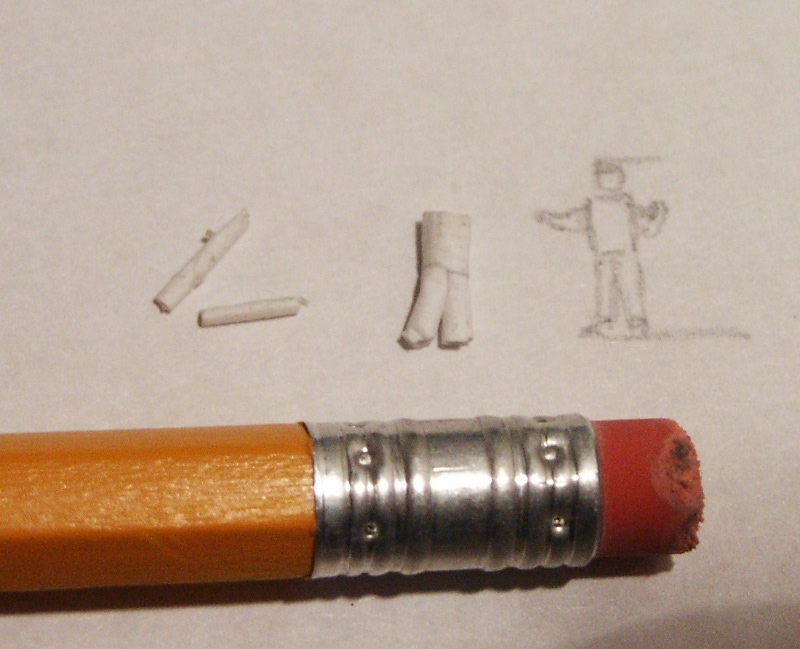
Here are a couple of shots with the semi, sitting on my work table along with the tools used to build them. The tweezers, mini screw driver, and push pin are from the Swiss army knife. The little scraps of paper to the far left are what I built the smaller detail parts from.
I'll have to take some better detail shots of the finished truck later.
Grand Wazoo
VERY NICE!!! A little paper trucking empire
FAST AND BULBOUS!
Grand Wazoo
VERY NICE!!! A little paper trucking empire
FAST AND BULBOUS!
Forum Guy
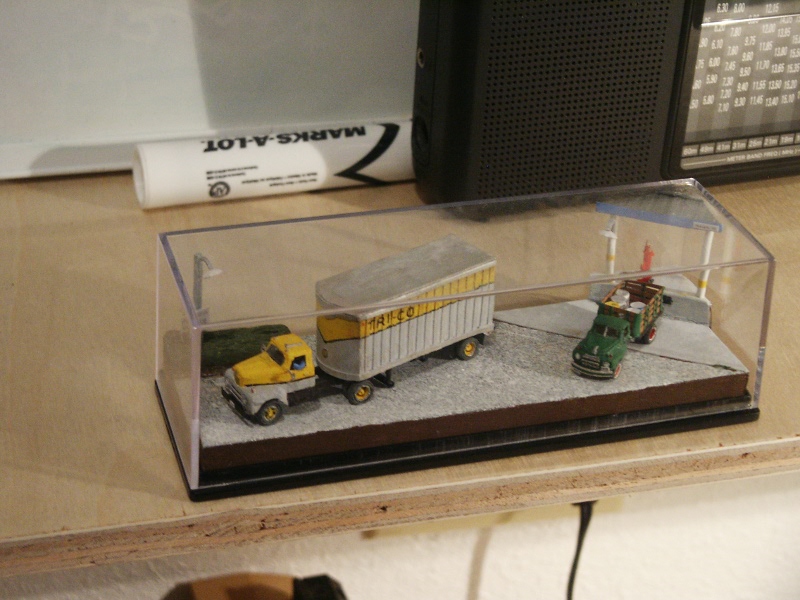
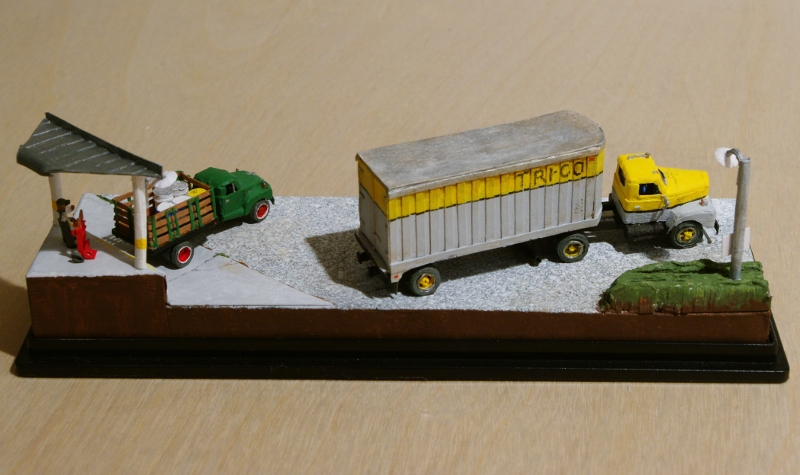
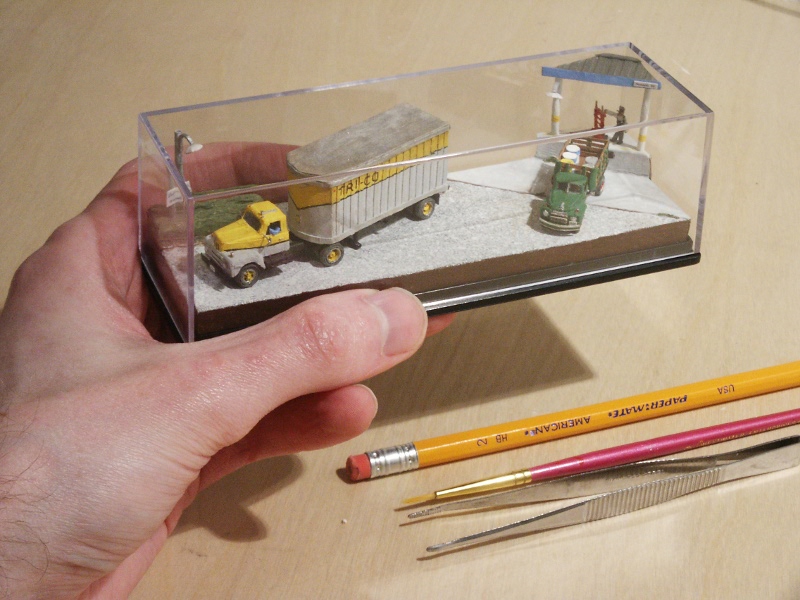
Well, more than a year later I'm back at this project. These trucks need some display protection. They've been hiding under the dust cover of my record player for most of the last year.
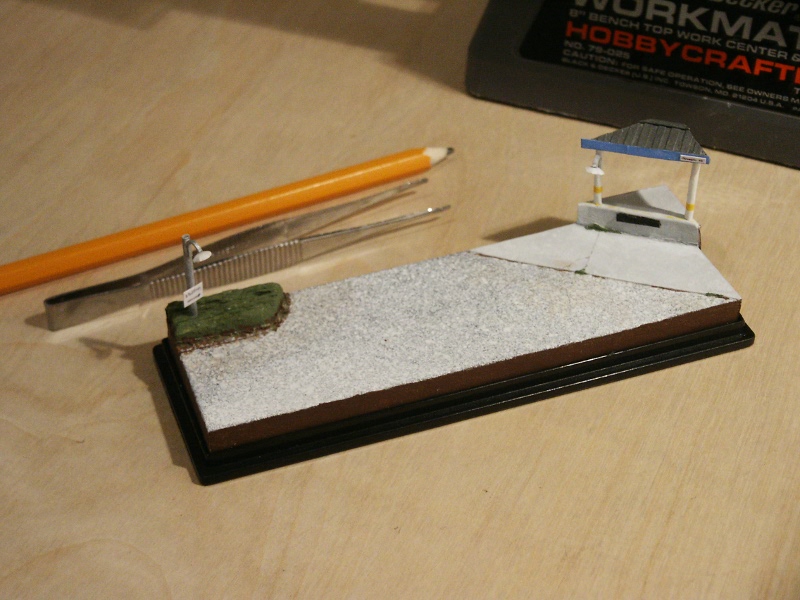
My original idea for a small truck yard diorama is underway. The primary consideration was the kind of protective cover I could make work. I found a decent plastic base and clear plastic cover at a local flea market (when I bought the case there was a small car and trailer in there).
I removed the die cast car and trailer, and built up a card stock platform that fit the plastic base snugly. I took a couple of weeks thinking about how to best arrange the trucks inside the space, and settled on one that leaves the clear case sidewalls open, over early ideas to obscure one side with a "flat" building backdrop. This way viewers can examine the models from all angles, and hopefully none of the static scenery is big enough to distract from the trucks as the primary subject.
Here is the work on the display base by itself:
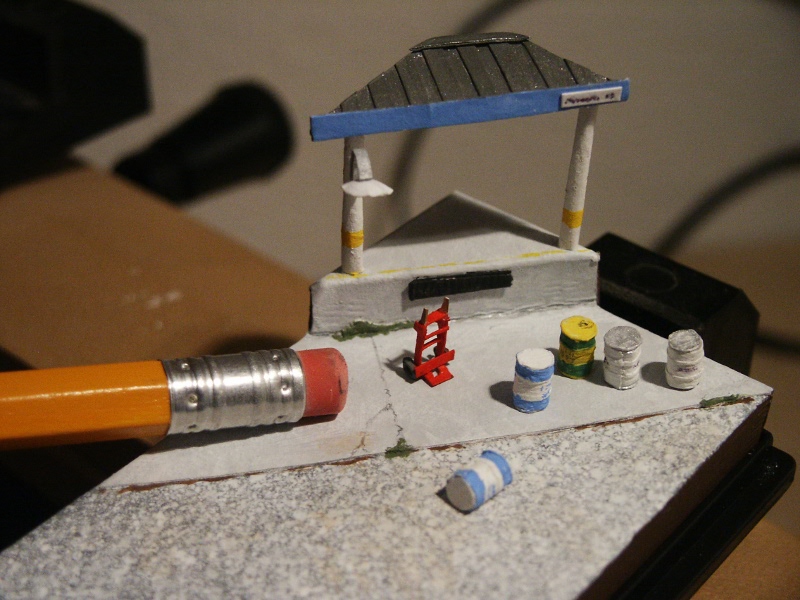
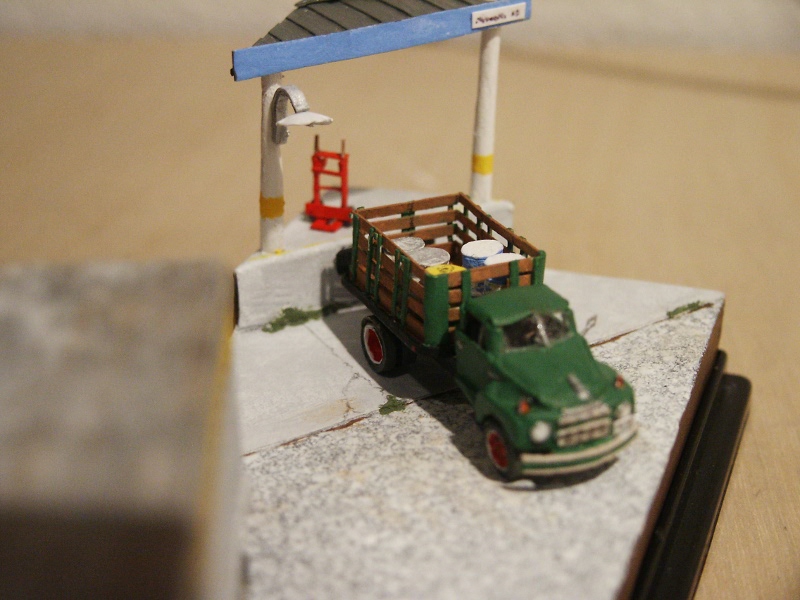
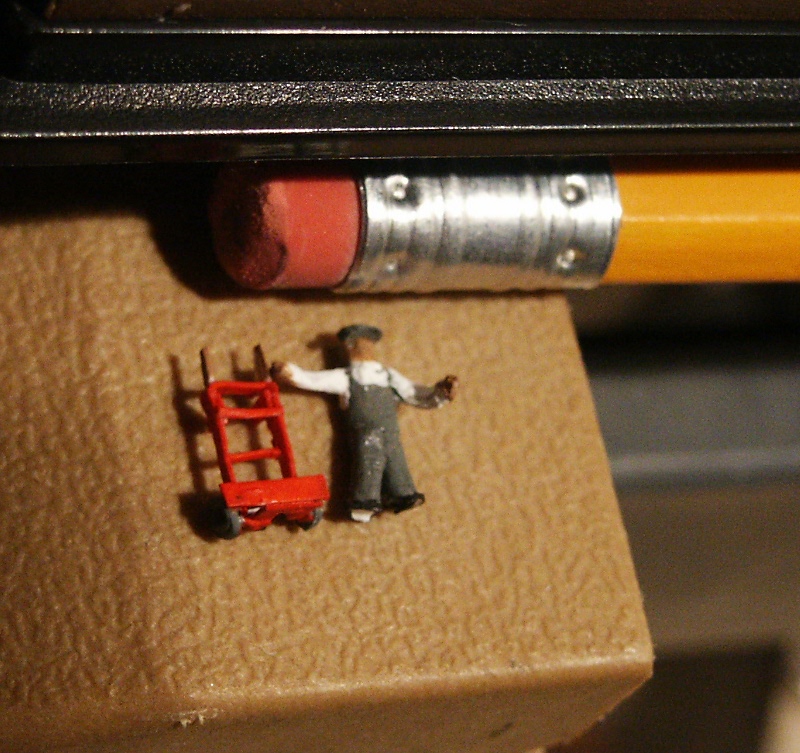
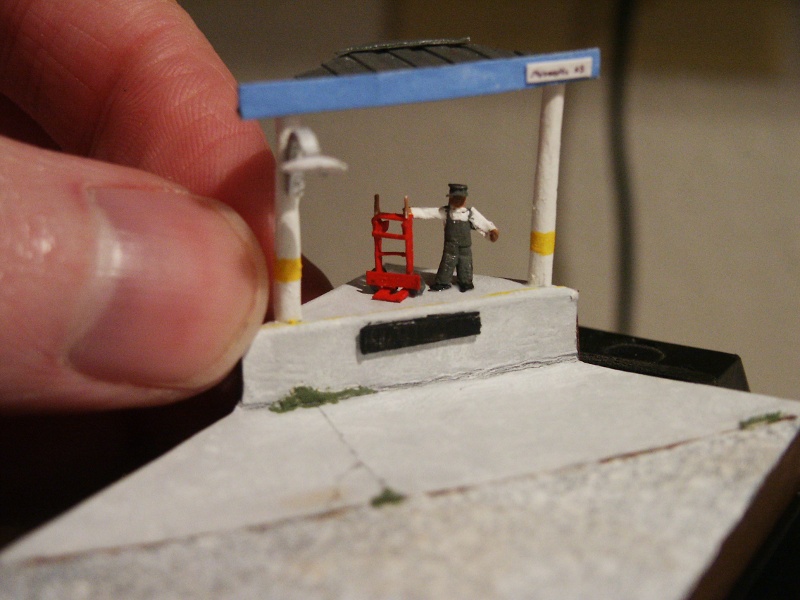
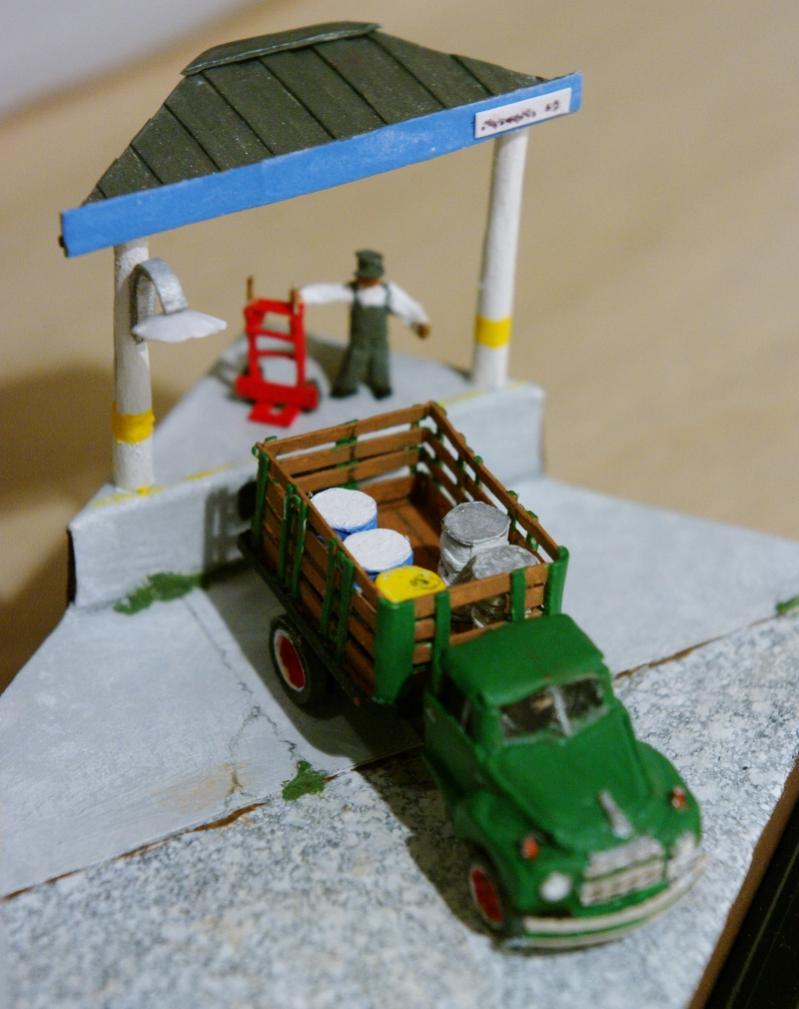
And some small scenery objects to decorate the loading platform area. The barrels will be in the truck, with a small figure on the platform waiting with the dolly.
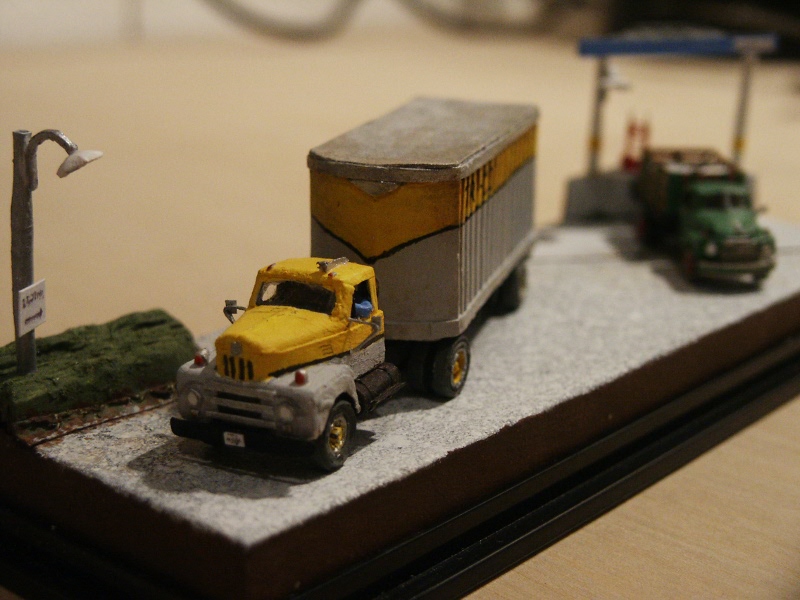
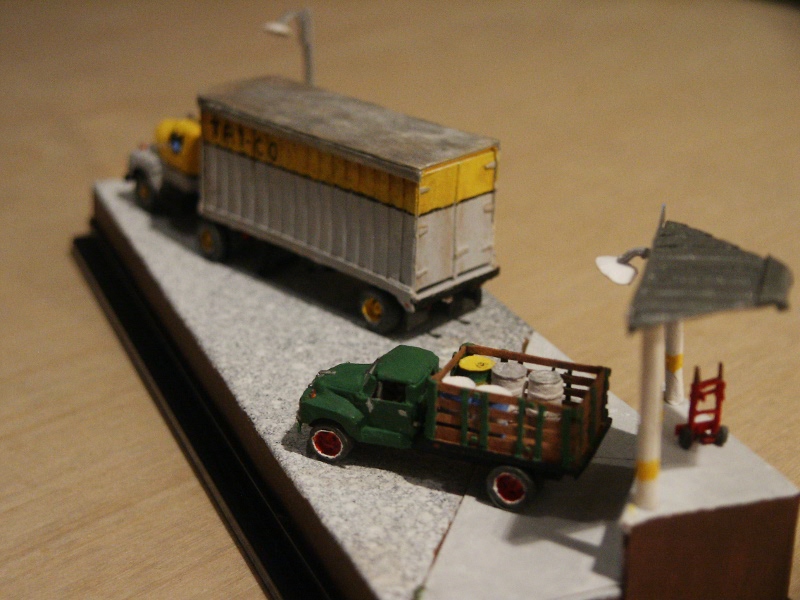
Here they are loaded:
And everything together:
Showing the plastic cover installed:
Only the figure on the loading platform remains, he's a work in progress:
Super Moderator
Amazing the scale you are working at adlabs, you must have fantastic fine motor skills! Did you make the perspex cover yourself or is it a commercially available product?
Click my signature picture to visit my site showing my profiles
Forum Guy
That plastic case originally had a diecast car inside. I emptied it for this project.
Ok, the man on the loading platform is done, and he and everything else are glued down. I borrowed my brother's camera that does some super macros for a few of these shots.
The figure done and painted:
And glued in place on the platform along side his dolly:
Truck with barrels glued in place:
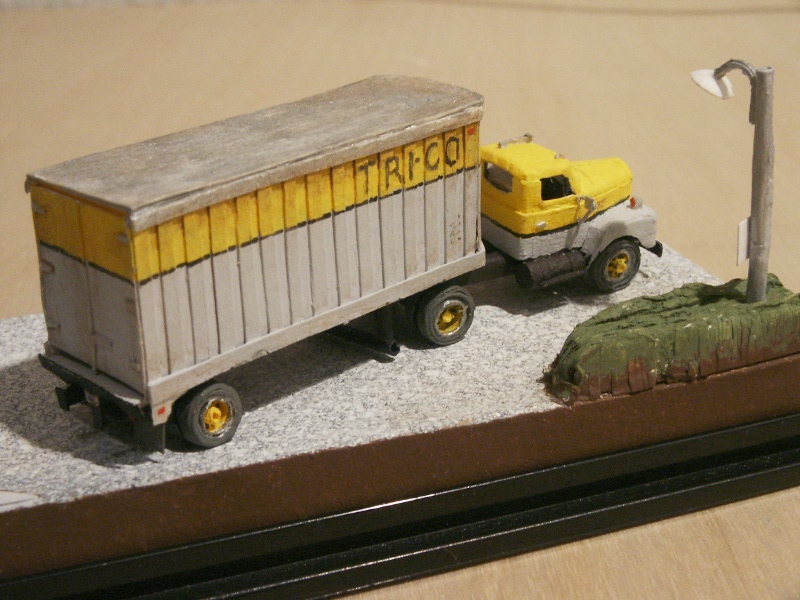
Semi glued in place:
Opposite site view of the scene:
Done and ready for the display shelf:
Grand Wazoo
VERY VERY NICE!!!!
Now you need to wire up those lights!
What's next?
FAST AND BULBOUS!
Senior Member
Blimey that's microscopic! Very, very cool.
But I would suggest to perhaps use glossy paint for added realism.
Great work, very inspirational!
Please see Facebook for my latest work: www.facebook.com/aviationart.aero
or visit my aviation art gallery and web store: www.aviationart.aero
 Posting Permissions