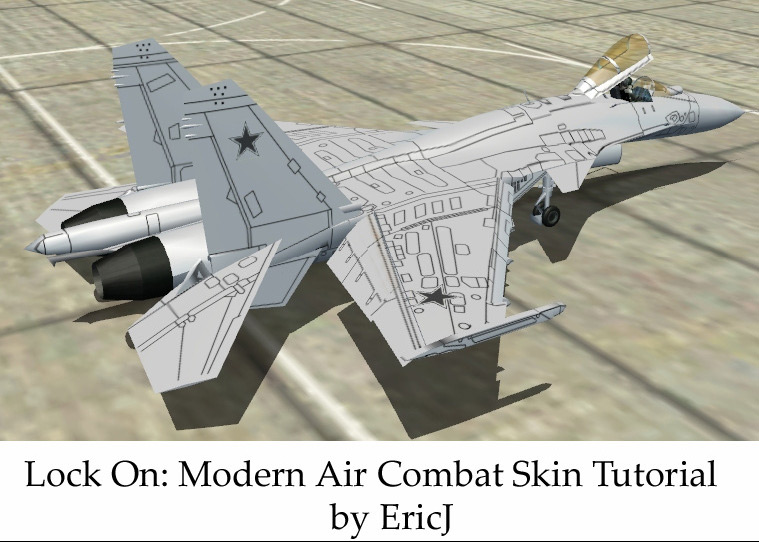
Today we?re going to learn how to do skinning in LOMAC, and we?ll start with
the Su-33. To get started, you will need these:
? Adobe Photoshop or Paint Shop Pro
? Template of your aircraft (whichever it may be)
? Time
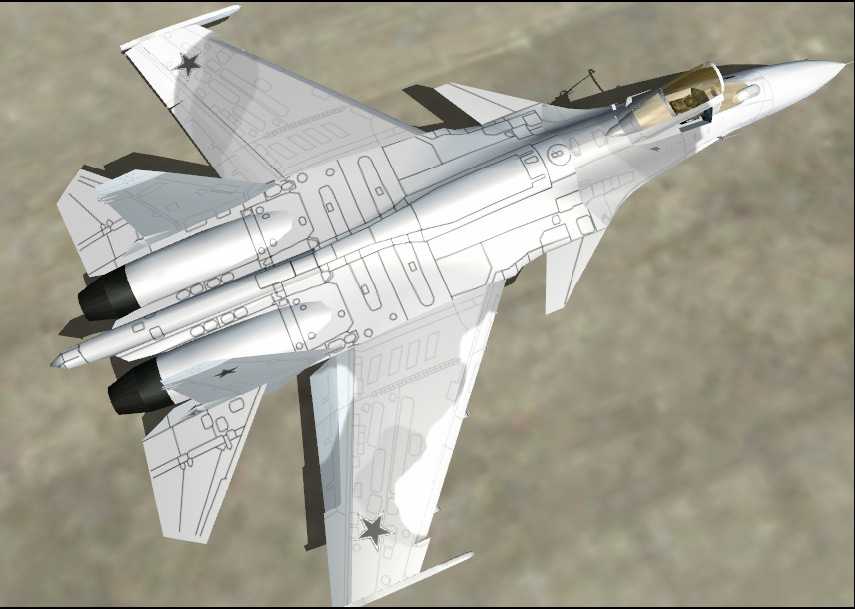
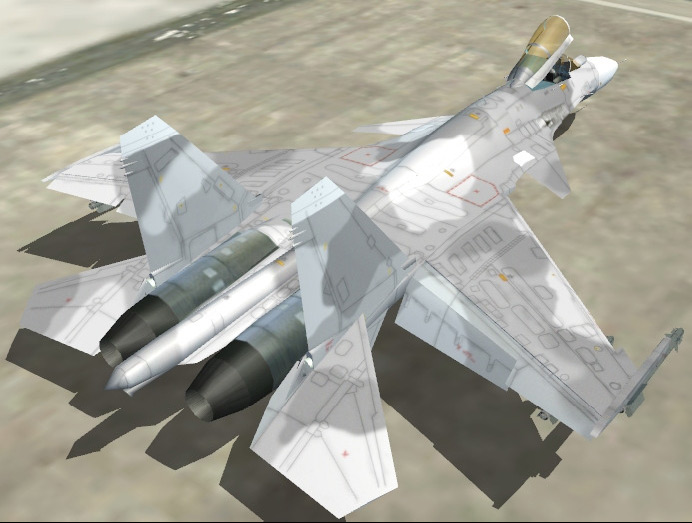
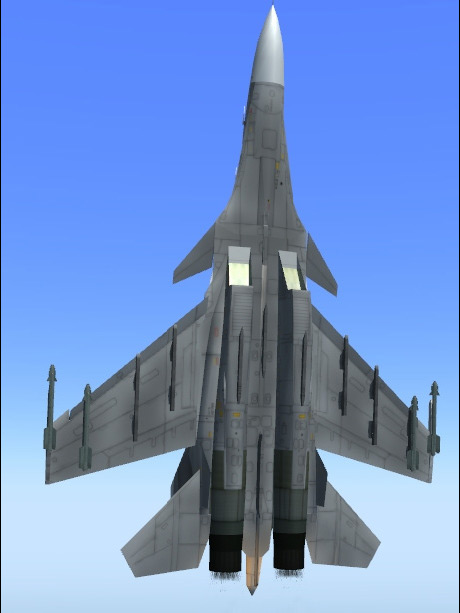
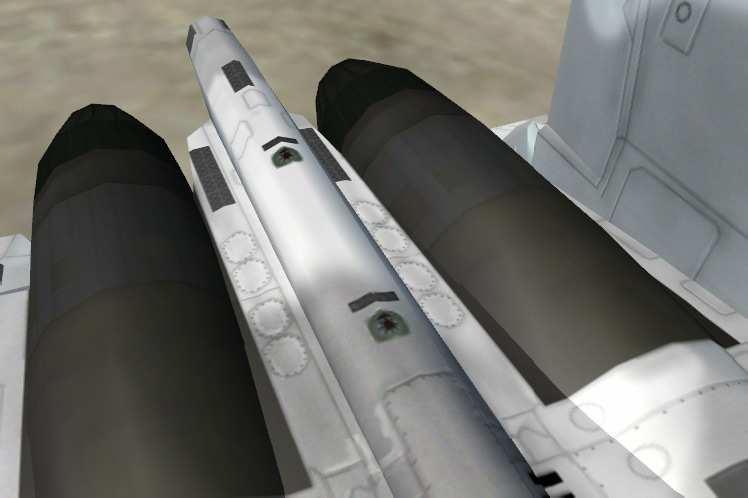
Starting off with the above image, we have the aircraft above. We?ll assume you have a working knowledge of Adobe Photoshop or Paint Shop Pro. Right now the aircraft is in an ?unpainted? state, i.e. really nothing but the generic aircraft lines that make it an airplane, or other than 3D model anyways. So then we?ll figure out some kind of pattern to do for this tutorial. For this one, to keep it simple, we?ll give it a rather generic pattern in order to get the basics down and then go into more ?advanced? stuff as it goes along. So since I mainly do ground attack missions and I like winter, I?ll do a generic winter scheme.
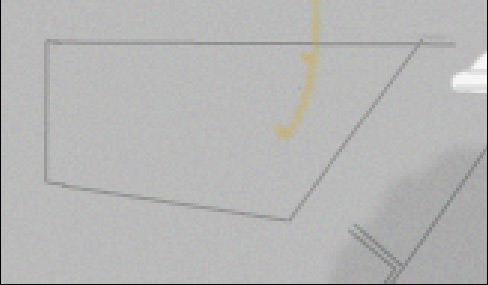
First off we?ll open the ?L? file, which in order to get great resolution, Eagle Dynamics made two files. Since the original files were 512 x 512, we?ll resize them to 1024 x 1024. So this is what we have above, two 1024 x 1024 files. Due to modeling, you can increase it so far up to 2048 x 2048, or ?high res? which makes a lot of skins impressive. 1024 x 1024 in my opinion is ?medium res? while the original ones are ?low res?. Anyways, let?s open the file. First thing though, we?re going to change the opacity
of the ?Lines? layer to 20%, which when it comes down to it, helps, not hinders the skin.
At this point, the lines are pretty much invisible, so we?ll add a grey layer so we can see them:
Now we?ll start with a cheap, easy pattern:

As you can see, the camo is covering the panel lines. You?ll also notice that I?m going for a more ?standard? look, which shows a single color underside, versus the wraparound camo patterns. So we?ll move the layer down:
Much better, now we don?t have to mess with the color too much. Now we?ll just add another layer, the underside and another shade of grey to complement the white, and a shot in the sim:
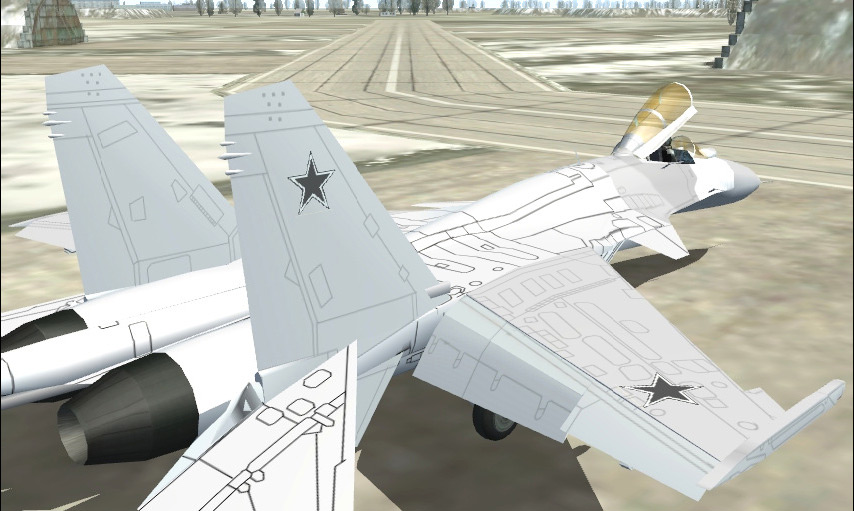
As you may notice, the ?-L? file handles the wings, tailfins, and ventral fins, as well as the forward fuselage and nose area. This is readily apparent from the color and the opacity of the lines. Next we?ll move on to getting the nose to a standard Russian white, and add white tailcaps to the aircraft:

Let?s say there?s a few hints here? but as a personal preference, when making generic camouflage patterns like this, I prefer a Soft brush over a Hard one anyday.
Reason being is a Soft brush seems to ?melt? the camo pattern on, while the Hard just throws it on there, but is good for filling in spots though. It takes some experience to figure out what works for you, and after that it?s all cake:
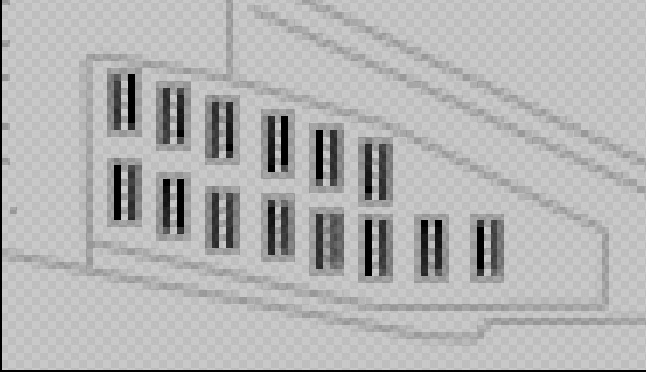
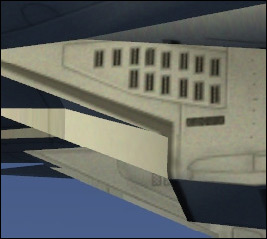
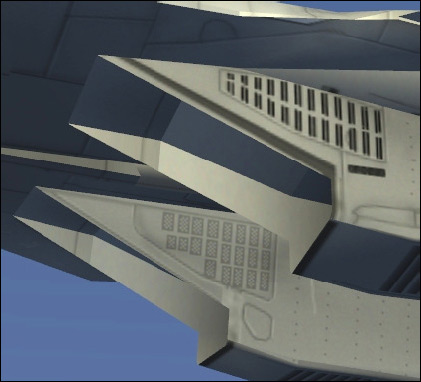
As you can see, it?s starting to show some shape of being a combat aircraft. It should be noted a lot of trial and error should be applied to making a skin. Since we?re on the ?-L? side, we?ll add the other details that came with the original skin. Layers are very important for when you are doing skins. They determine what you can, and cannot do within the limits that ED has for us. It?s in all sense of the word as again, trial and error. Normally your ?Details? (what I call it anyways) should be on the top part of the layer, consequently they will go on top of your camo pattern as those are usually best left alone, unless you are doing some custom work on it. You?ll also notice that we?ve added the ?Stickers? layer, which has all the normal warnings and other informational stickers associated with a complex fighter aircraft.
As you can see, we?re missing the detail in the cockpit, but that?s on the ?-R? file, as well as the engine textures. Never fear, we?ll get there when we do, but we have to finish up the rest on the ?-L? side before we move on:
Now we?ll start on the ?-R? file, which comprises the main fuselage, and other parts of the aircraft, as well as the canards:
Not bad eh? Looking more and more like a plane, not just a model. Note the area near the left canard. Easy fix really. Now since it?s a cheap skin, we can just pack it up for ModMan, and put it on the web. But not all aircraft are clean. Sure when they come from the factory, but we want to add some weathering to make it ?sparkle? in a sense.
Weathering in a sense is a hit or miss depending on the type of aircraft you are doing, as well as how much you really want to do. First off, the aircraft has a ?glossy? look to it, which in a sense is true, but a little roughness wouldn?t hurt. In this case, I?m going to use a little tip from the Simmer?s Paintshop on creating such a layer. First you create a new layer. In Photoshop, go to your color picker, and set the RGB values respectively to 128,128, 128, which is just the basic grey:
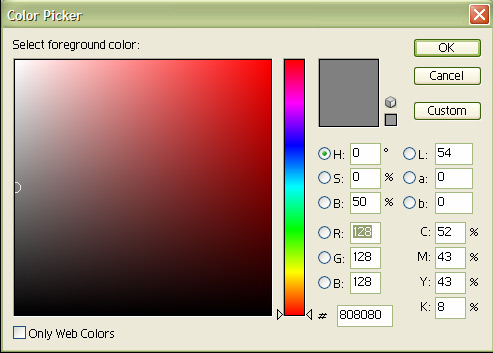
Then now, on your new layer, bucket fill the ENTIRE thing. Don?t worry,
everything is okay. Now go to Filter>Noise>Add Noise. Select what you like, and then click OK. Right now you have a large grey layer covering the whole entire canvas. Go to your toolbar, and select that layer to be Overlay, leaving it at 100% opacity. From the bottom images, you can see the difference:
This ?graininess? helps out a lot for giving a more realistic appearance in my opinion anyways. We?ll save it and check it out in the simulation:
Another thing to do is to add some sort of oil or dirt. Generally it?s a technique I got off of scale modeling. You simply add some paint mixed with water. This makes it flow and collect in the seams, generally highlighting the lines themselves. In this case, I?m going to make a new layer, and use a 1 pixel black and trace generally over the panel lines. This is going to take a bit, but to me it?s worth it. Opacity is a big issue depending on the overall color scheme of the aircraft. So like most other things, adjust it to where you get the best effect. Currently I have it set to 60%, which so far is working okay, but I may have to lower it just to get a better effect. However, it may look too garish, and not
what you truly want, so more than likely I?ll make it less visible. Down the line of course, it?s going to make a difference.
After tracing the panel lines, take a Blur brush, and adjust the size and type of brush depending on your preference. Overall this is just a technique to use maybe, rather than a ?standard?. It?s just something I prefer to do to my skins. Run the brush over the tracing lines, and ?burn? it into the canvas. Photoshop applies a certain amount of ?pressure? to the pixels so again, it?s what works for you. Using the Sponge brush also helps in this case sometimes, where you can ?drag? the pixels around to create an effect you want. Only thing I would recommend this for is known spots where oil or grease may be applied. Note that you should always ?pull? it towards the rear of the aircraft as it is on the canvas. Common sense-wise, the air would naturally drag the oil stains towards the rear because a plane moves forward, so the more natural, the better the skin.
As some people may have caught on as this is the ?weathering? part. Weathering a skin shows that it has seen ?service? and therefore ?used? not just rolled off of the factory line, where even after trials, it would immediately start getting it?s stains and other assorted dirt (snow stains, etc). Weathering is as probably noted, a hit or miss proposition, and it comes to a point just how much weathering you should really apply to the aircraft skin. For example, more heavily used, more weathering. Here are a couple examples:
As you can see, this aircraft is ?well maintained? (Lipetsk skin shown) so it shows a rather ?clean? appearance. Now we?ll go to a ?worn-out? appearance:
As you can tell from a ?worn out? version, the overall camouflage is of course faded, while oil streaks are present, and other grime and fluids that occur on a modern fighter plane. A note however on gear bay doors, the insides are perhaps the cleanest part of the aircraft, because they have to be. The plane?s gear enables it to land, so proper functioning (as best as possible anyways) MUST be paramount. If there?s a hydraulic leak in the gear bays, it can get messy on landing or takeoff. Of course you can get really extreme on weathering. Reference pictures off the internet or otherwise are a great help.
Scale modeling or related material always helps when doing a skin. My general rule of thumb is that if an image looks worth keeping for reference, save it and store it an easily accessible folder. Find a simple image viewer, and you?re good to go. Other techniques I will of course get into later, as the skin progresses until ?completion?. However, a skin sometimes is never complete unless you really feel like you can?t add any more, or simply releasing to the public. People who do know me know my trademark camo, so I use that as a guinea pig for possible techniques or ideas.
Sometimes I just go with the flow when doing a skin but things do change. This brings us back to the topic aircraft:
Okay, not an effect that?s not working compared to the image just above it. Oh well, time will tell as we go along. However, since we are going for the worn out look we?ll adjust the texture a bit:
Now, looking better, and down the line, it?ll help us in the quest to weather this beast. Naturally we have to adjust the other canvas to match this one (the ?-R? file). Technically I can get away really with this skin. What started as a cheap skin is now becoming a little more "expensive?. The cost is time. Put more effort and time into your skins and more people will appreciate them. As you can tell, I haven?t touched the other file, the ?-L? one. Now we?ll equalize everything, so we?re not doing one thing at a time, and not working on the other, which I have been doing at this stage in the skin.
One thing I need to mention. Rome was not built in a day, and you cannot weather an aircraft with just one layer. While if you?re doing a cheapie, sure whatever. But if you have to go the extra ten miles to get a quality skin, then using multiple layers is the key to success. While on one hand it doesn?t look like it, realize that Photoshop, Paint Shop Pro ?flattens? the layers onto one canvas. Which is what it does. And from personal experience, I would recommend frequently backing up your files just in case you really mess things up or get confused, and change it to being unusable. Anyways, moving on since we got the aircraft finally completed at this point:
What we?ll add however is some more camo in the middle of the fuselage, as it really doesn?t help the overall look (complete camo job) so we?ll add that. A note on tracing the lines when doing the above, you should really not have to be too exact. In a sense the elements don?t show up too exacting, so the more exact, the less realistic in my opinion it will look. However, too much and you get the idea. Use the Eraser tool of an appropriate size and delete and re-Blur the area.
But where did the grey go? Good question, looks like our little trick backfired on me eh? No worries we?ll just get a darker grey and re-apply it to the aircraft. Then we?re going to ?dirty? up the bottom of the aircraft more than the top. Realistically, there?s not much action on the top of the aircraft, due to the simple fact in this case, that most maintenance is conducted at the bottom, such as the engine maintenance, etc. So naturally at this point, people get cold in the winter time, and in some cases, more lazy since they don?t want to stay out there too long, generally anyways. So we?ll assume this aircraft has been fairly active. A misnomer considering the state of the Russian Air Force, but hey, it?s a ?fantasy? skin so how I envision how it?s supposed to look like, that?s my choice:
Next thing is to ?Burn? the area. Go to your Tools Palette and select the Burn option.
As you can see from the above image, the underside will be the dirtiest from the higher level of activity compared to the top of the fuselage. Which is okay, since that?s real life, and in this case, would do for now. However it?s not too complete as there are some gaps that need to be filled, such as where the forward fuselage/nose area meets with the middle fuselage. Care must be taken when using the Burn tool however, since well, you may burn it too much. I would recommend the layer you are considering burning, to make a duplicate. Therefore if you don?t like it, you won?t have to go back and redo the layer. It saves time and allows you to adjust the look as you see fit. Now we?ll go back and edit the skin some more, and this is what we have so far:
At this point it gets annoying, and will for you. It?s still not working out right, so I have to go back and get it right:
At this time, I can go to bed knowing it?s a decent skin. Now for the top part, the dark grey is well? not really faded. So what we?ll do is make another layer first. Then we?ll use a general white, or a lighter color of the base color.
To do this, simply take a brush, and generally draw over the areas, and then apply Blur or Sponge (or a combination of both, in this case). What this does in the end, give the camo pattern a more sun beaten look, i.e. again, a more weathered look, caused by the sun?s rays:
The major issue is of course the white portion. Trying to fade it is of course difficult, but since the camo is at a lower opacity, and this layer right now is at 100%, it gives it that faded look what is needed. I also selected Hard Light instead of Normal to get the effect as well. Now I got the whole aircraft finished:
Now to work on the top some more, adding some darkening. This represents dirt and grime that will collect even on the top. Making a new layer, we?ll use black right now, as oil will do that, simple as that is. Brush size and type is of course dependent on just what works for you. I?ve had to experiment, and in this case this skin is an experiment while I?m doing a tutorial. Things you learn you can apply down the road of course. Naturally the closer to the engine areas, the more grease, oil, or whatever else you apply in that area. Furthermore, you have to look at what exactly do you think it may be applicable. Since in reality, the Russian Air Force only has so many Su-33s in the first place, you can always make a fictional representation of some Siberian unit that operates them in the Far East, or whatever floats your boat. Sure it?s about a real world aircraft, but most of this is based off of fun, not always real life.
As you can see, I went a little on the underside, and so far has some decent results. Another view of the top real quick:
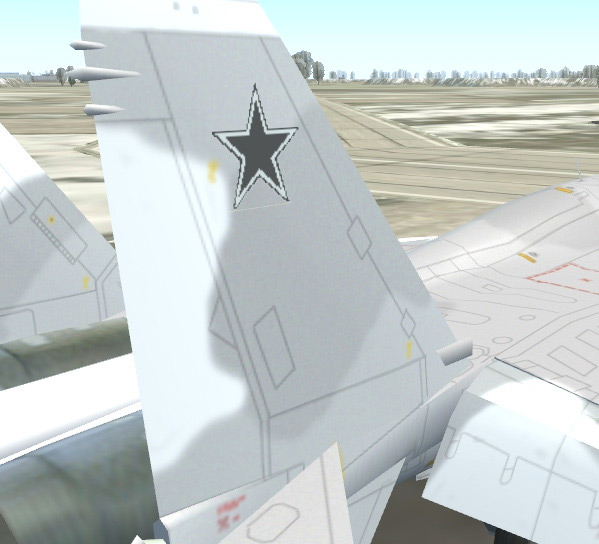
Rust and dirt are pretty much the hard ones to do. Reason being? well there?s no real reference where to put it. Then again, the Su-33 is a sea-based aircraft, so it would take quite a while for it to happen. However, given that this skin is a winter based one, melted water, constant? you get the idea, it would start to crop up on a fighter like this:
Note that weathering doesn?t mean you have to make it dirty and used and abused. The above are techniques I use to achieve the effect. A little bit, and maybe lower the opacity of the camo pattern can also achieved a ?used? look on an aircraft.
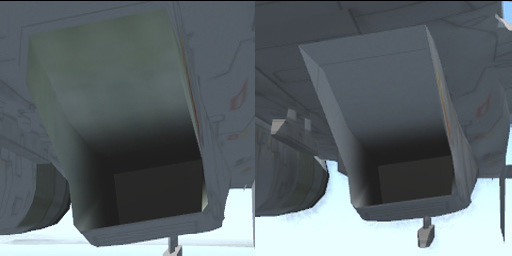
At this point, we can start working on the other details of this aircraft, as it?s suitably weathered for this portion. Next up is the intake ramps. Generally, as you look at real world photos, it?s not the texture, more or less the generic color associated with Russian combat aircraft. So what we?ll do is use a gradient to make the generic fade to black that is associated with shadowing. The best combination is of course white and black. The reasoning is that when you set that to Multiply, you get the effect you are looking for, the white goes transparent, and the black stays black. Simple stuff:
Now all we have do now is weather that area and we?ll be good to move on. The next thing we?ll do is add subdued (grey) stickers. Generally I?m more of a realist in this case with warning and other associated warning signs. So if it?s going to be a combat aircraft with a subdued look, it?s going to have everything else associated with it:
The thing to remember is that skinning is a complex subject. Pretty much there are layers and modifications that must be done in the course of skinning an aircraft. So we?ll just modify the engine textures and can release a simple skin that will probably impress somebody.
But still not finished (?Come on Eric hurry up!?) just yet, as we have a few more steps and additions to do. First we?re going to add a line highlight. This gives a quasi-3D effect to the panel lines on the aircraft, and makes it look better overall anyways. To this is really simple. Take your line tool and go on the inside of the lines. Inside is defined as towards the rear of the aircraft. Why mainly for the sun reasons, but overall just plain works for skins. It gives the panel lines a more ?sunken? look, as most aircraft should have anyways. Adjust the opacity to the point where it?s noticeable, but doesn?t overpower the skin. It takes some adjustment for this to ?look right?:
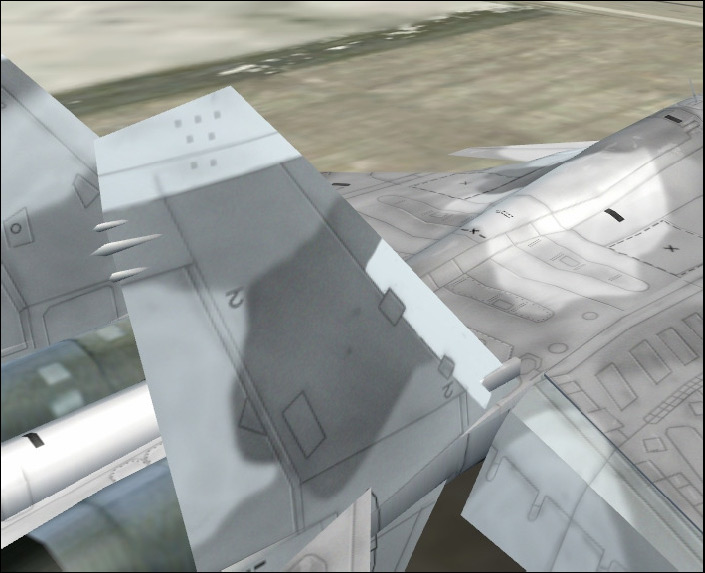
Next we?ll look at riveting the aircraft. Most aircraft today are basically riveted together on a frame, much like a car. However, they?re more noticeable, and on Russian aircraft, always present. Doing rivets is quite easy. Get a boatload of reference pictures or skins, and simply make 1 pixel dots around the areas that have it. I?d suggest making another layer as seeing them depends on the overall camo of the aircraft in question:
Another thing, let?s ?fix? the engine textures. They?re old and been bugging me the whole time while doing this tutorial. These are what I came up with while working on some other skins, so far I like it very much compared to the other ones seen:
Next on the list are the intake areas. I?ve pretty much neglected this area due to extreme laziness, particularly on the fact on really didn?t know how to attack it at these junctions that I?ve been at, but now it?s time to work on that stuff.
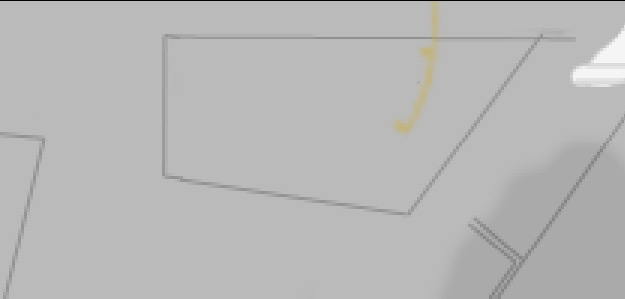
First we?ll start with a 256 x 256 image to act as our test canvas. Select the gradient tool and then use white and black. Go from right to left and adjust it accordingly. Now we?ll copy and paste, and resize (CTRL + T) to what we want. First off, it?s not going to work anyways:
Okay, as said, it won?t work for squat, as it doesn?t give a true 3D effect that we are looking for anyways. The bottom acts as an air scoop. Since the 3D model is what it is, we?re going to have to use the texture to do the work:
Now since that worked, let?s take a look shall we?
Looking much better don?t you think? I think so, turns it from a dull flat image to something more 3D, even though of course, it?s still a flat piece of geometry. However another fix is the panel lines, but that?s an easy one to fix.
Moving on we?re now going to get the outer intakes. I tried a mesh effect, but as we all know, not everything works out as well as you planned, so you gotta do what you gotta do. Same as before, we?re going to use a 1 pixel line and draw them out:
Even at 1024 x 1024, you can?t get too much detail, but in a sense this is good enough. Down the road when I get a better computer, I can go 2048 x 2048 and really get the detail down. So to help with the effect, we?ll add a splotch of black around the open areas, to simulate something of a mesh. In Photoshop, it doesn?t look too good, but that?s that. However insert it in:
One thing to note before I work on the inside portion, is that sometimes you should not merge layers until it looks how you want it. Right now I may have to just edit it some more in order to make it look slightly better than it should be. And here?s how it turned out, which in my opinion, IS better:
Of course, there are some bits that do need to be edited, so we?ll finish up the inside portion of the intakes, and redo the whole area as well, to touch it up.

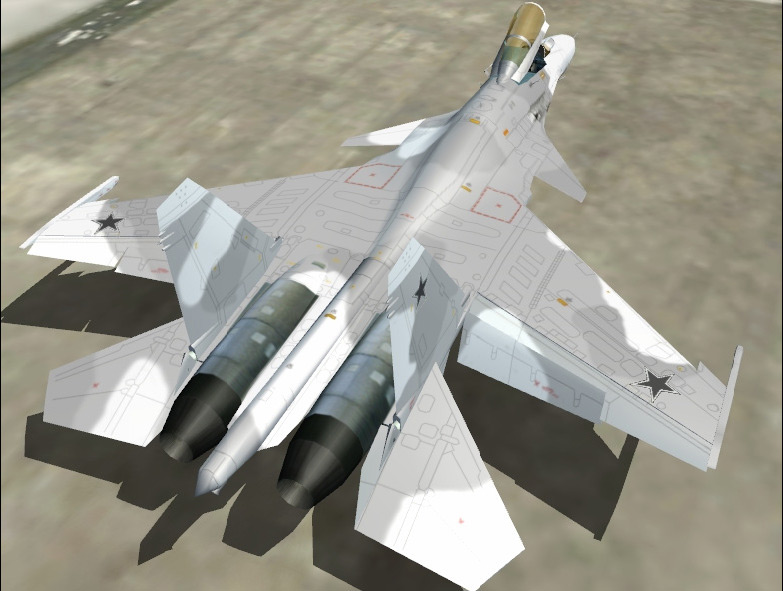
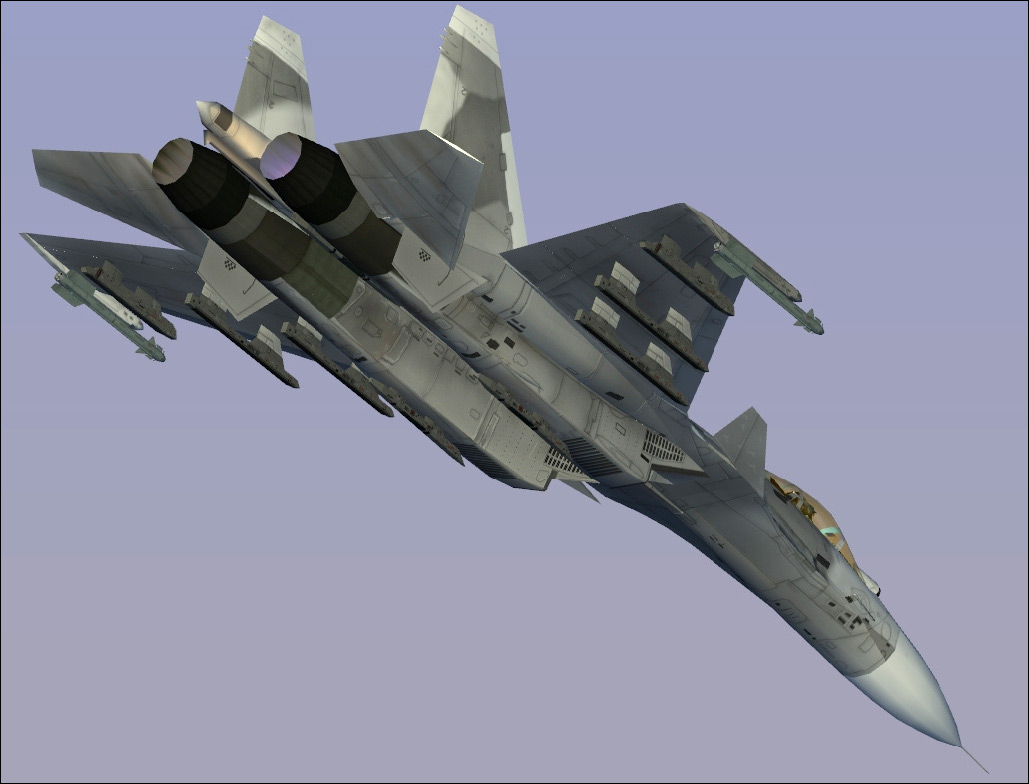
Well I think at this point, the skin is pretty much finished to be honest with you.
Surely there are extra things to add, butt at this point, I think I added and did what I could really do for this:

TutSkin.zip
Getting Complex
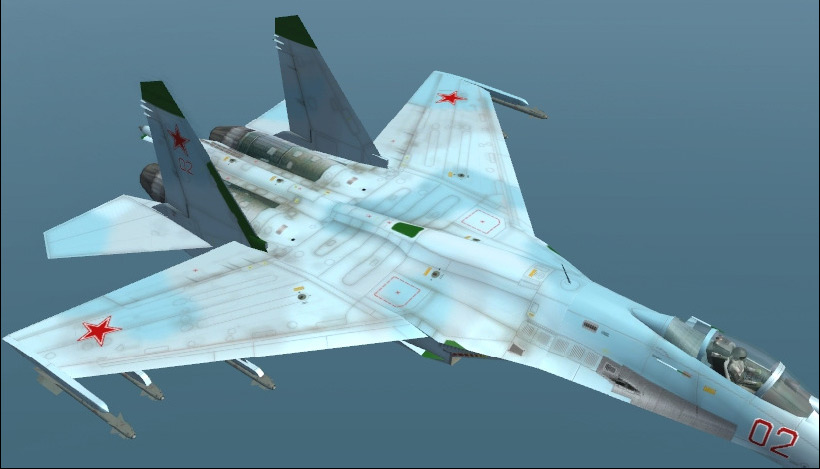
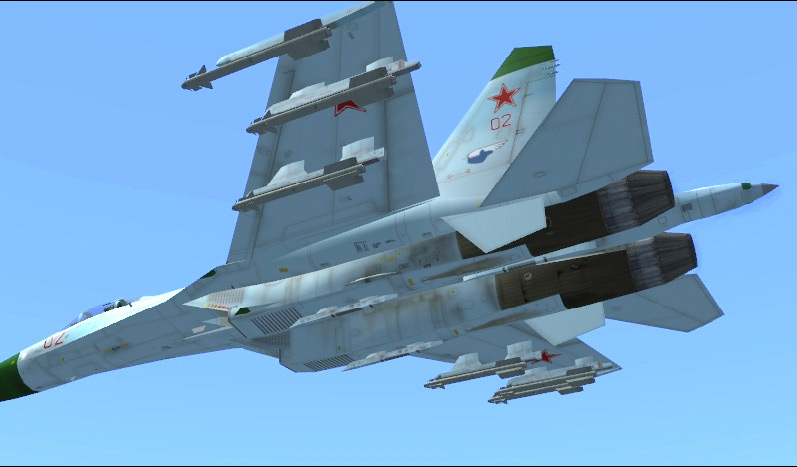
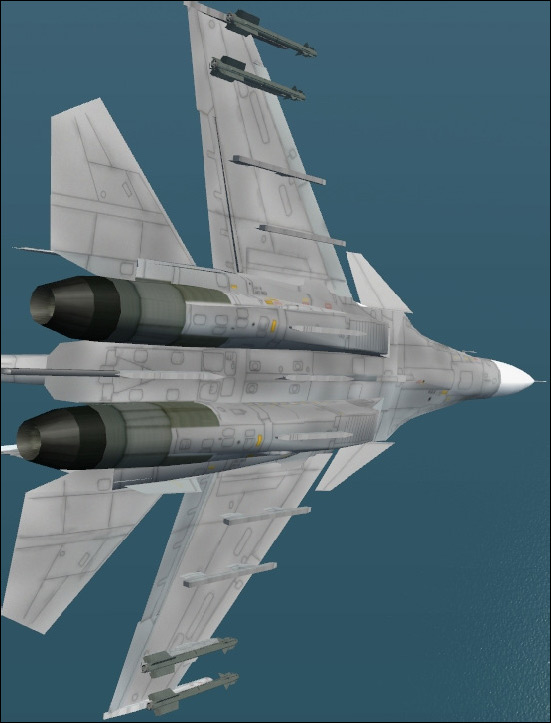
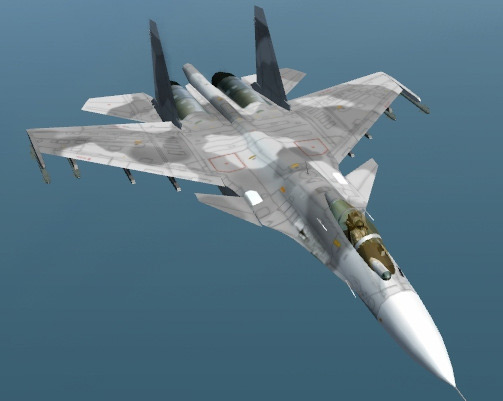
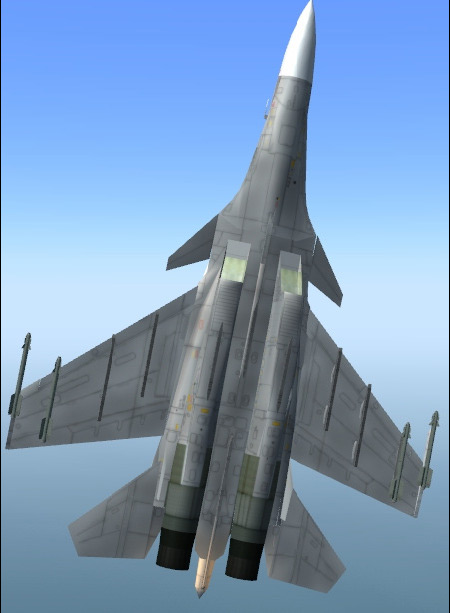
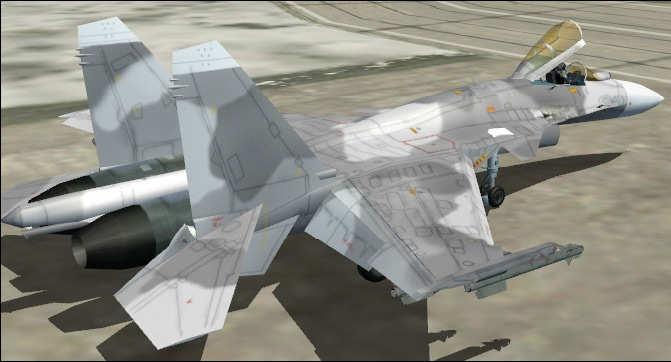
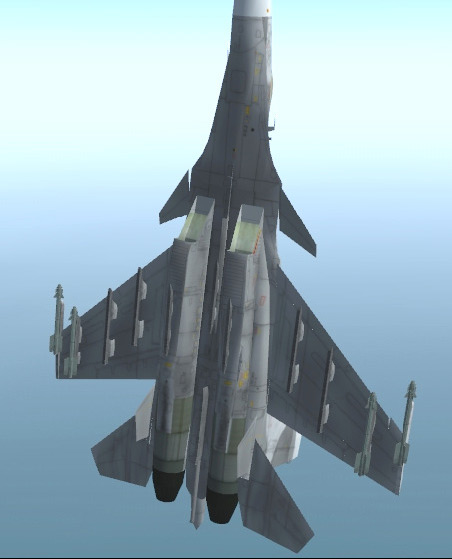
Naturally this is probably an ?easy? skin, and that?s the whole point of the tutorial. Throughout my ?career? in LOMAC I sport a rather unique splinter camoed Su-33. It?s been through a lot of additions, and changes so numerous to catalogue it would be a waste of time. And in a sense, most people do like the skin, but that?s not the point of the topic, but how to achieve something like this. Nothing grand, but let?s start off with the overall pattern. First off it?s a ?wraparound? pattern, so:
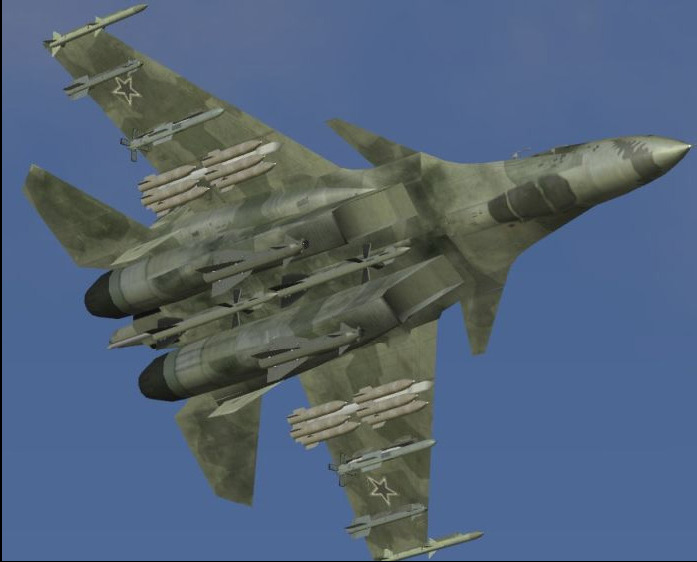
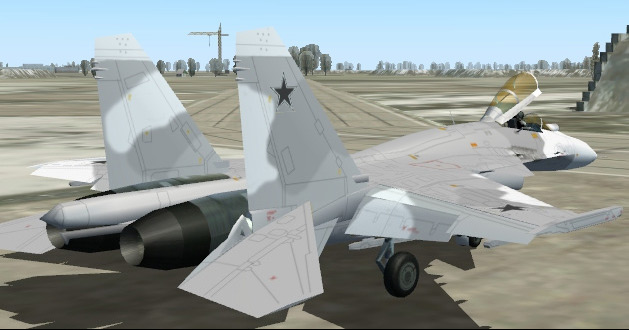
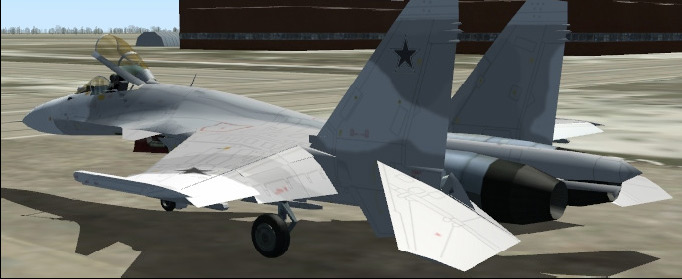
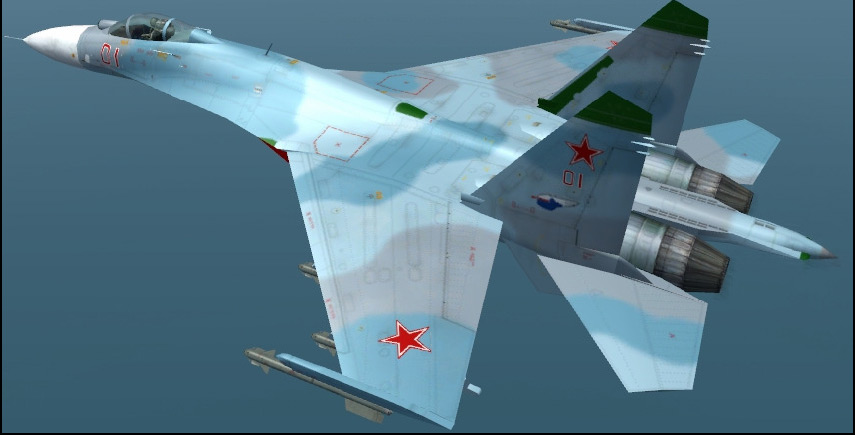
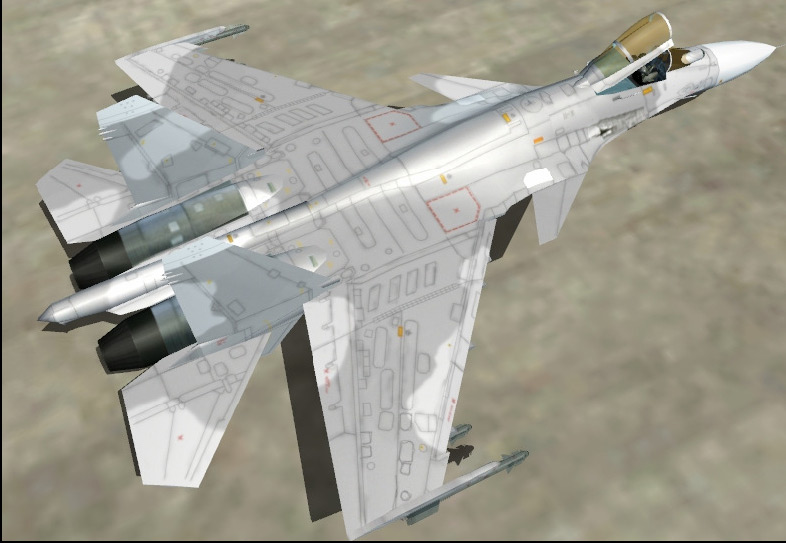
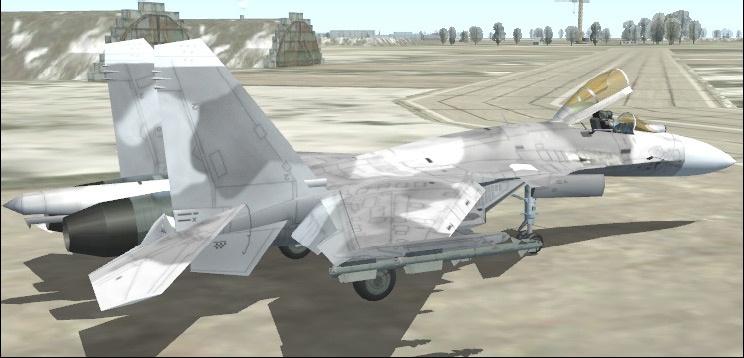
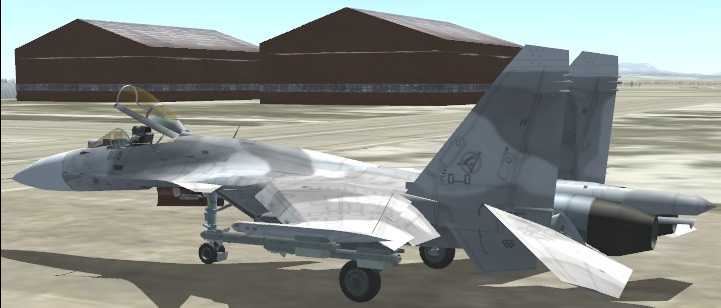
As you can see, the pattern is fairly well done. However, you have to realize that depending on the aircraft, this can be a snap, or make you tear your head out. In this case, it?s a combination of both. Eagle Dynamics did release a model viewer, so in a sense it helped. However, you have to go in and out of the sim to see what works and how it looks. By this time, you will start to understand what is what. Doing some work for Eagle Dynamics of course gives you an edge, but overall, the more complex the skin, the more you have to look at what is what, and how it will affect you. To do a splinter or a simple wraparound pattern, it?s best to draw lines where you want it to go, and where it ends up. This takes some patience as most people want it right, and for splinter and wraparound patterns, it?s a must. As you saw on the two Su-27s above, that?s a standard Russian tactical pattern that most if not all air forces around the world use, camo on top, some color to try and blend in with the sky on the bottom.
This is where knowledge of the skin helps as you know what you can do and what you can?t. Every skin has a limitation, etc. etc. It?s all gravy really when you start to experiment with techniques.
Filenames
LOMAC has a very strict regime when it comes to names and file conventions. Pretty much the skins are numbered in sequence, which corresponds to the amount of available skins able to be used with a particular plane. Most of the aircraft have one basic scheme in order not to drive too many people crazy. However, skinners like to skin, so hey, why not do a little more? The best thing to do for this is to look at the few CDDS Browsers (so few because really, do you need more?) and go from there. And after it?s all done, remember: 24-bit bitmap is your file format. Some people say 32 bit but 24 has always worked for me. 32 bit will show up in the simulation, but you cannot insert it into the appropriate CDDS file. Note you can also manually place textures without inserting it into the CDDS. Personally it works for me since I can just remove it, and not have to deal with files that cannot be removed. Keeps the sim ?pure? in a sense so when changes are introduced, to revert would make it easy and not lose information.
Time
Face it, texturing takes time. Which is why skins are never released quickly (though I did one in a day, but wasn?t too difficult in the first place), and for the simple fact that unless you truly don?t have a job, we have the real life to deal with as well. This also reflects on what people think of your skin. The more effort you put into it, the more it?s going to show to everybody. That all depends on what you have available, or what
you can make available to you.
Creating your own PSD
One thing that helps a community (and you) is a template PSD. Be prepared to spend some quality time tracing, erasing, and modifying. You see, the level of detail reflects on how long it will take. Among the PSD templates for LOMAC is the MIG-29A skin. I will not let it go. It is HIGHLY detailed, and deserves a mention. But I also love it for the excruciating detail it has, but also curse it. You see, making a skin from a base template is easy. But you're talking about lines, which isn't too hard. But think about every little rivet, and you get the picture. It's quite simply just one of those things that really make you think. Though second place goes to the IL-76/78M-A-50 skin. Next up is a "Details" layer. I like to separate it as another layer, because sometimes you want to modify that, without the lines interfering with it, and allows you to turn it off when you
are creating a custom skin, allowing you to complete a camo layer. You create this layer by erasing carefully everything that would be considered a detail. Though I like to make a copy of the base skin so I can erase from that. Stickers layer is also a must, and as well with the MIG-29 skins, Ukrainian and Russian symbols. It's pretty much it.
Again, this will eat up quite a bit of time, so expect to be staring at a screen for a bit. This goes in hand and hand with catching everything. It's possible to be zoomed in to miss things, and generally you get tired, and distracted, etc. Rome wasn't built in a day, and making a template shouldn't be yours either. Take occasional breaks, rest the eyes, etc.
And just remember to save it as a PSD.....
Creating Skins for other people
This is a topic in which I'm personally aware of. First off, be professional when dealing with "clients" Though skinning itself is not a business, your work shown to others could be. Things to consider when doing custom skins:
? Do you have the right resources (files, web, and books) to do the skin?
? How much time do you have personally to finish it?
? Can you do it?
? Do you want to do it?
I will admit a few skins I've never liked doing, and probably consider doing them a lot less than others. Everybody has a bias, and most people see I'm geared toward mainly Russian a/c. I fly one, so yeah; I'll probably jump on one more than another. You have to then again maybe say no, because of real life commitments, etc. Nobody says you have to do one, but then again, do you really want to?
On the flip side is the person who wants you to do the skin. First off, I've had tremendous resources at hand, so in some cases it isn't too hard. Plus I know some people who may have what I'm looking for. But then again, help is always good. One thing that gets me is that somebody asks for help, but then again, says "Good Luck." That's personal. Don't leave your skinner hanging in the wind, forced to sometimes waste precious time searching for something that even on the Internet, may not exist. It basically boils down to communication between the two of you. "Client" wants this on his/her skin, and you have to deliver. In some cases take some liberties, but make sure you can remove it if the person doesn't like it, and always ask "Is this cool". That person may like it, so that's good right? In the skinner's position, make sure he/she sees your progress. That lets him/her know what to add/remove, and saves some valuable time. Plus it builds a desire for it. You are basically selling your skills, and even I'm looking for a possible digital artist job. It's not only helping somebody else out, but you're looking out for yourself too. If the "client" doesn't understand a concept, explain, not condescend because he/she doesn't want to do it themselves. That's their prerogative, and let it be.Some people just don't have the skills, and treating them like crap doesn't help you. Naturally the time factor is a play. Give the "client" a lead time (time expected to be completed) of a few days, based on your schedule, what exactly has to be done, and nobody complains if done early. But if it's going to be late, let them know. I'd rather be honest, than lie. It's just not about skills, it's about personal relations. Oh yeah, you may be the Skinmeister, but why would I want things done by you? Get the point? Your skills will spread word of mouth or as they say, "a picture is a thousand words", by showing your work. Note you should always reference somebody else if you know them. This helps because the person may have the skills to do the job you know you can't. There is nothing wrong with this, as again, be honest, and don't lie. Plus it gives them exposure too, as they might want to do the same thing.
Another thing is while being professional, I would possibly deny a job if it was ethically questionable. If you're asking to put swastikas on your a/c, don't ask me, that's for sure. Or anything that might be really bad. The fact in this day and age of instant communication can ruin you. But if that's your ocean, float your boat how you see fit. If for some reason you don't think this helps, look for "Eric Johnson" in the About section
of LOMAC. It's definitely not the singer.

 Member

 Posting Permissions


 Reply With Quote