


 Reply With Quote
Nice TUT, want to use it. Will it be possible to have it in a prinable version (incl. the pics.) as a download?? I like to have a printed copy next to my keyboard when process the TUT.
Kind regards,
Papa Roach

 Senior Member

Laying Down the Paint
Using PaintShop Pro 7
Hello again!
In this tutorial we will begin to lay down the paint. I will be using a template from LOMAC, the A-10 to be exact. Once the panel lines and rivets are done you can begin to top lay down some paint. This is a simple way of doing this process so do not make it any harder than it is. As with the other tutorial please feel free to contact me via e-mail. Also there are a lot of talented skinners to be found at the IL2 forums so pick their brains and get as many tricks for your black bag as you can.
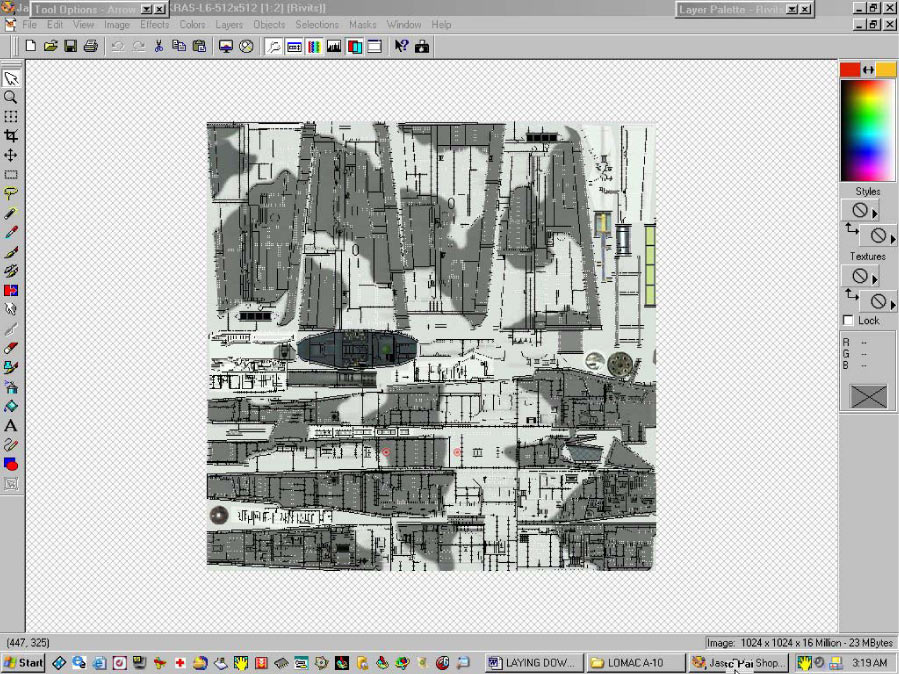
Fig. #1
Here in Fig. #1 you can see the panel and rivet lines. You can change the colors of these like this.
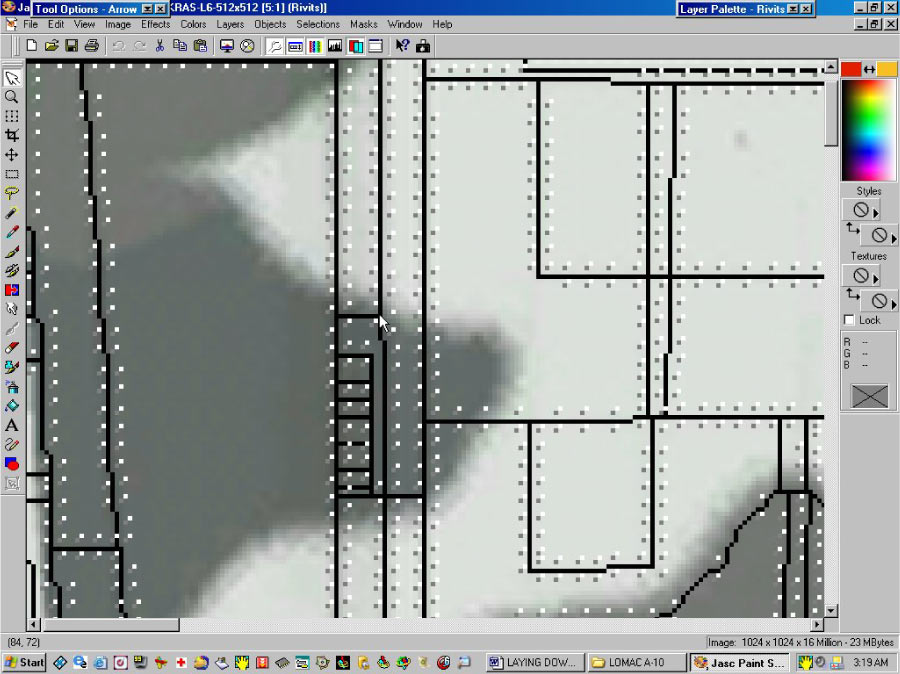
Fig. #2
Here is a close up in Fig.#2.
You can see that I have changed the primary rivets on the wing section to gray and left the highlights white. In this skin I will be painting the top of the skin mostly black so I will change them later to a red or dark gray and lighten them up by playing with the opacity settings.
If this sounds like Chinese to you I suggest you read my other tutorials. These will assist you in getting a quick understanding and translate some of the lingo occurring here.
[CHECK FOR PROPER LINKS]
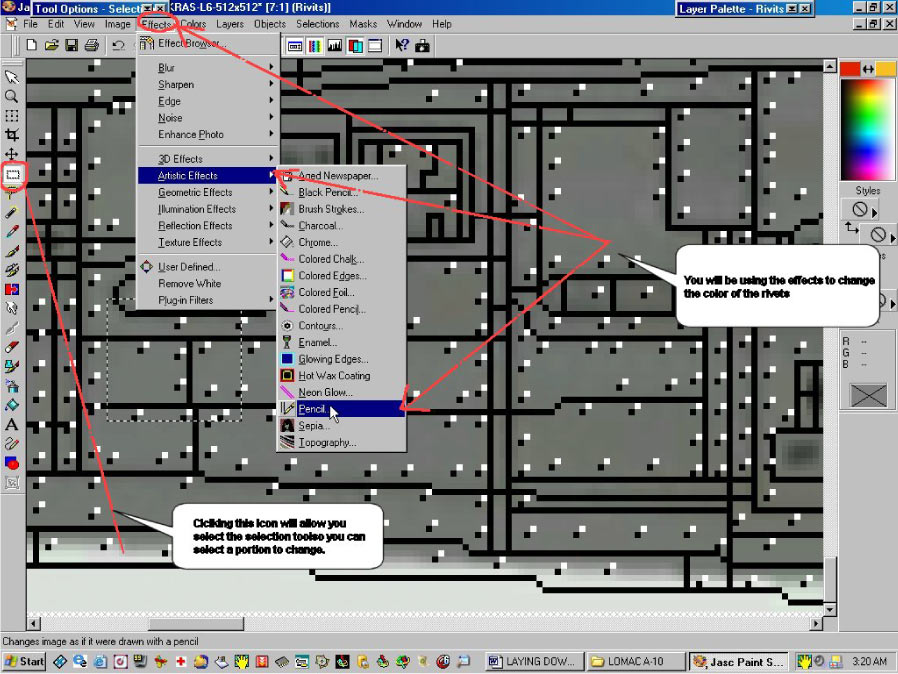
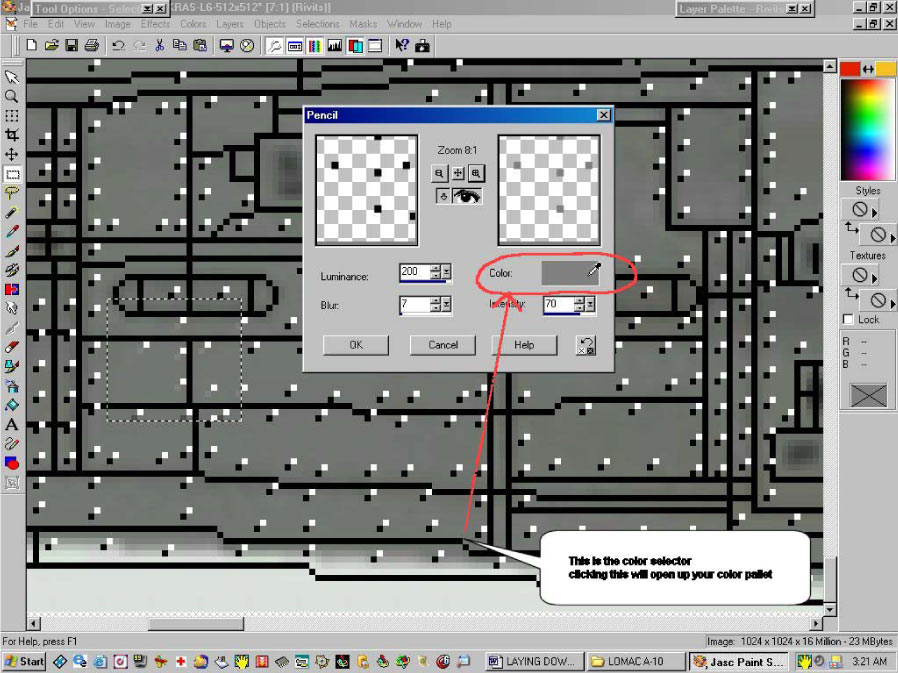
Fig. #3
You can see the portion of PSP7 that we will be using to change the rivet colors. The Selection tool on the left side of the PSP toolbar, and the Artistic effects specifically the pencil selection.
The dotted lines you see formaing a square is the area we will change, just use your selection tool to draw a small square to try for yourself. If you do not like it, change it back or hit your Ctrl+Z buttons on your keyboard to reverse what you have done.
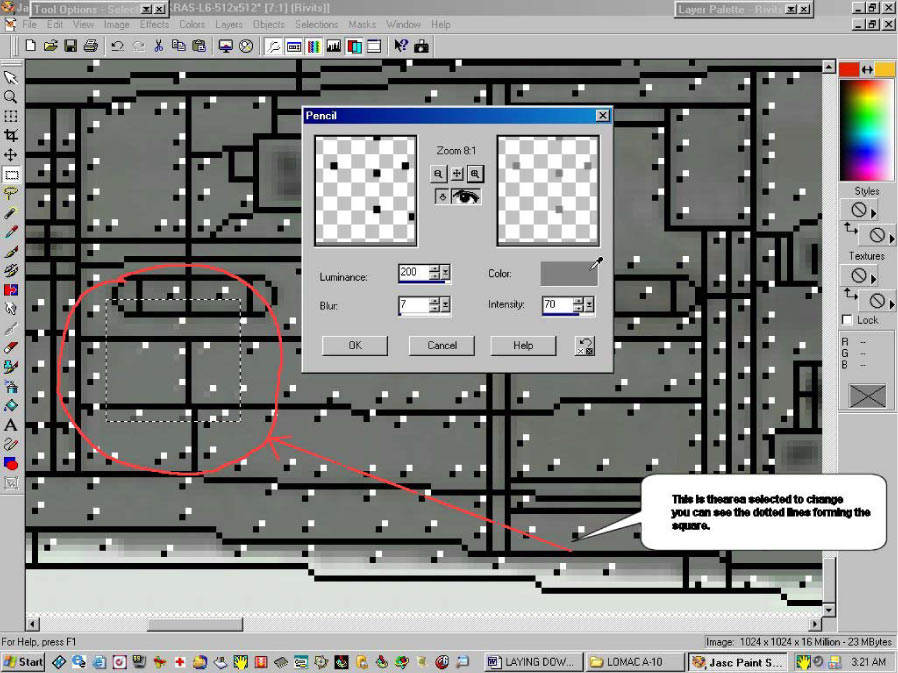
Fig.#4
Here in Fig.#4 you can see the area that we will change outlined in red. The square box is the pencil properties box, this is the magic tool that allows you to change the rivet colors.
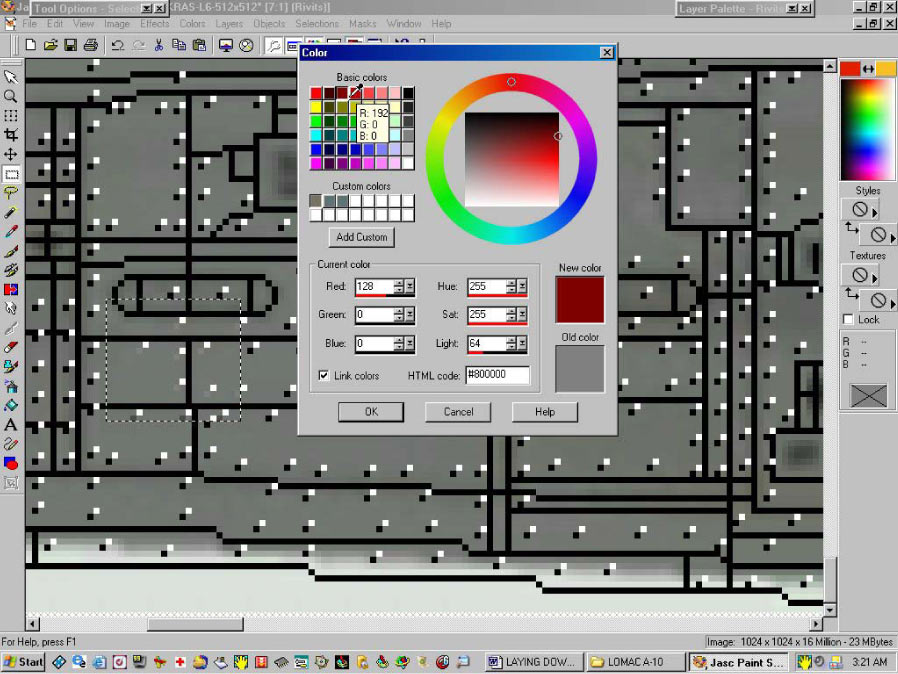
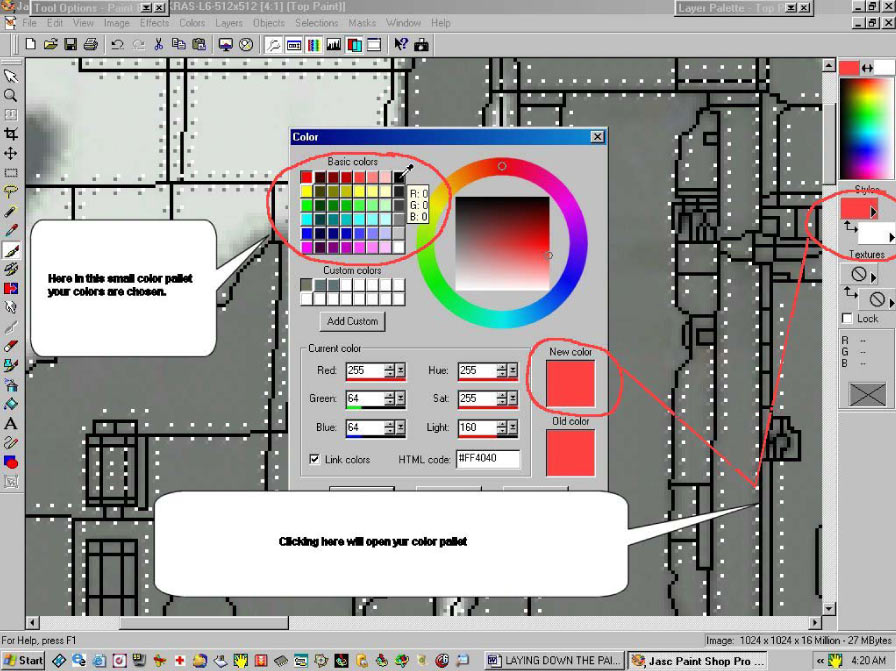
Fig.#5
In Fig.#5 you can see the color tab which allows you to select the color palette and bring it up like this.
Fig.#6
Above in Fig.#6 you can plainly see the color palette, This is very simple to use so play with it a little and see for yourself. Remember if you screw something up just delete it before saving it.
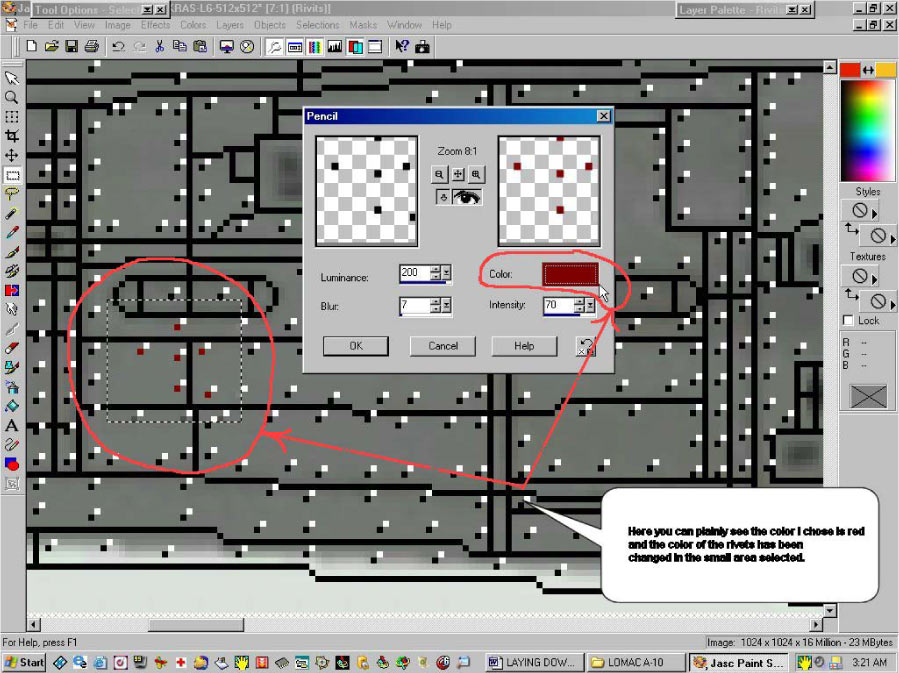
Fig.#7
Fig.#7 plainly shows the color which was selected in the pencil properties and small selected area in which the rivets contained in this area only have been changed without affecting the surrounding rivets.
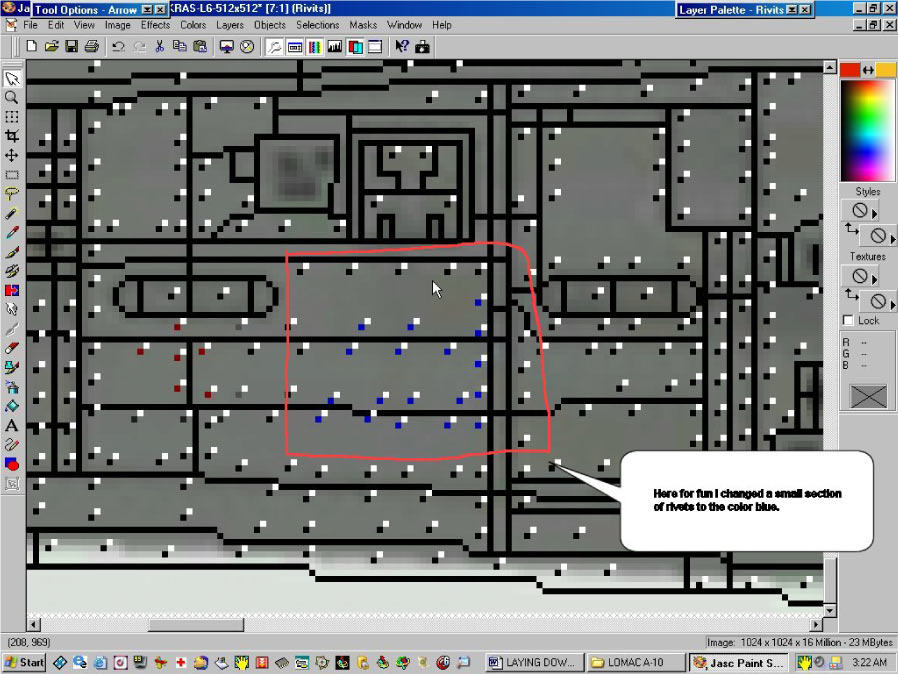
Fig.#8
Fig. #8 shows a small blue section next to the red rivets afer they were changed to the color blue. I did this to show you the diversity of the options in this program.
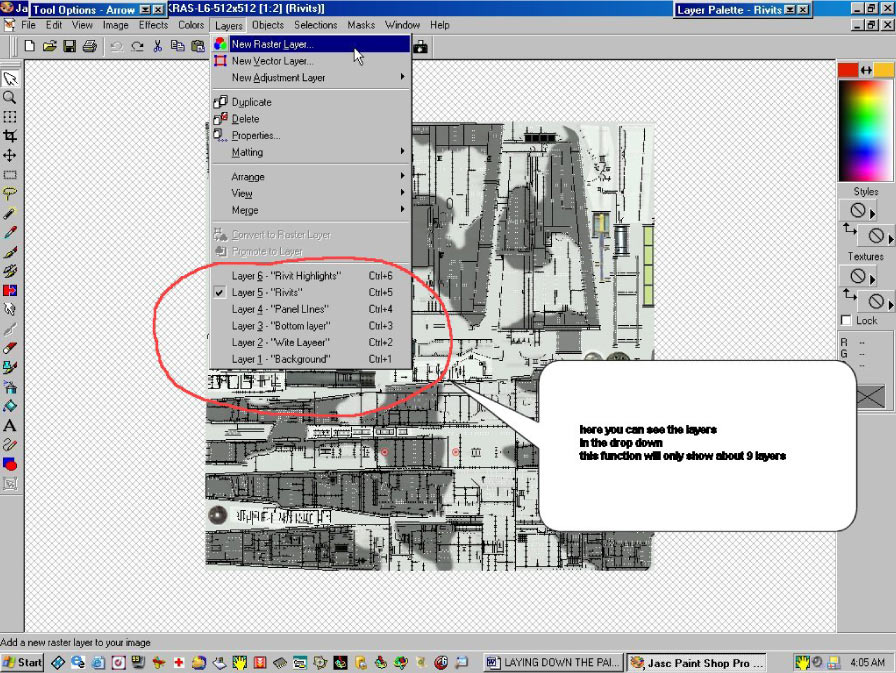
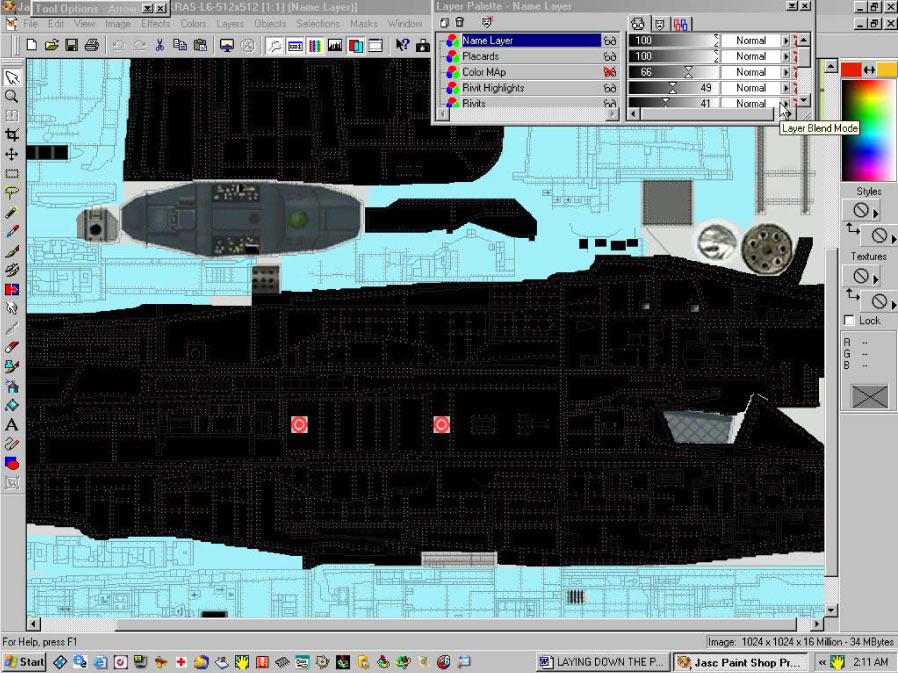
Fig. #9
Fig.#9 above shows the layers already generated in the small drop down area f the layer palette generator. This section will not show all the layers you have created. Only 9-10 layers will be seen here. PaintShop Pro will handle 100 different layers and these can be viewed in the main layer palette like so.
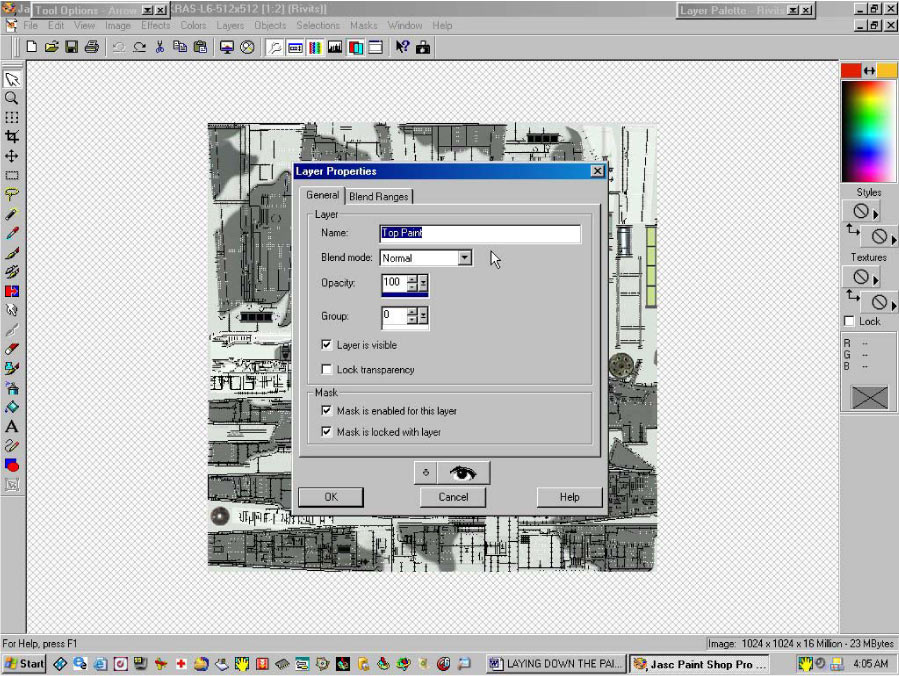
Fig. #10
Above in Fig.#10 you can plainly see the layer properties drop down that appears when you click the create new raster layer option. This must be done first in order to create a separate layer for you paint.
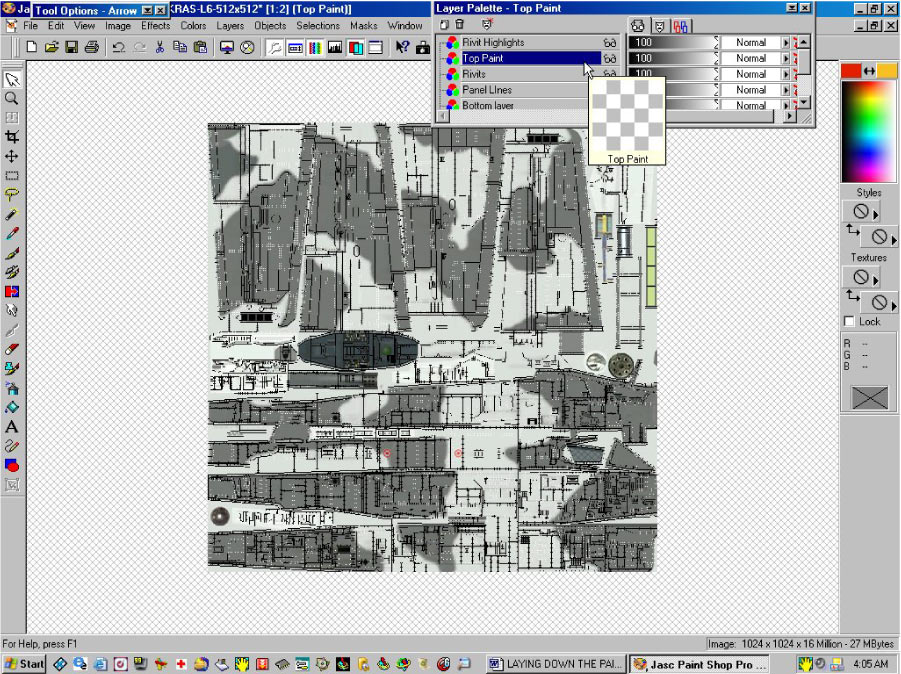
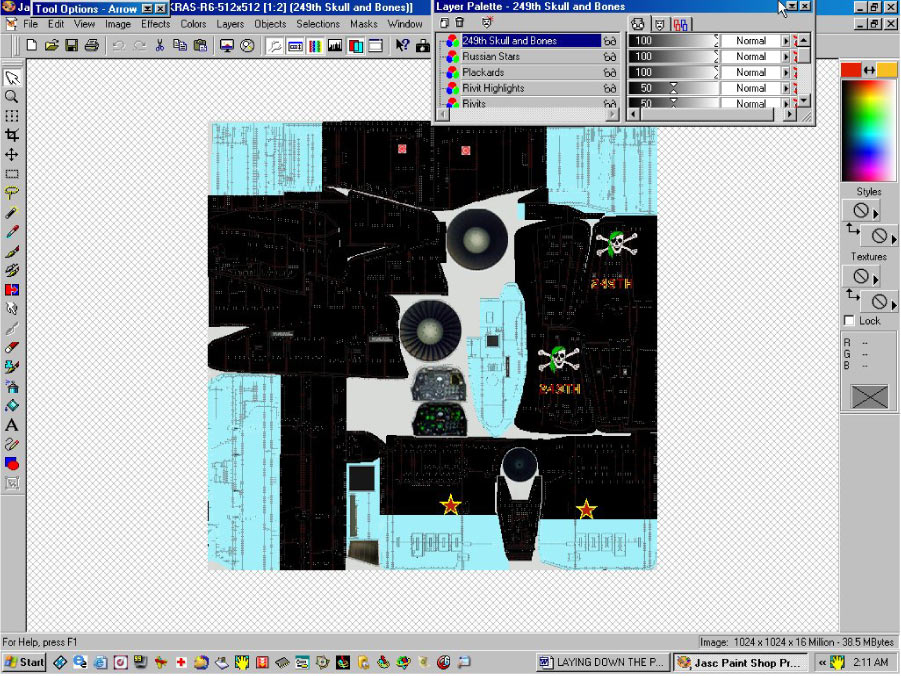
Fig.#11
Fig.#11 shows the main layer palette, this is where you will be able to view all the separate layers that you have create for your skin template. It is not unusual to create as many as 50-60 separate layers in the course of creating a skin.
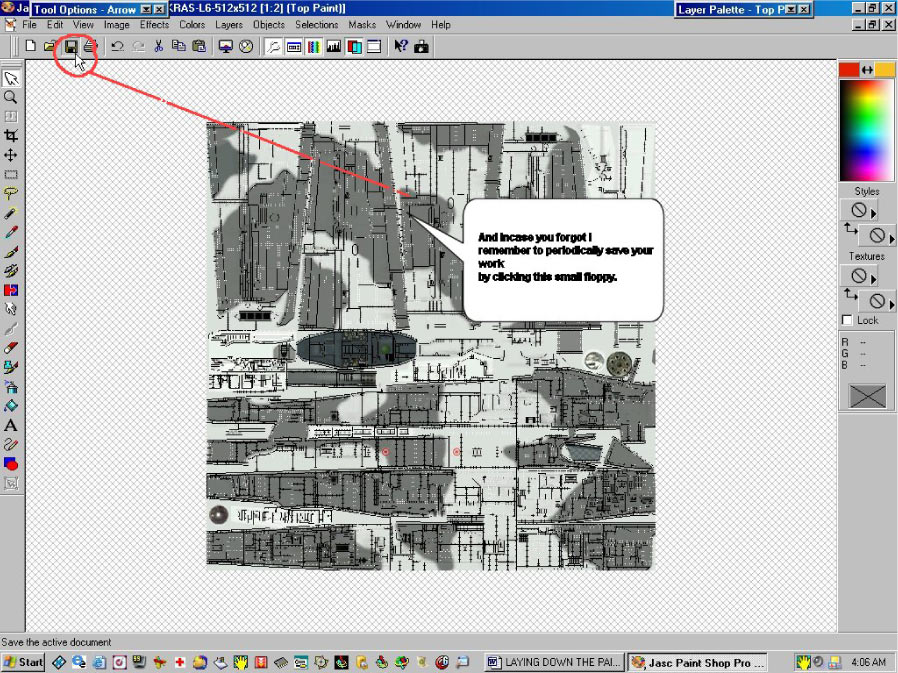
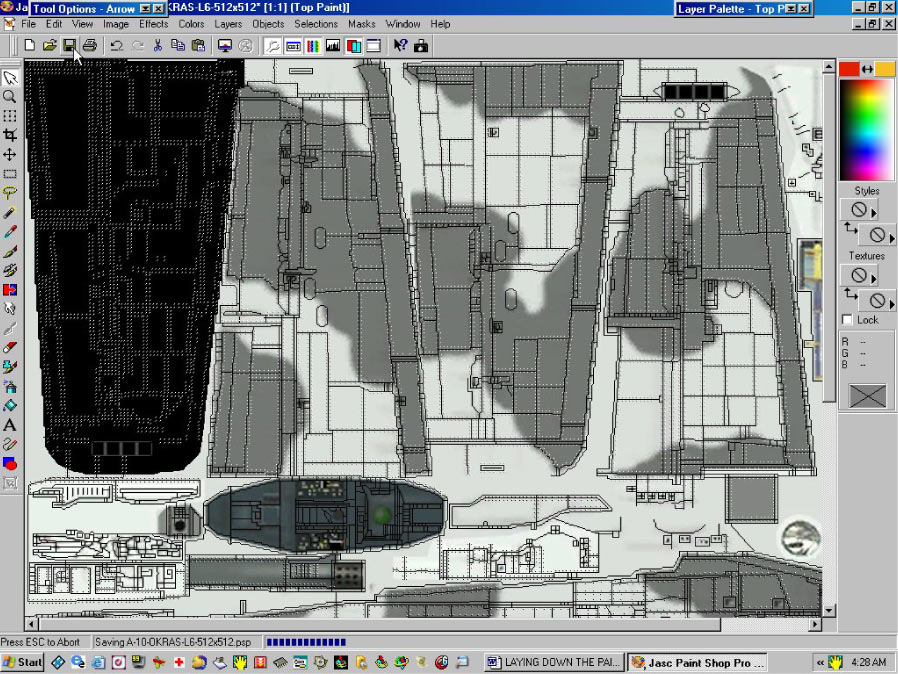
Fig.#12
Fig.#12 shows you the little floppy which you will continually use to save your work as you progress through this project.
Fig. #13
Fig.#13 shows the layer palette with the layer selected in dark blue. This is important because if this layer is not selected then you paint would go onto the wrong layer and could cause problems down the road in completing your project.
Fig.#14
Fig.#14 above demonstrates how to open the color palette and select your colors that you will use to lay down the paint onto your project.
Fig.#15
In Fig.#15 it shows a layer of black paint laid down on a section of wing. Across the bottom you can see the dark blue broken line which travels from left to right as it saves you work. Note the arrow in the upper left of your desktop pointing to where the floppy is, just in case you forgot where it was.
Fig.#16
Here in Fig.#16 you can see the layer palette with the layer chosen, and the drop down thumbnail showing the contents of that particular layer being shown. To activate this small feature all you need to do is hold your mouse cursor over the chosen layer and the thumbnail drop down will appear. No layer need be chosen for this option to work.
Fig.#17
Here you see ni Fig.#17 that the paint has been laid down. I suggest you place ech color of paint onto it's own separate layer; this facilitates greater control over your skin.
So lets recap quickly.
1. Obtain your template
2. Resize your template to 1024x1024
3. Change the colors from 256 to 24 million
4. Start with your panel lines first
5. Next rivets
6. Then the rivets highlights
7. Lay down your paint each on it's own layer
8. When done resize and convert the colors back down to 256 and save as a BMP image.
Fig.#18
Again this is a template for LOMAC so the size will be different than if you were flying in Forgotten Battles. Here's the good news, IL2FB sees 1024x1024 and 512x512. So for those of us who have low-end computers can convert our skins to 512 for better in game performance. Once your skin is completed just give it a name and place it into the proper folder. There is a lot more to the painting stuff, this is just scratching the surface. If you have any questions feel free to contact myself or one of the other skinners.
Hope this help you, happy skinning
Snake
Last edited by Serval; 18th November 2015 at 15:07.
Member
Nice TUT, want to use it. Will it be possible to have it in a prinable version (incl. the pics.) as a download?? I like to have a printed copy next to my keyboard when process the TUT.
Kind regards,
Papa Roach
 Posting Permissions


