


 Reply With Quote
Thanks Snake, now when people ask me PSP questions I can send them here!
I've made this a sticky over at the TW forums.

 Senior Member

SKINNING TUTORIAL - PAINTSHOP PRO 7
This Tutorial will deal specifically with Paint Shop Pro 7. I use this program because it is more user friendly in my opinion, although photo shop is an extremely good and powerful program you must really know your way around it to use it effectively. I will use as many screen shots as I can in order to guide you through this skinning process. First You will need Paint shop Pro 7 or 8 both are similar in nature.
NOTE: I will be doing this using A skin template from LOMAC. The principals remain the same.
Your Paint shop Pro. Should look like this. If it does not look like this then you have a install problem or a graphics problem and you will need to either install the program correctly or update your video drivers .
The Paint Shop Pro desk top should look like this
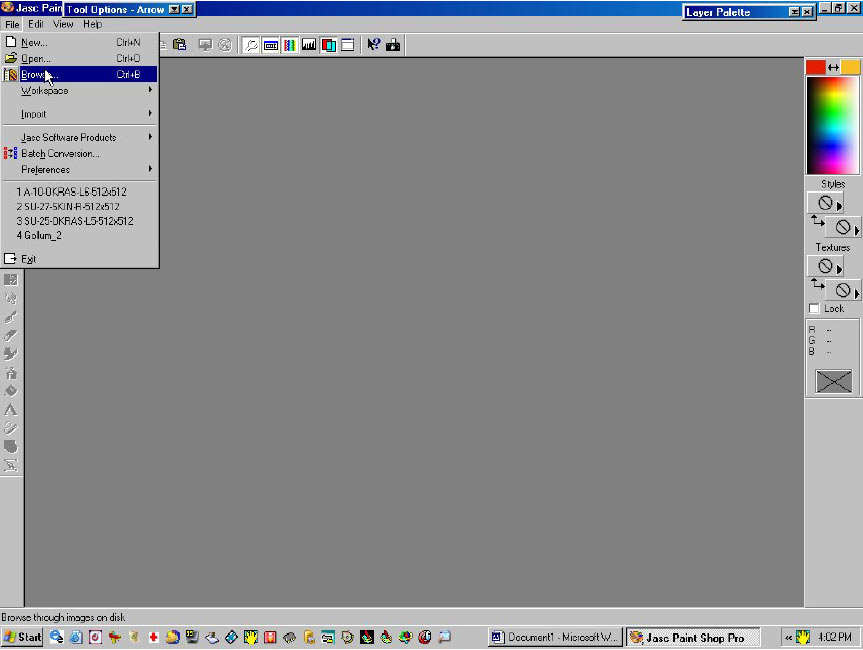
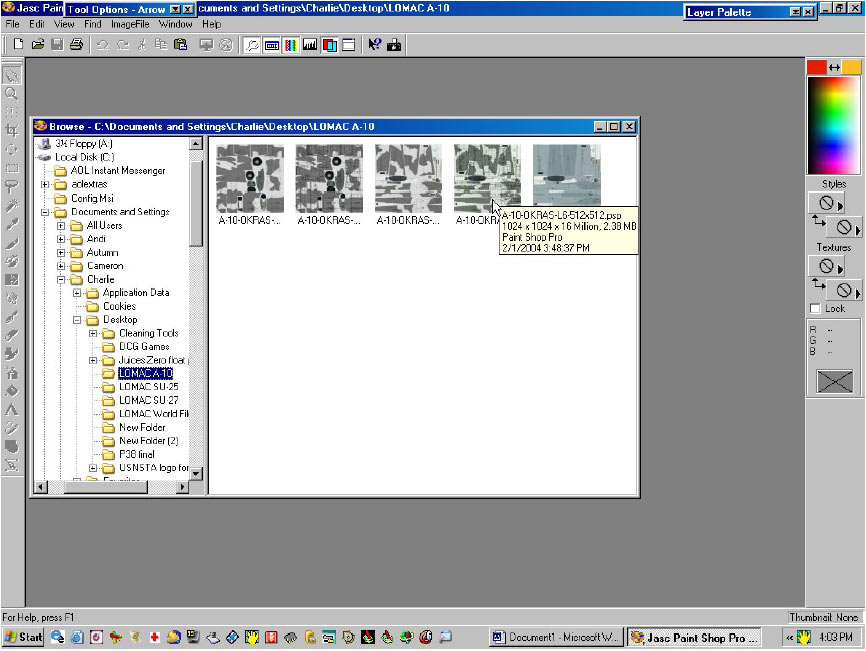
Next you Must open the file you will be working with like this.
This will get the object to be worked on to your desk top in order to start painting it.
The next thing to do is to increase the color depth from 256 to 16 bit like this. This makes the color Hi-resolution for easier working.
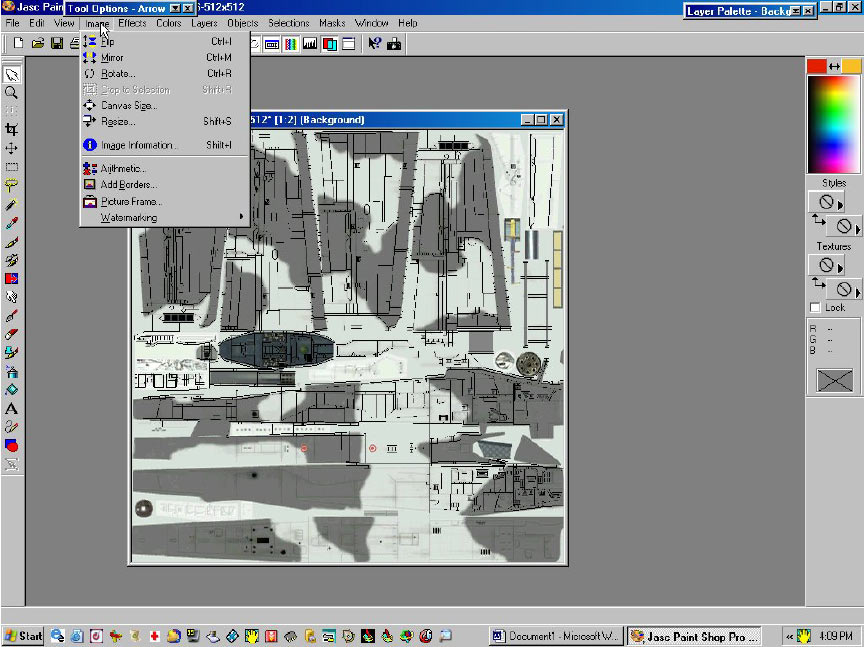
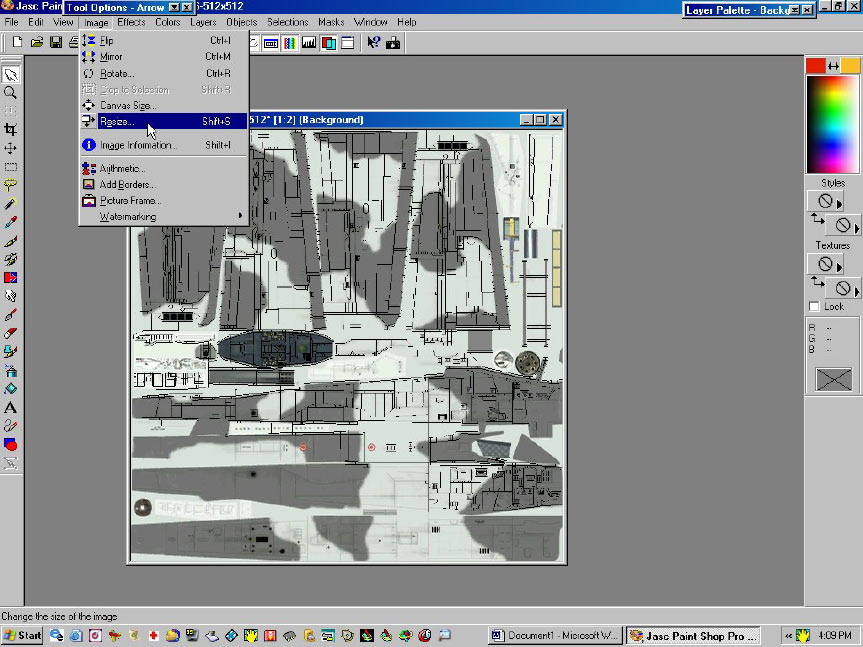
The next step is to resize the Template from 512x512 to 1024x1024. This will allow you to do some better detail work and make you final template look more gooder .
Select the Image tab and click it like this, a drop down will appear like in the screen shot above.
Next you must scroll down to the resize tab like this.
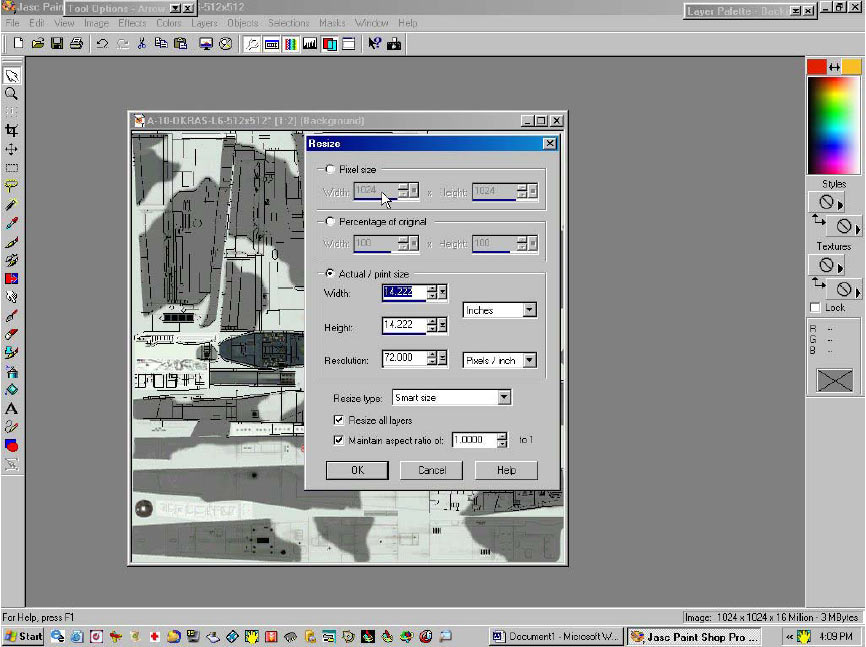
Click this tab and a properties box will pop up.
Like this.
As you can see this is already converted, but if it says 512x512 in the pixel size box then you must convert it to 1024x1024 by just deleting the 512 text and reentering the 1024 text. Very simple really .
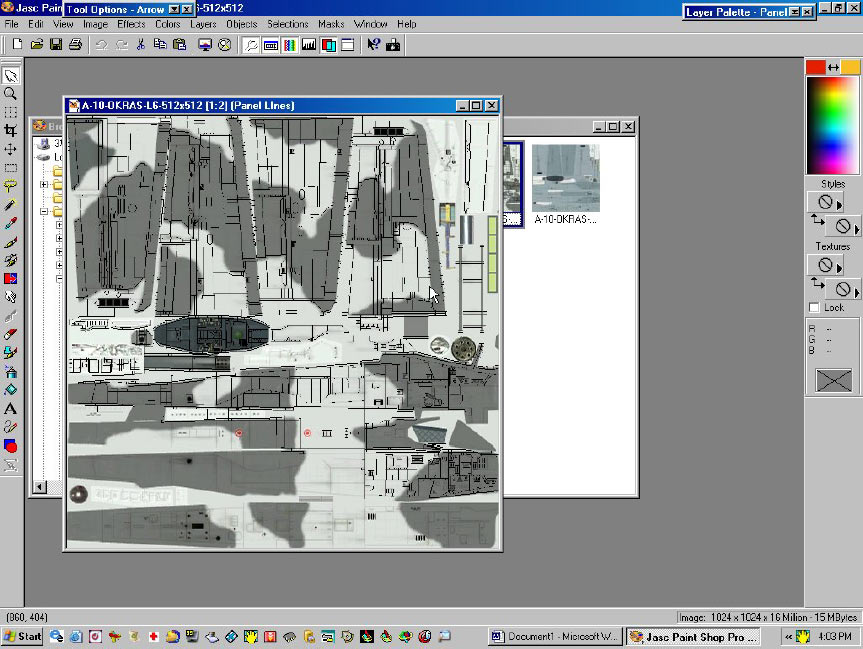
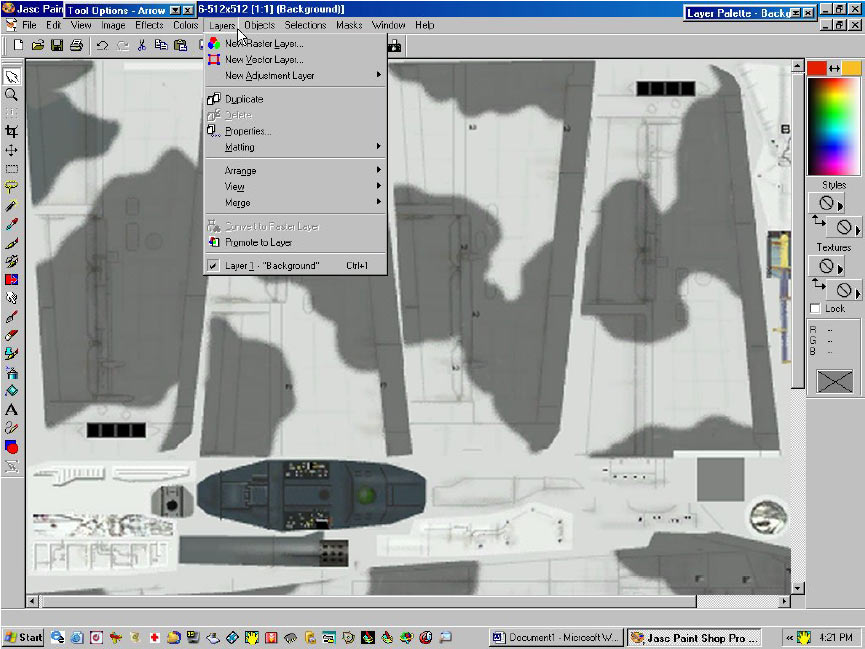
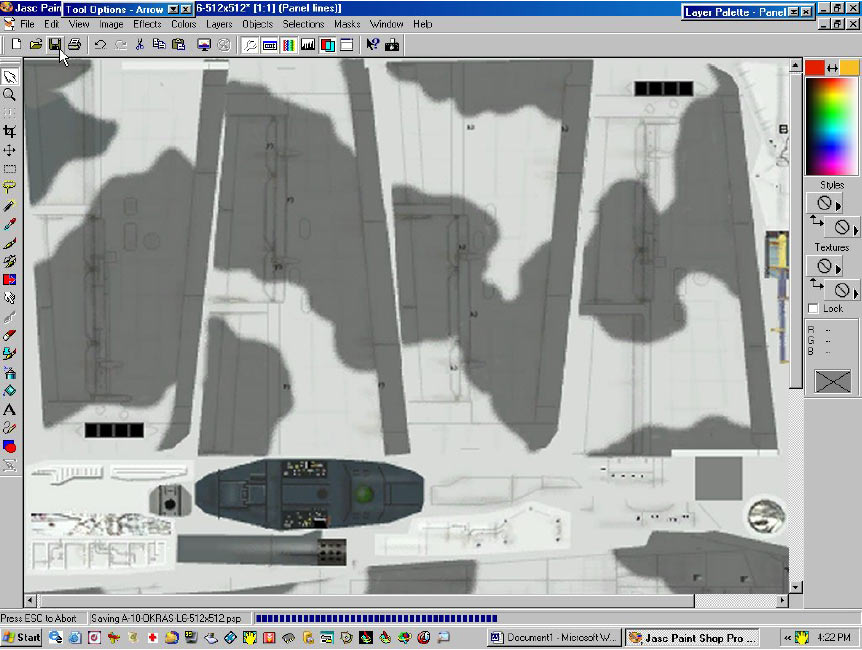
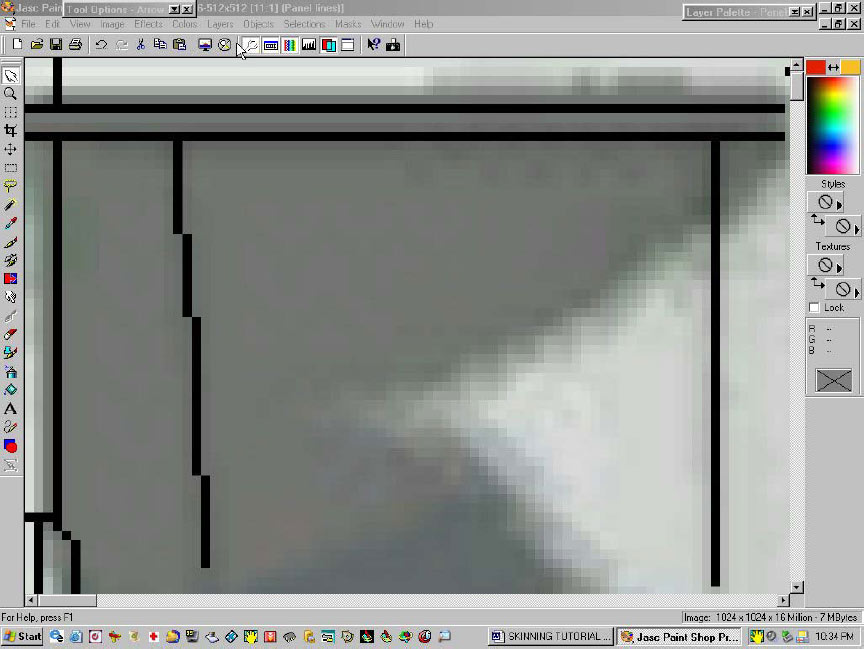
Ok Now that you have resized your Template lets get going. The first thing that I begin with is the Panel lines. You will be working with multiple layers in Paint Shop , just so you know an average skin or template can have as many as 50 layers in it just for one plane or skin. Paint shop Pro can handle up to 100 different layers. Here’s how to start locate the Layers tab at the top of your desktop and find the layers tab. It will look like this .
A nice drop down will appear like in the screenshot above.
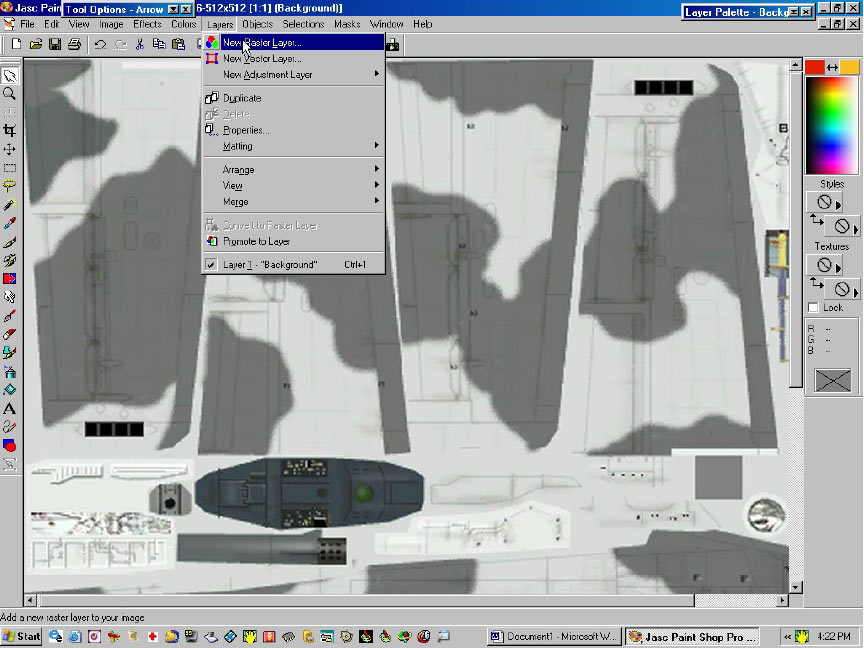
Select the New raster layer tab like this
When you tick this option a new box will appear.
Like this
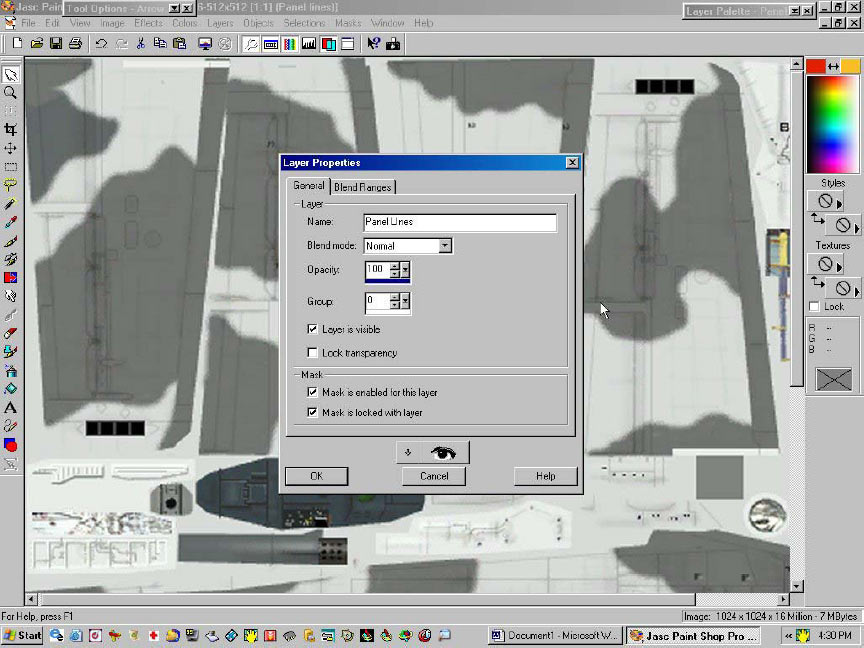
You will see A highlighted text saying Layer 1 delete that and type in Panel lines Like this.
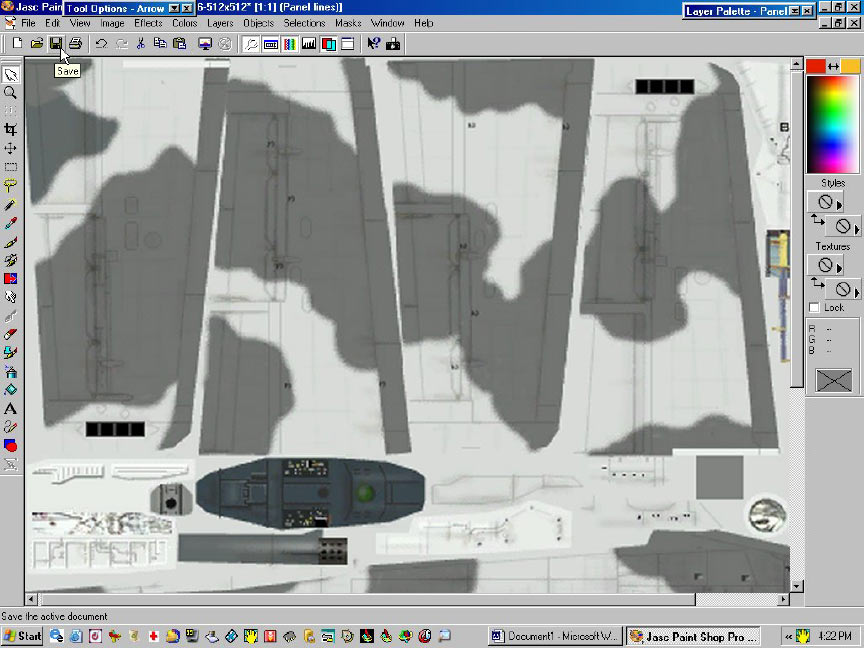
The next thing to be done is to save your work. Get acquainted with this little fellow cause he will be your friend and assist you in the saving of your work. If you do not save your work every so often then when you stop working for the day and close your PSP program it will be lost. It goes something like this.
When you tick the little floppy disk you will see a broken Dark Blue line appear on the bottom of the desk top and it will traverse from left to right across the bottom of the screen. This means that your work that you have just done is now saved and you can either move on now or close the program with out fear of losing your work.
Here you see the Dark Blue progress bar traveling as your work is being saved.
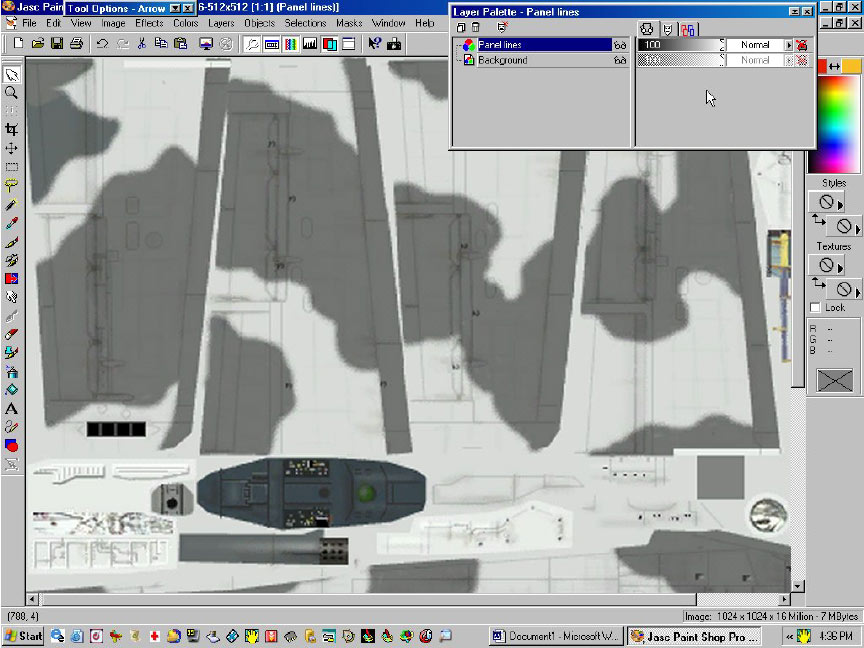
Here is what your Layer Pallet box will start to look like. If you do have a layer pallet box on your PSP desk top just hit the “ L “ key on your keypad and it will appear like magic .
Here you can see the Beginning of your layer pallet, this will become very large as you continue your work and when it does you will be able to scroll thru the different layers.
If you pause and place your mouse cursor over a particular layer a small thumb-nail picture will appear so you can see what is on that particular layer you are viewing.
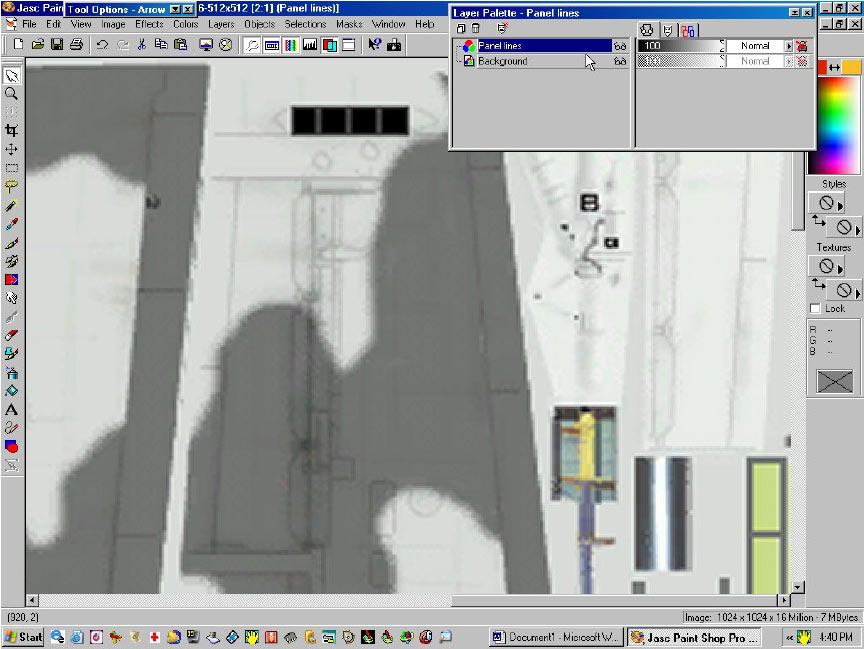
Now , to work on any layer you must have it Highlighted like this, it will show text inside a dark blue box thusly.
You will have to constantly check your layer pallet and see which layer is highlighted . Once a layer is highlighted that indicates this layer will be the one that the paint or imports will be placed on. Imports being small pictures and such like new engines and canopies . But we will work on that later
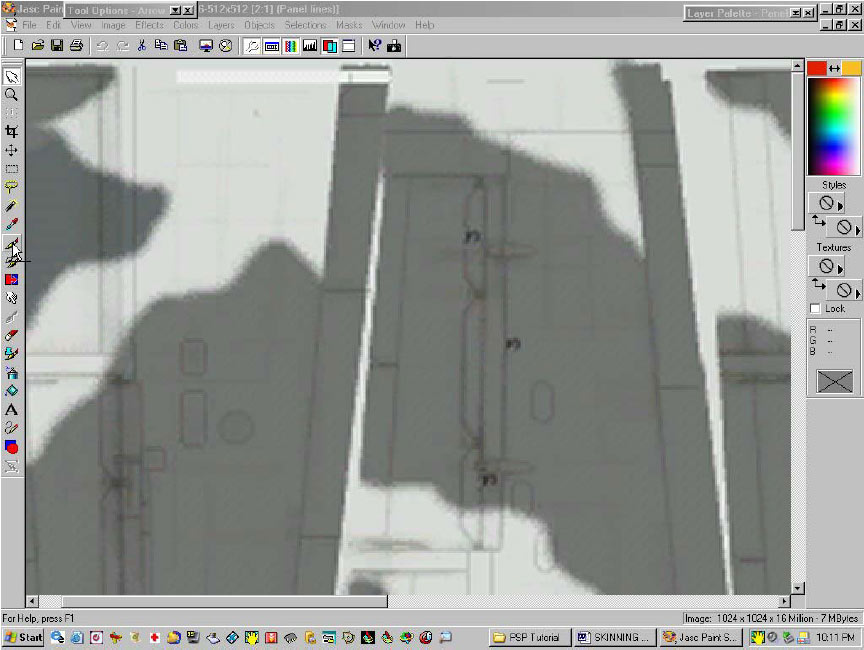
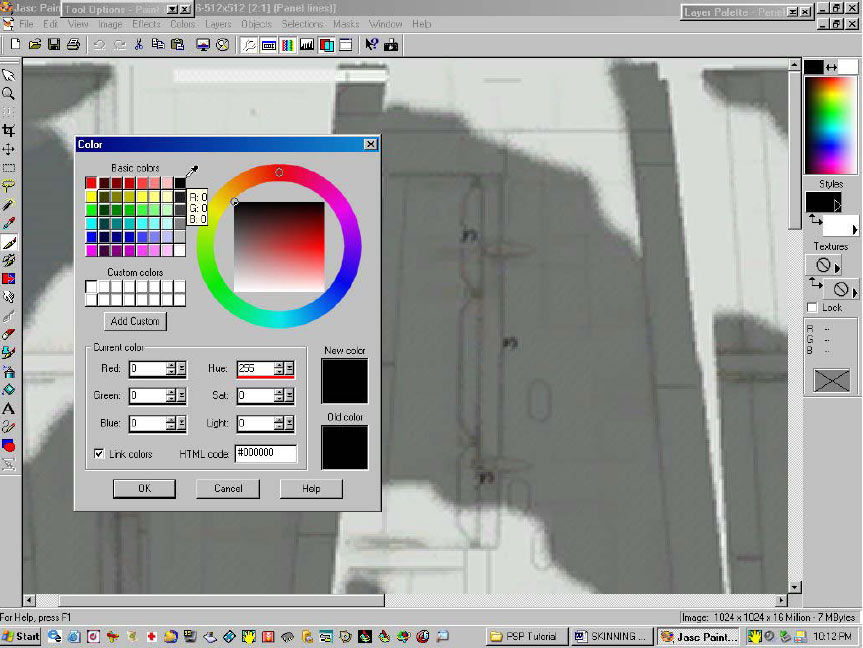
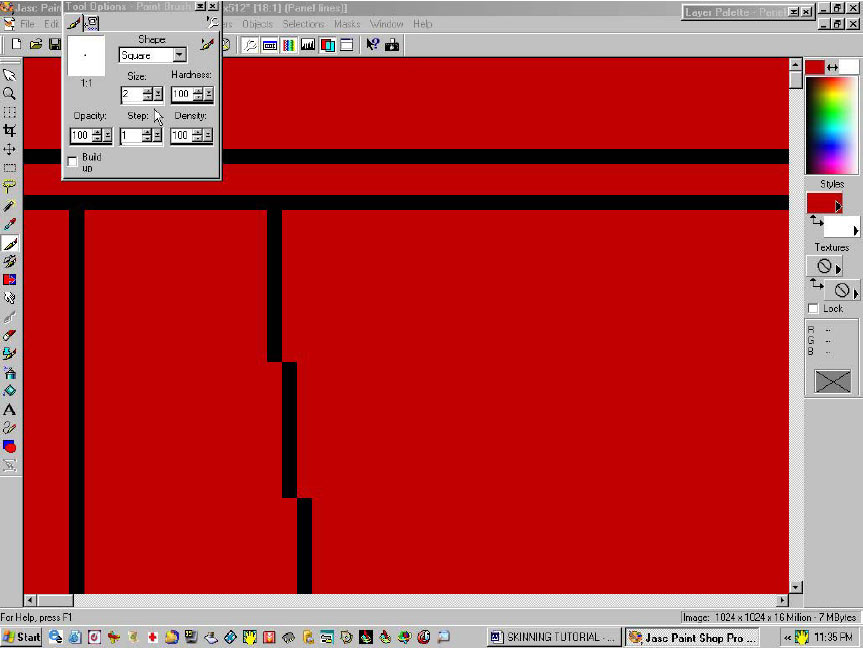
Now we begin by painting the Panel Lines. First I paint them black and use a brush size of “ 1 “ pixel this allows you to apply nice neat lines. Also I using the tool options I make the shape of the brush head square for nice straight lines. Later you can adjust the opacity of the panel lines and rivets to match what ever color paint you apply to your skin template. First we will choose the color and brush like this.
You can see the single brush on the left side of the PSP desktop click that and a color box will appear.
Something like this.
Here you see the basic colors chart box. Note the small circle in the red painted circle, by moving this you can adjust the color or change it all together. Down in the lower left of the color box you will see the HTML code, this is the color code so if you wish to copy this color exactly at a later date and time you can do so by typing in the color text code in this box and it will bring up the particular color associated with the code text you just typed in.
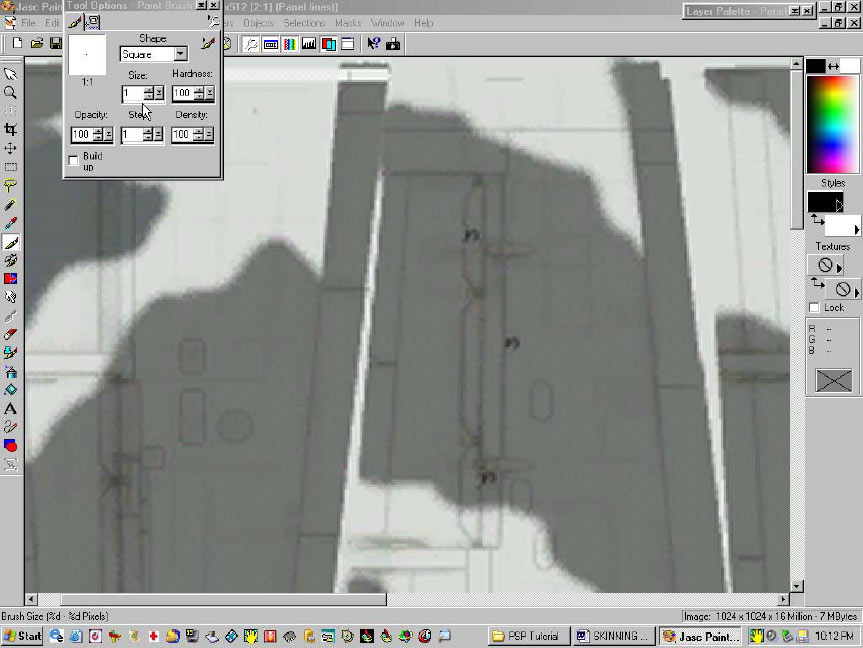
Here you can see the too options window where the brush shape size and opacity can be selected and or controlled.
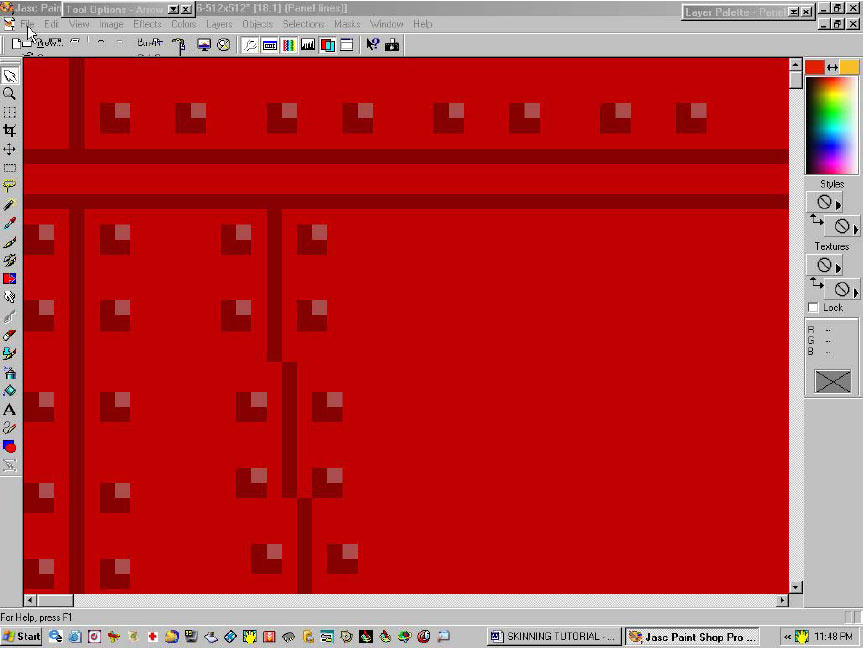
Again to paint the panel lines I use the square brush and make the pixel size “1” Below you can see that black paint has been laid down to form and shape the panel lines .
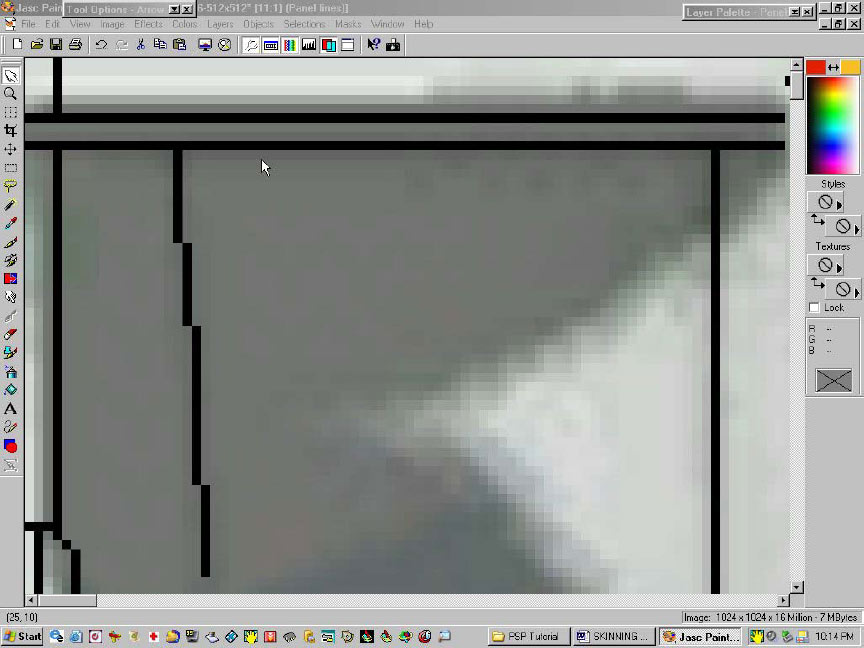
Panel lines can take you awhile to complete, im sure there are a lot of ways to do panel lines which you can pick up as you go along these tricks you will learn as you progress, it has taken me 2 years to amass a few tricks of my own. Another way to do the panel lines would be to use the draw tool and make your lines mechanically by clicking and dragging them along the intended are which you are working with. The problem with this is you get over slop, which looks tacky and does not compliment your new template very well.
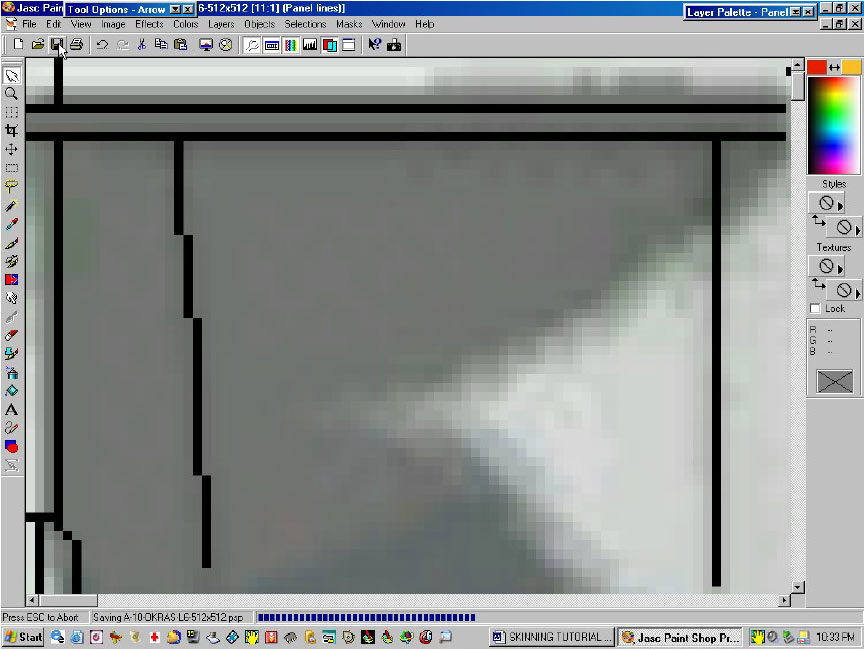
Now go up into the left top corner of your tool bar and locate the save floppy and click it to save your work. It will look like this .
You should save your work periodically just incase something happens like a PC crash or power failure. Cause you never know what is going to happen.
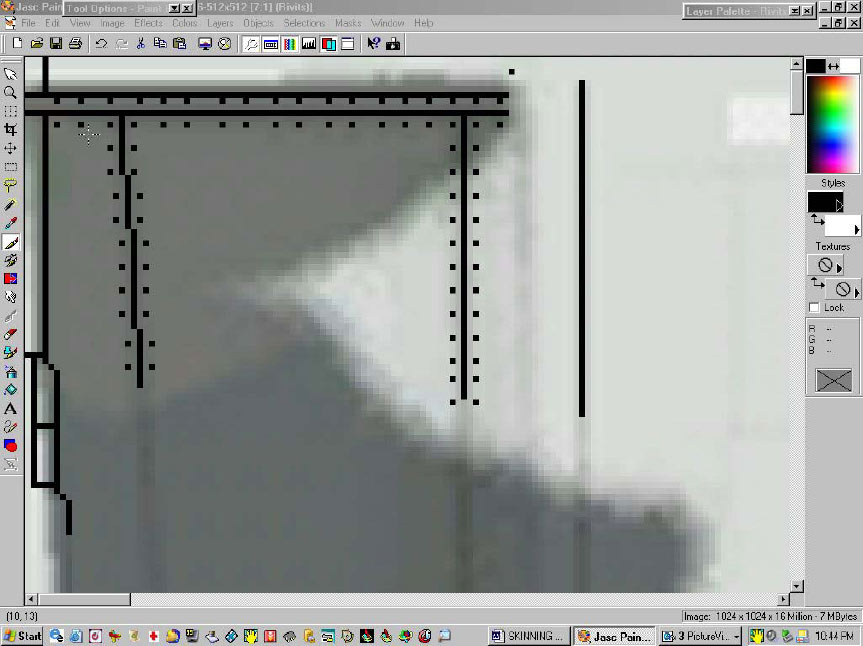
RIVETS
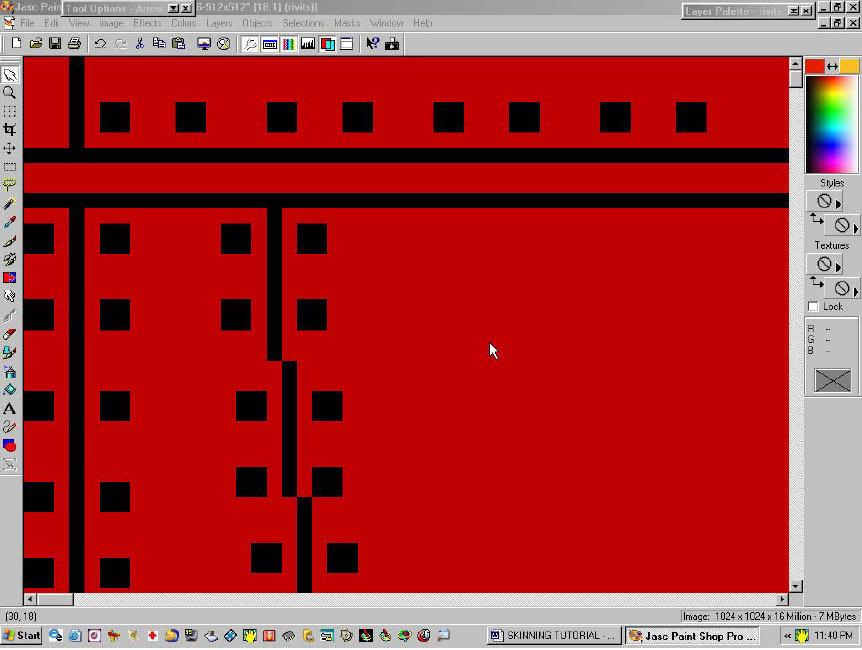
There are a couple of ways to make rivets. Personally I like them both. A new way that I like is to use one pixel of black paint which can be duplicated later . Another way is to use a 2 pixel brush and then go back later and add a highlight to the upper left corner of the black rivet in order to make it stand out and give it a 3D effect when applied to the skin and used in game. I will show you both ways.
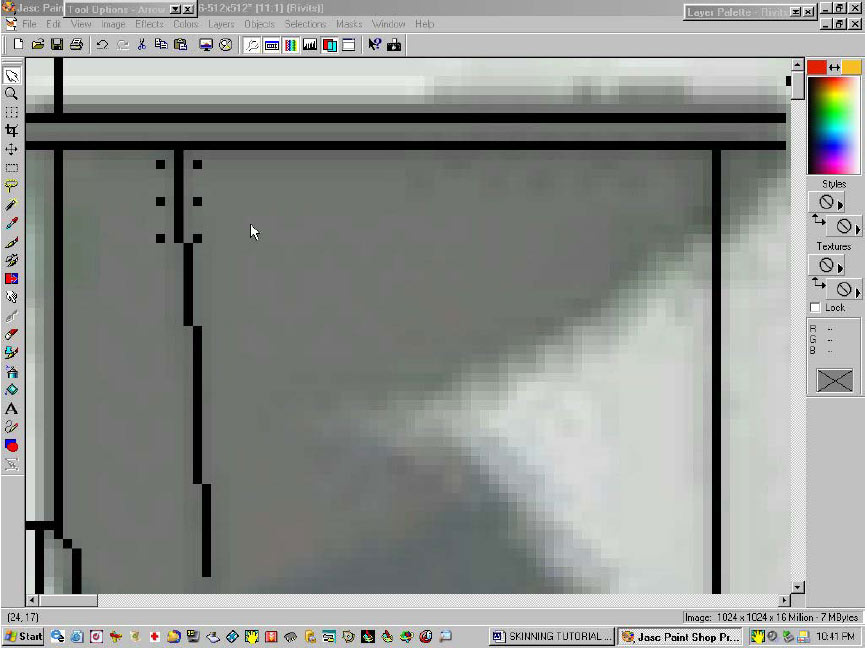
Start the first way by using a square brush , now size it down to “1 pixel” Like this. First you must make a new layer like this.
Just repeat the layer making process like before , once done save it by again click the little floppy disk in the upper left of your tool bar.
Now using your paint brush lay down some rivets like below.
There is a slick little trick that will save you oodles of time just use the selection tool on the left side of your PSP desktop. It is the little square with broken lines. Take this and right click your mouse and hold while you drag a small square around a couple of the rivets you have done . Now go up to the top and click the Edit button and then copy.
This will copy the rivets you have chosen . Now what this does is this it allows you to copy and paste the exact rivets you chose as many times as you wish without any opacity or color loss by hitting you “ Ctrl + E “ keys on your keyboard. This will speed things up tremendously.
Once you have completed all your rivets you are ready to move to the next step.
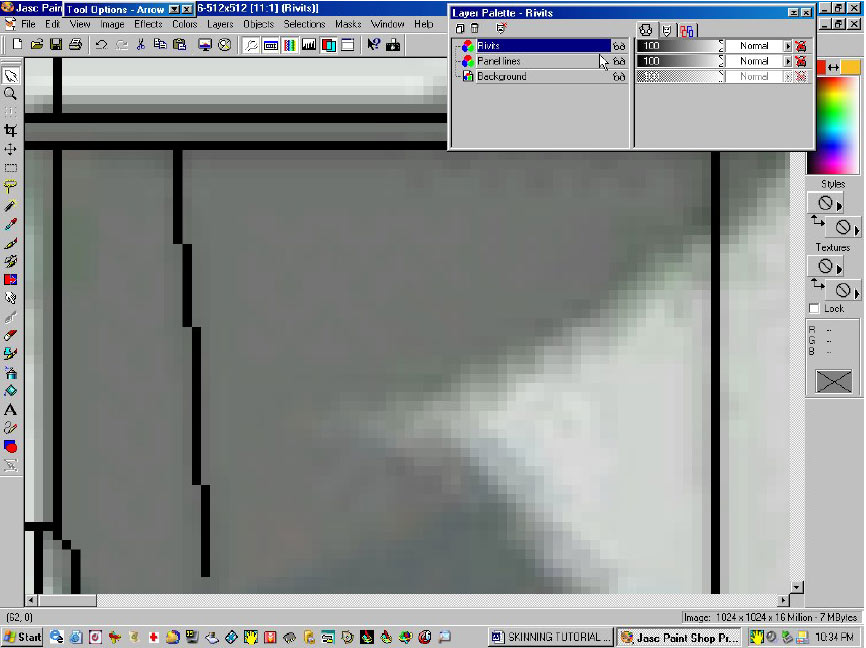
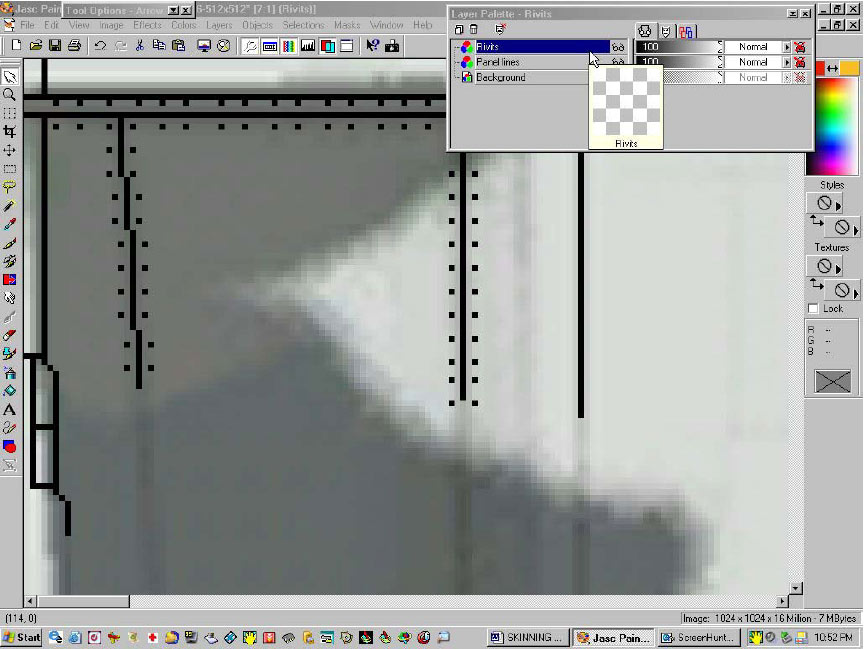
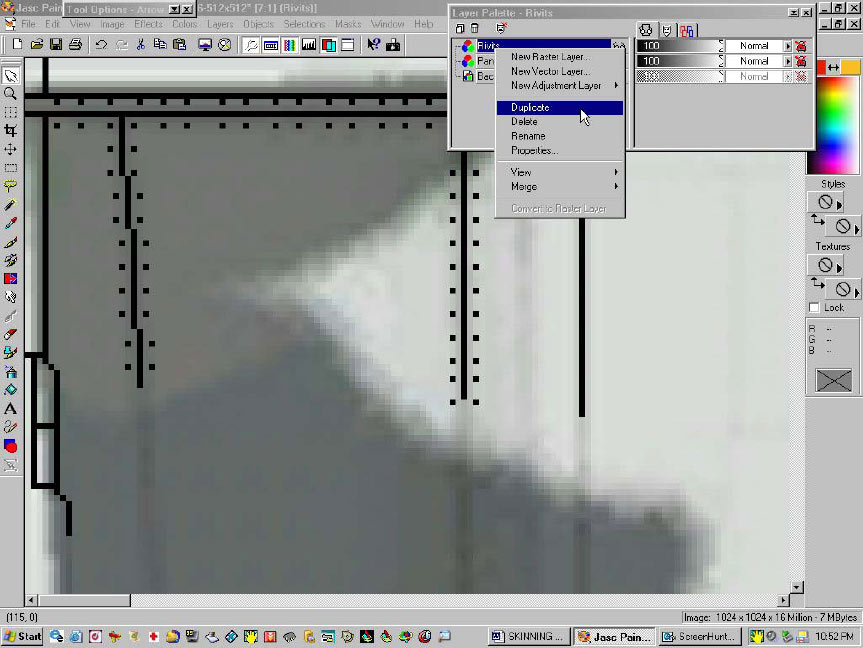
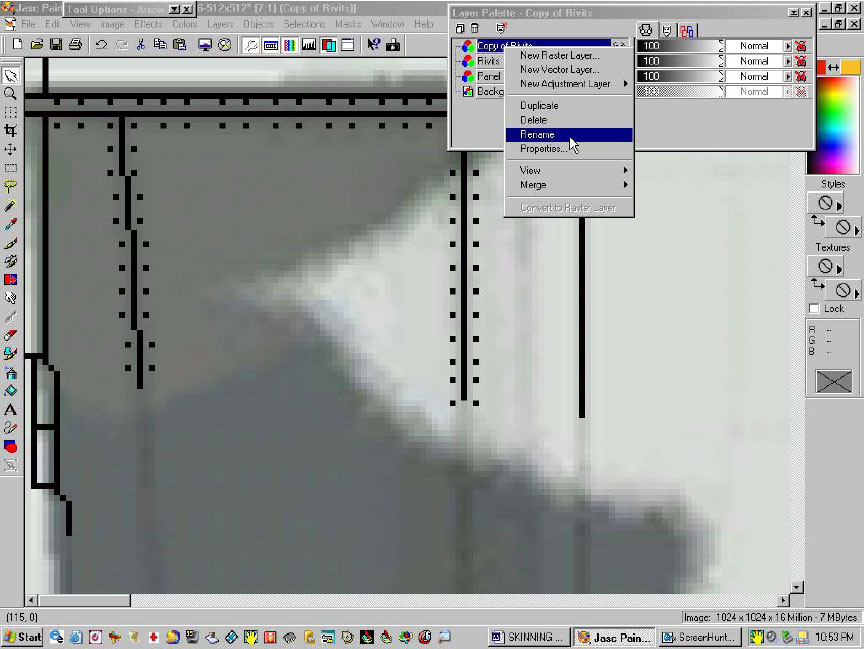
Now place your Mouse arrow over your layer pallet this will open it and allow the drop down to appear like this.
You are now going to duplicate the layer like this , this will make an exact copy of your layer of rivets. Again you will know which layer you are working on because it will be highlighted with dark blue like in the screen shot.
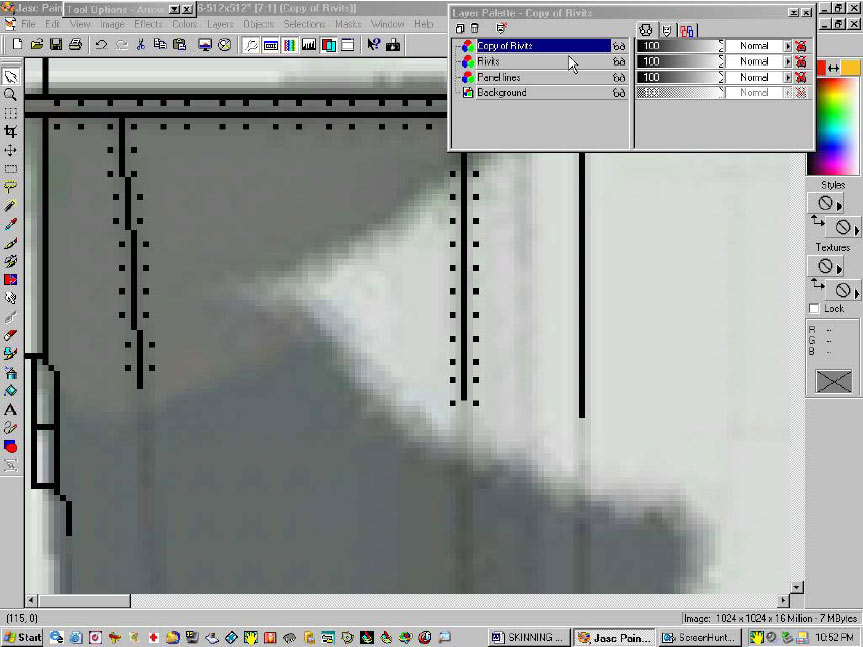
You should now see your original layer of rivets , and a new layer called copy of rivets like this pictured below. Your layer pallet should look something like this now.
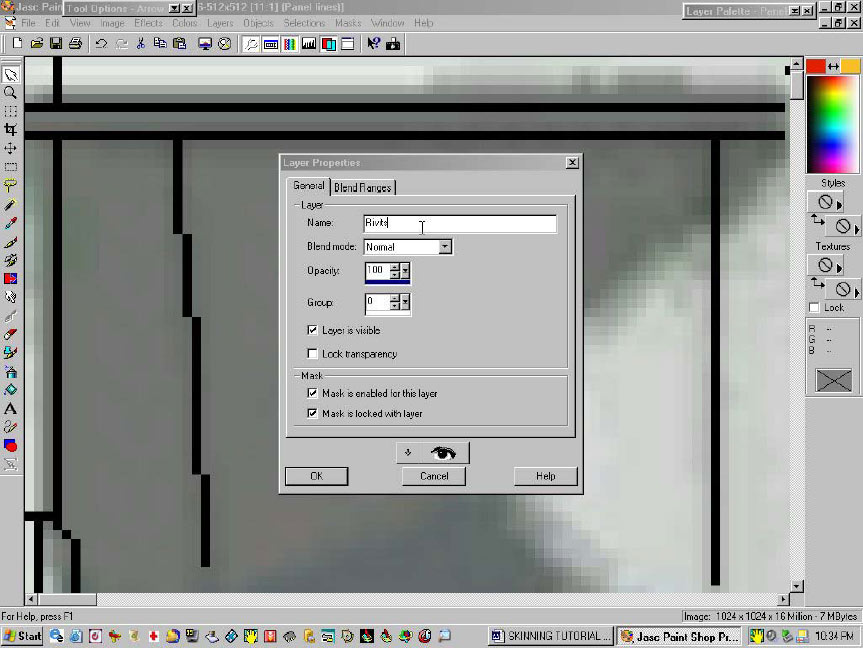
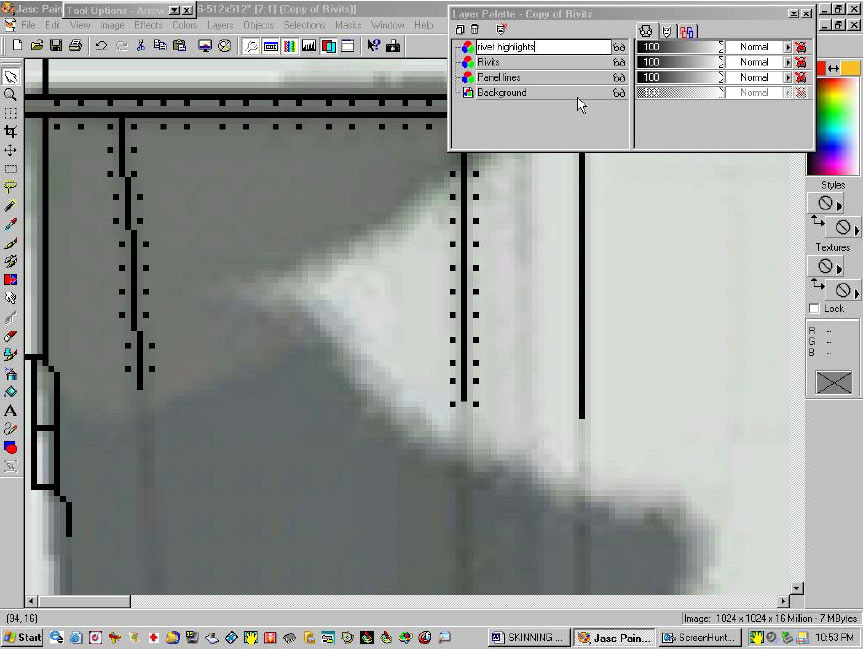
Next we will rename your new layer “ rivet highlights”, Like this .
Just place your mouse cursor over the layer you intend to rename and right click your mouse this will cause the drop down box to appear where you will select rename.
Here you will retype the text , I call mine rivet highlights, you may call your what ever you wish.
Just type the new name of your layer like above.
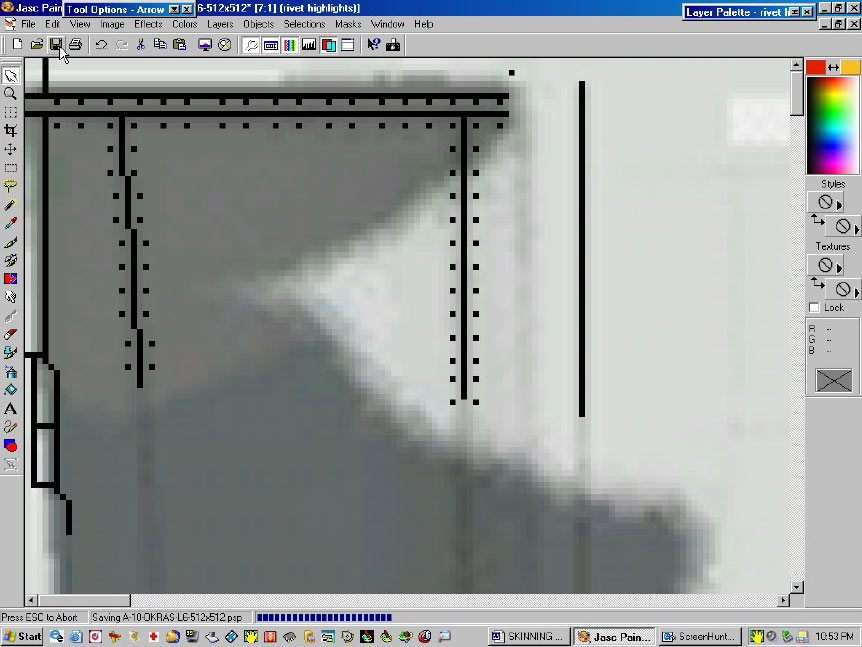
Once you have renamed your layer find the little floppy at the top and save your work. You should see the progress bar indicating your work is being saved like this.
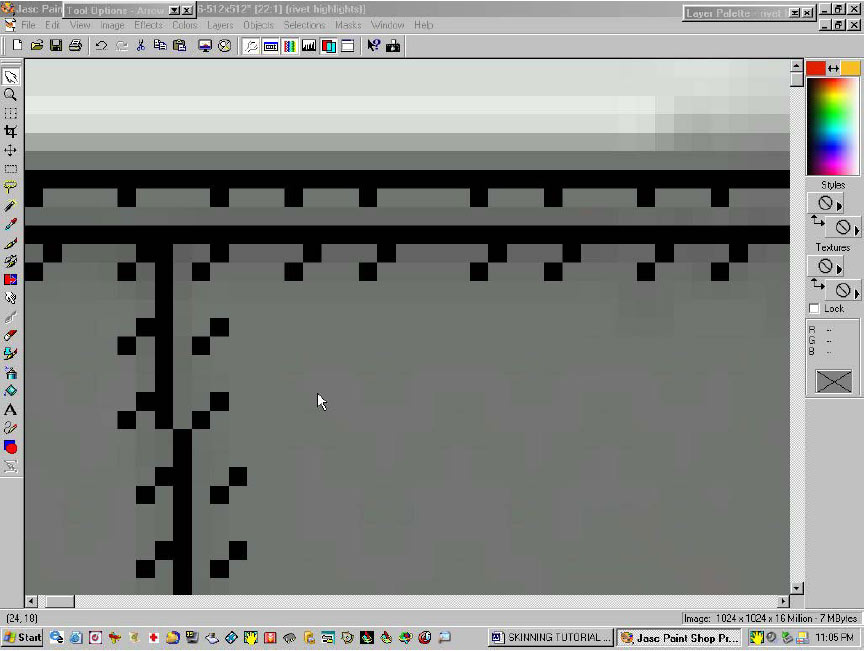
Now using your moving tool located on the left side of your PSP desktop in the vertical tool bar , (if this is how you have your s set up?) Offset the new copied layer like this , so that the corners are touching the upper right corner of the original rivets and the lower left corner of your newly created rivets like this.
Your rivets should now look like the above screen shot above.
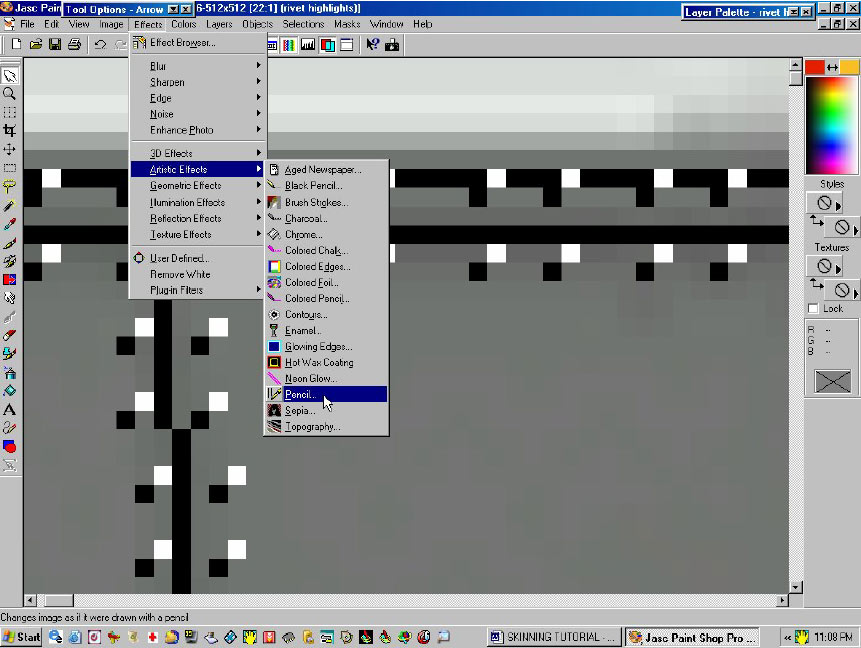
Now here is the slick little trick I was telling you about I learned this from my friends at IL2skins.com. Go up to your effects buttons and click on it like this .
Choose the pencil like in the screen shot above, this opens the effects box for the artistic effects for the pencil once clicked.
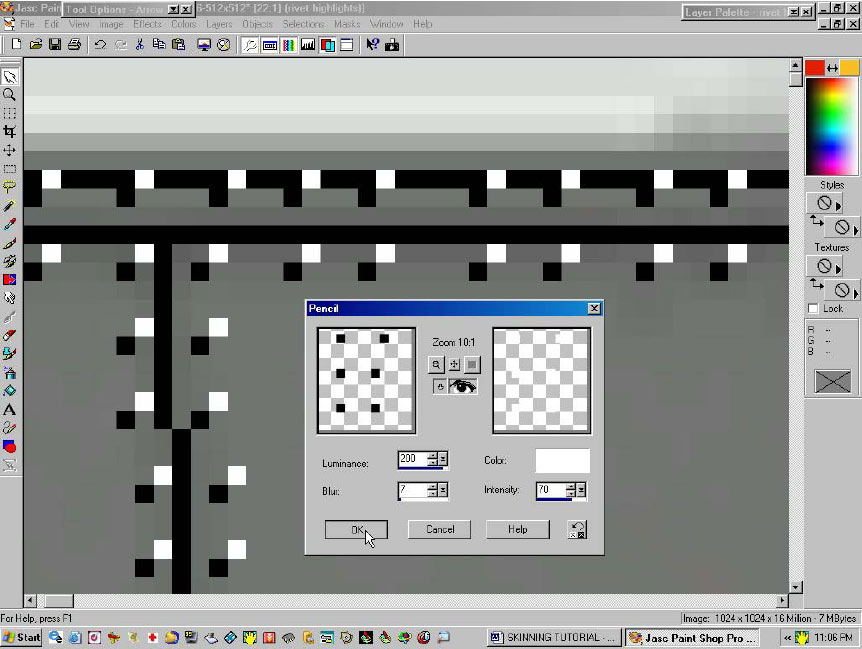
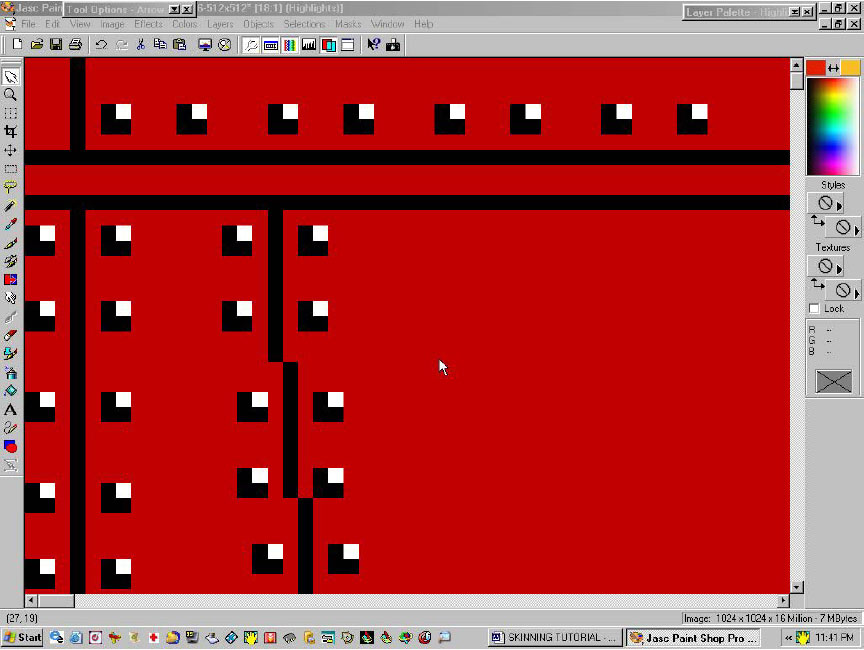
Here you can see the pencil effects properties you can play with the settings and most likely make the rivet highlights any color you wish but I stick with white as it can be adjusted later to make it appear they have all been painted a color to match the particular colors laid down on your template.
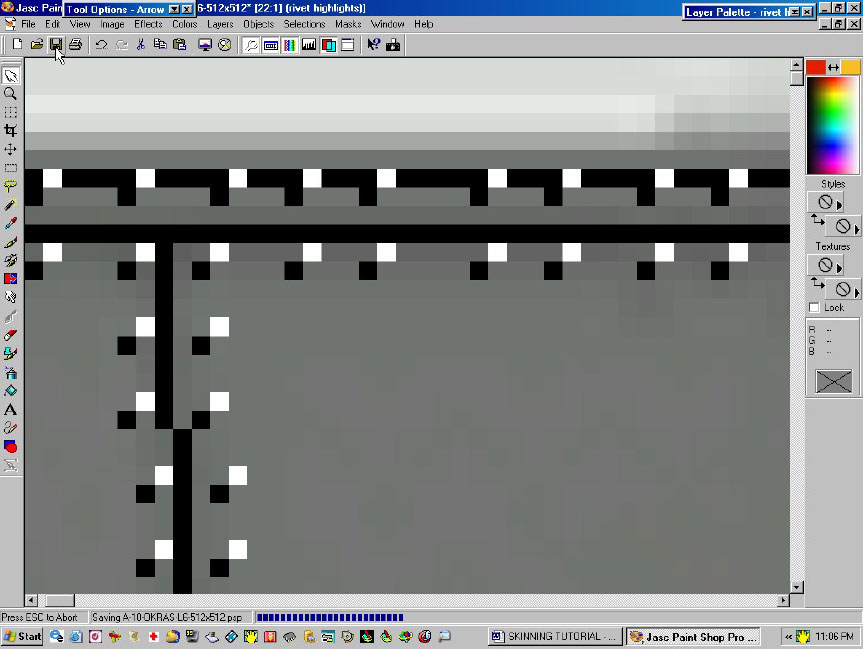
Here you see the new layer after you have converted the secondary rivet layer to white and as in the screen shot above you can see that you must save your work as pictured above.
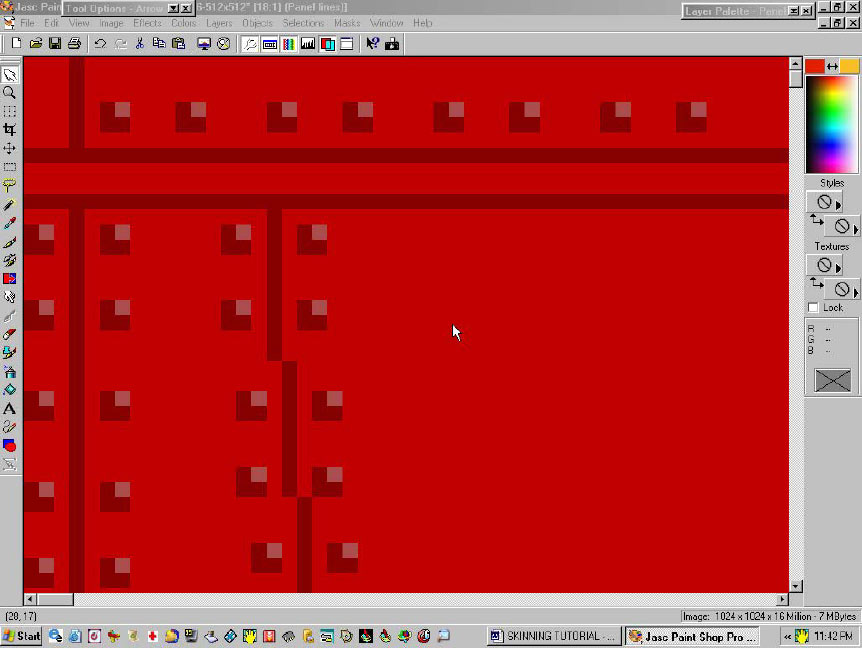
Now were going to adjust the rivets to make them blend better with your paint.
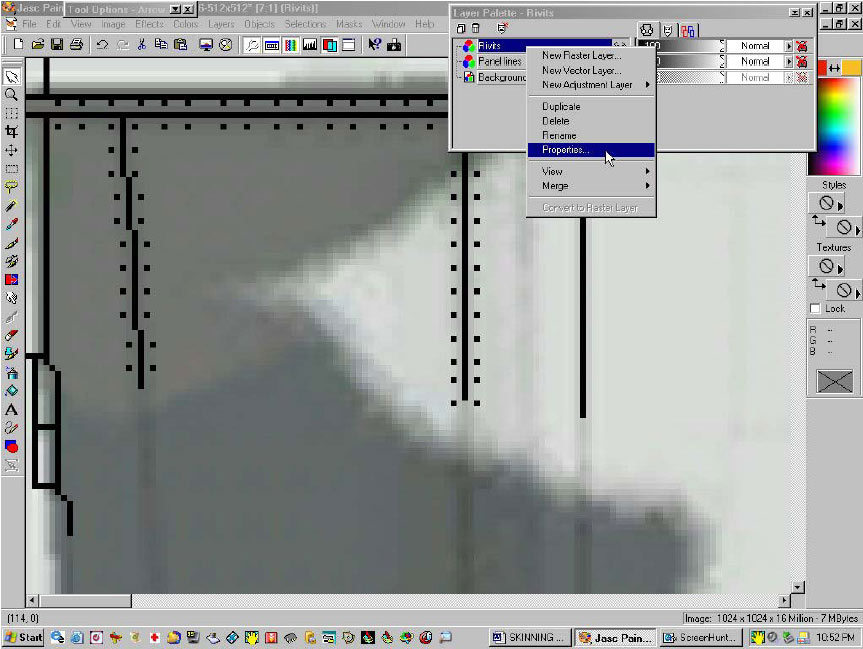
Go to your layer pallet and right click the layer you wish to convert.
This will be the panel lines , rivets, and rivet highlights.
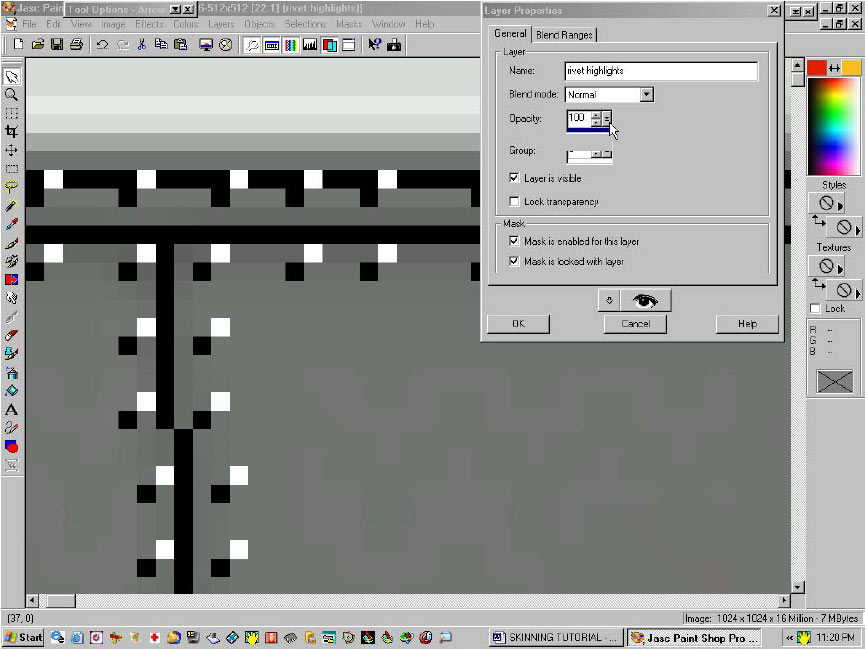
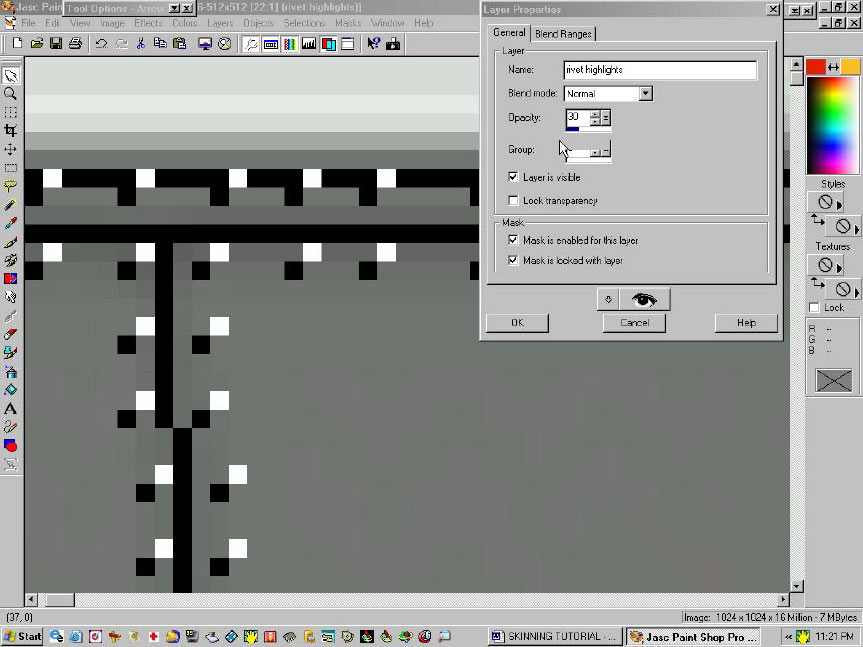
Now me I play with the settings on the opacity but generally “30” in opacity is a good place to adjust your panel lines and rivets and the highlights to.
Here you see the properties box, just right click your mouse on the layer you wish to work with like above.
Above shows the layer properties box Find the opacity window and you can see the little arrow on the right side of it, this allows a drop down box with a slider bar so you can adjust it this way or you may type into text the numbers you want it to be.
Again you can see above that the opacity has be changed to read “30”
This will adjust the transparency of this particular layer and no others.
Here you can see the change of the opacity in your rivet highlights layer.
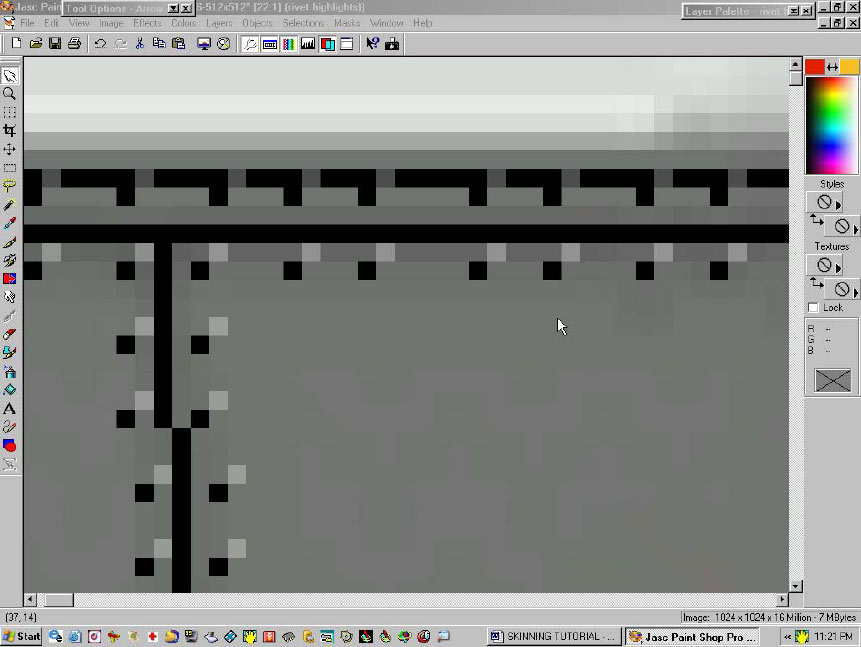
Here you can see what the changes look like after you adjust the opacity of the primary rivet layer and the panel lines. You can also see how they take on the color of the bottom paint layer. This is a simple trick that works very nicely. Now the other method of rivet making..
The optional method for making your rivets is as follows, select your paint brush and resize it to “2” pixels. Like the screen shot below.
Here you can see the changing of the pixel size in the paint brush chosen, again I use a square brush tip, there is nothing that says you cannot use a round brush, I may even try this in the future but for now lets just stay with this for standardization.
Make your rivets now using the new 2 pixel size brush like in the screen shot below.
Here you can see the completed black pixels,(this is an optional method ).
Above you can see the completed highlights , again the highlights like before are kept on a separate layer so that they can be converted separately and controlled.
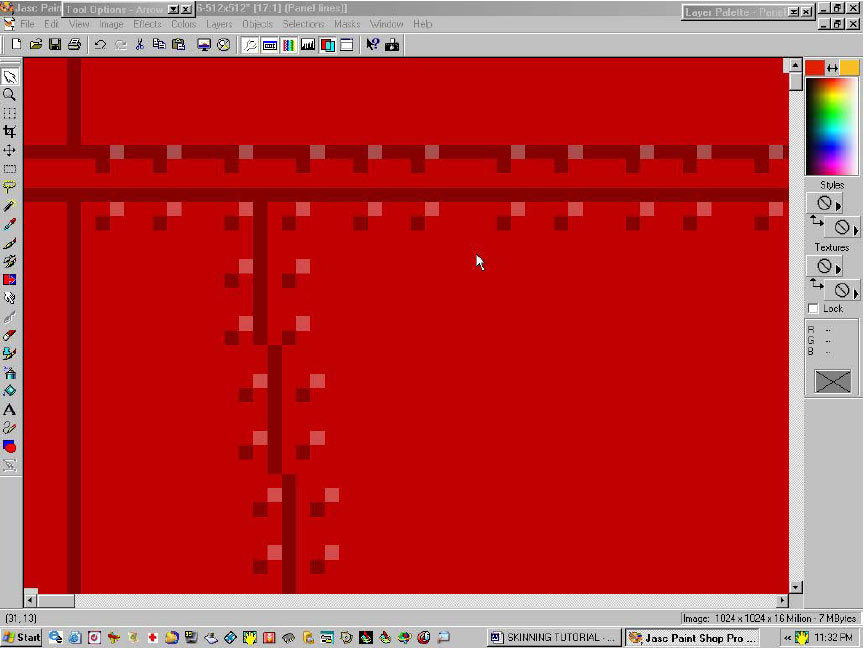
Above you can see all the layer after their being converted. The panel lines, rivets, and rivet highlights. Once you have achieved the desired look save your work as before.
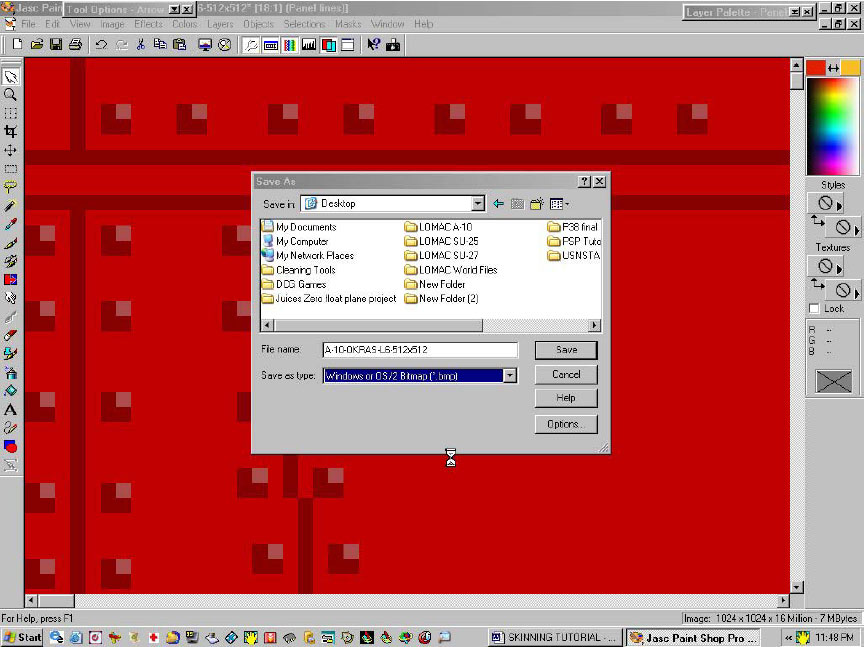
Now once you have completed your template/skin you must save it as a bmp image.
I use bright so I will show you how to convert it using bright, if you have problems or do not have the Bright program then e-mail me and I will show an alternative method , this would be the manually conversion of the colors from 16 bit back down to 256 colors and then the saving of your skin in 1024x1024 size format.
Here you can see the File button in the upper left hand corner you must click on the to open up the menu that you will be using to save your work.
Here you can see the drop down menu, choose to “save as” And click it then you will get another window like this.
Here you can see the save as type field using the drop down menu scroll down to the Bmp image and click this it will appear in the field like the screen shot above. Click save and now your skin is saved to where ever you have it saved to, me I save it to my desktop so I have fast access to it for further work.
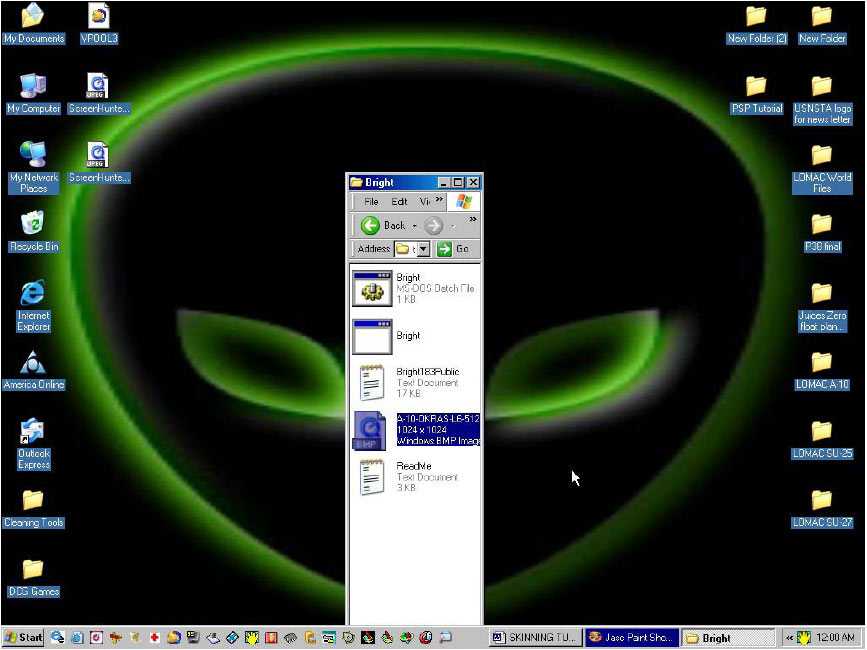
Now locate your Bright program, special thanks to its designers who have made skinning very easy and pleasurable. Open it and drag and drop your skin file inside it like this.
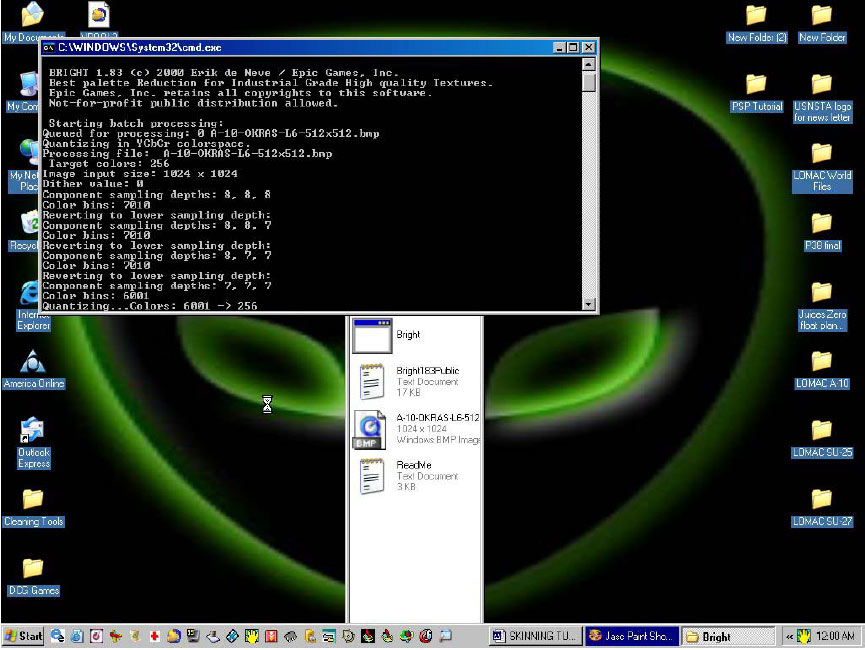
Finally you can see Bright as it converts the skin file down to 256 colors. I suggest that if you do not have the Bright Program that you obtain it. It will make the colors of your skins better than if you were to manually convert them yourself. Once you have the skin converted you can drop it into the appropriate skin folder to be flown in game on line and everyone will be able to see your creations as long as skin download is on . I hope this helps some of you who are just starting out I wish I had pictures when I first started . If any of you have any trouble I suggest you contact me or one of the other skinners at War bird aviation or Il2skins forums for more intricate assistance.
This was a quick simple tutorial there are a lot of aspects that can be addressed. These will be addressed as things progress and as needed.
Happy skinning
Last edited by Serval; 18th November 2015 at 15:04.
Grand Wazoo
Thanks Snake, now when people ask me PSP questions I can send them here!
I've made this a sticky over at the TW forums.
FAST AND BULBOUS!
Senior Member
Ten Fo Blowhard, let me kow if you need anyhting else, I also have PSP 8-9-10
and soon 11 , if something specific is needed let me know
Charlie
Member
Hi Snake,
good work, this is how it looks like to me... I am starting to get in to semi professional mode by skinning IL2 aircrafts at the moment. I would like to as if the TUT will be available for download, becaus I like to have a clear printed copy next to my keyboard when trying things like this out...
Happy NewYear
and
Kind regards
Papa Roach
Forum Guy
Hi there, yes this tutorial is avaliable for download in PDF format from Snake's links he posted here.
I'll also edit these articles to include a mention of this and a link to the appropriate download at the beginning of each article. Hope this helps!
Member
Must have overseen it, but thanks!!
Thanks a lot
Kind regards,
Papa Roach
Junior Member
It seems the link towards the tutorial is dead
Huub
Forum Guy
Yes I just tried and the file didn't download. Since that pdf is hosted at Snakes own space, he may have had to make room for some other files (for example he's been posting to me links to the other pdfs I've been converting and uploading).
You might try using the link above which will give a printable version of the article from these forums. The images don't show (though we can check into that) but you will at least have the text you can save or print.
 Posting Permissions


