
 Bug creator

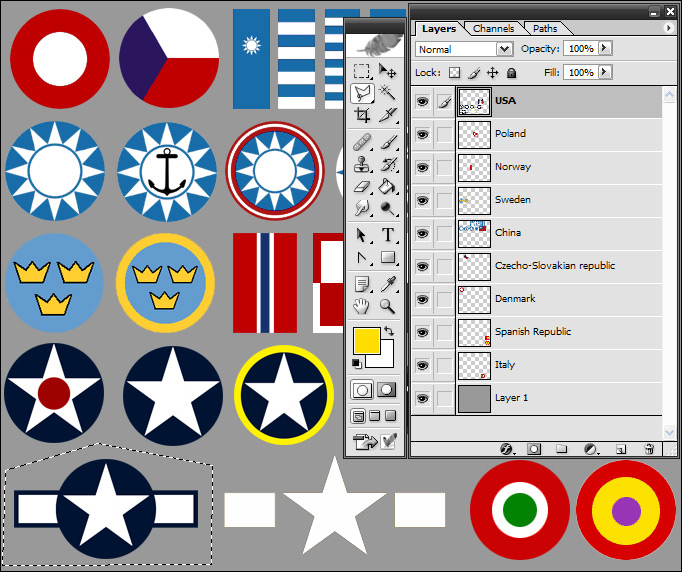
To start open your template or skin and the file that contains markings like the ones which you can find here.
In the file with the markings select the layer where the marking is that you want. In this example we want a USAF marking. If you are not sure on which layer your marking is, you can use the eye-icon in from of every layer to toggle the layer off and on. That way you can search for the marking.
Now select the lasso selection tool and draw a selectionline around the marking that you want. You need to do this to isolate the marking from the other USAF markings which are situated on the same layer.
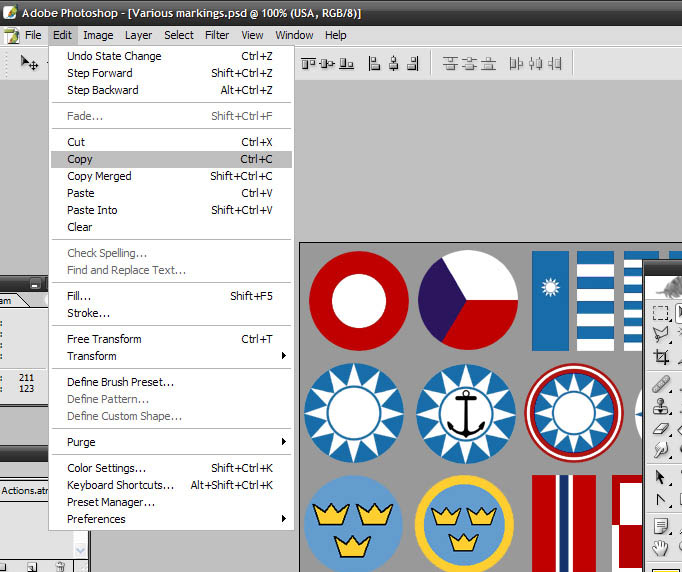
Now copy the marking through the menu or by hitting CTRL-C.
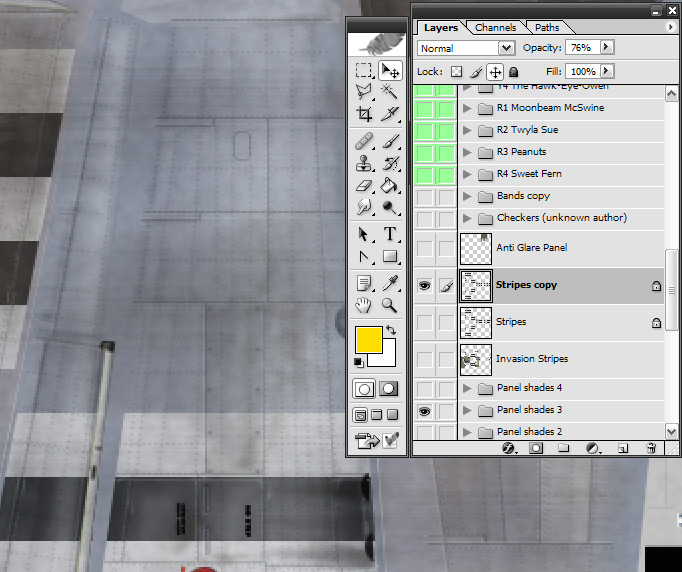
Switch to the skin where you want to add the marking and make sure the spot where you want it is on your screen. I have zommed to 200% so it is easier to place the marking.
Now paste the marking through the menu again or by hitting CTRL-V.
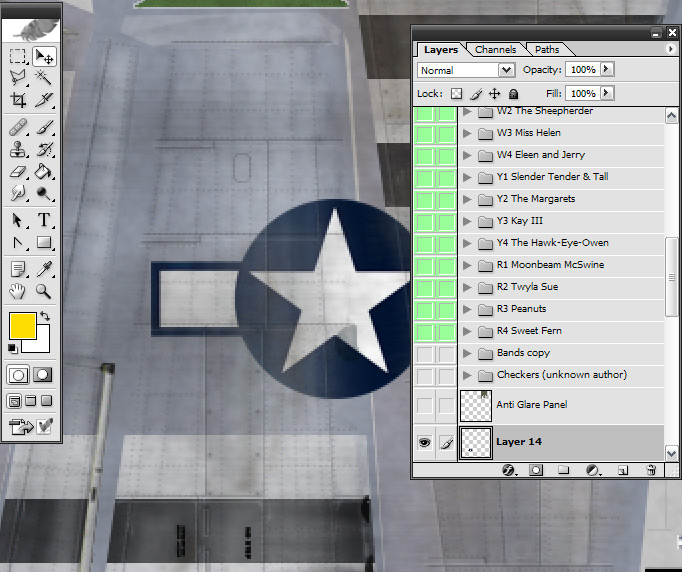
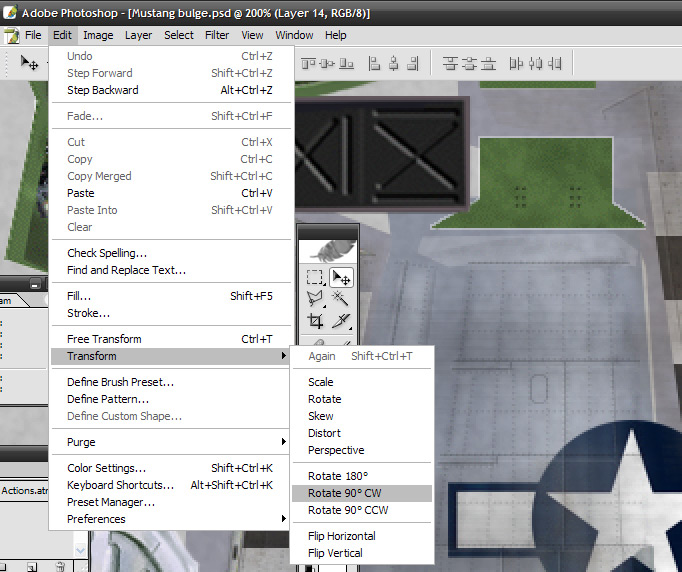
In this example we also need to rotate the marking to have it show up correctly in the skin. In the Edit menu go to Transform and select Rotate 90 degree clockwise.
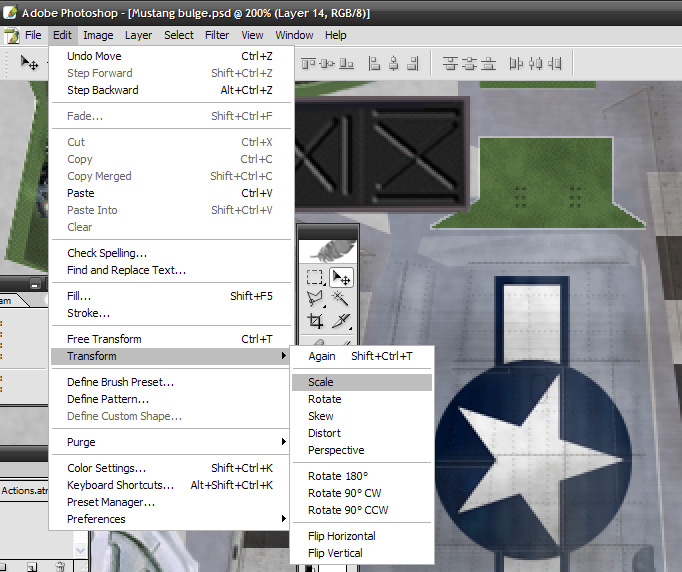
Move the marking approxomately to the position where you need it to be. Obviously it is too big. No problem. In the menu Edit select again Transform and then Scale
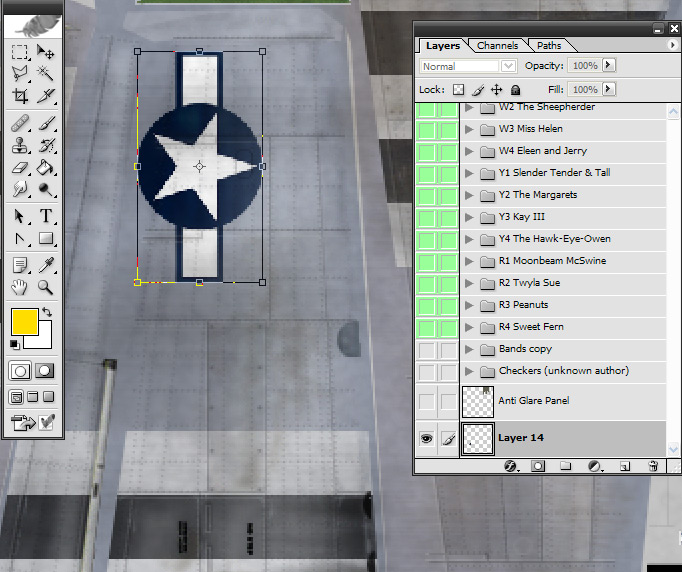
Now hold the SHIFT-key. This will make sure that the proportions will stay the same while you resize the marking. Now grab one of the corners and move it until the size is as you need it.
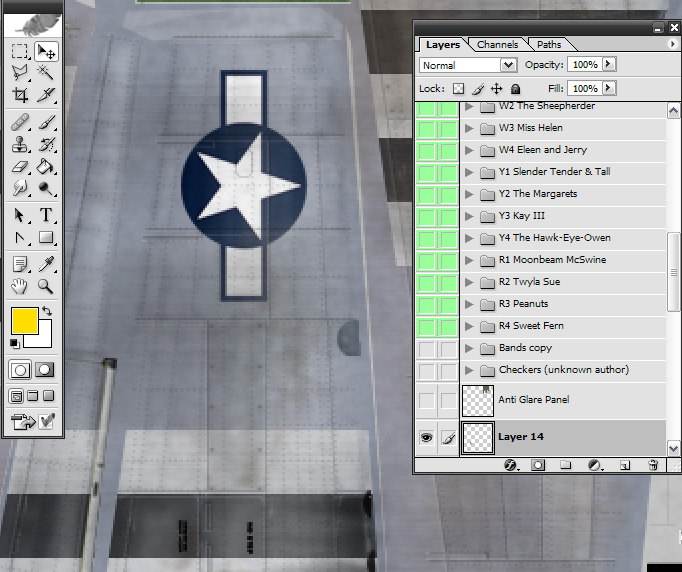
Finally you have your marking as you need it. If the others need to be the same size you can copy this one and move it to the right locations. That saves you double work and also makes sure all markings are the same size and not a little different.
Last edited by Serval; 18th November 2015 at 15:13.
 Posting Permissions


 Reply With Quote