


Bf109 done from an actual photograph
Hello again
This tutorial will deal specifically with changing colors within Paint Shop Pro. This is something which no one thinks about unless it is too late, and then it becomes an issue. This will help with changing colors in PSP; the information is simple and straight forward.
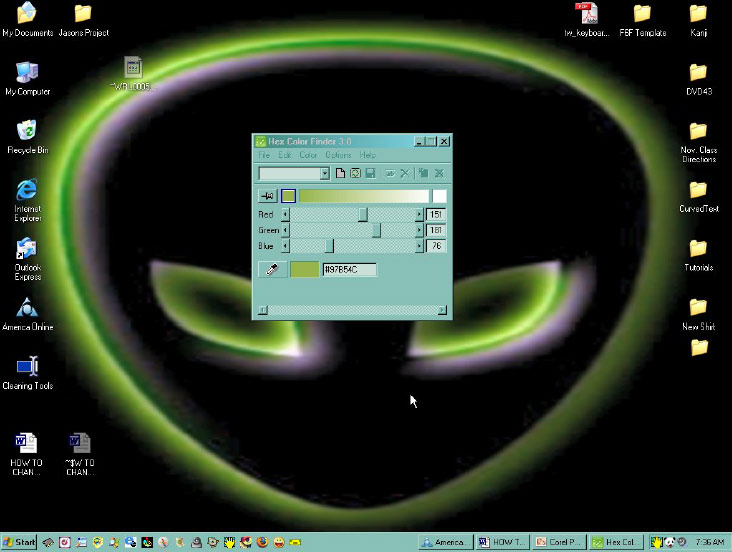
This is called the Hex color picker; it is small and free and will help you with obtaining the text coding to place into your paint shop Pro color wheel.
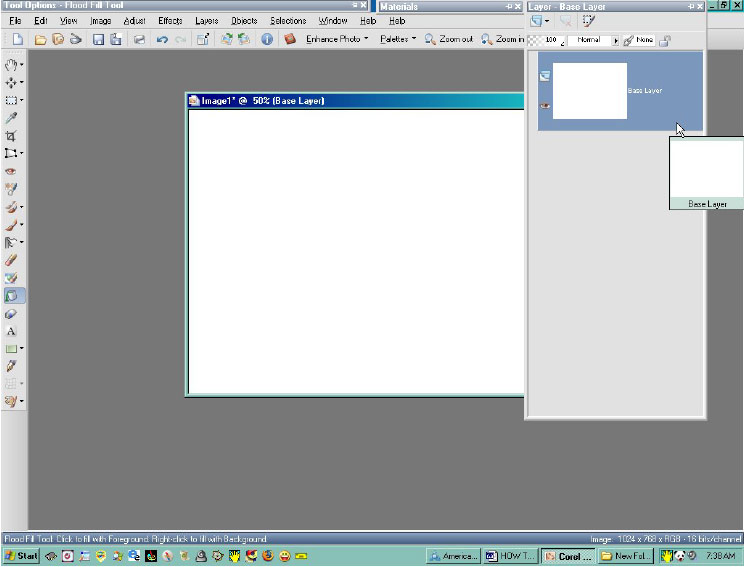
Start with your Paint shop Pro pallet like this.
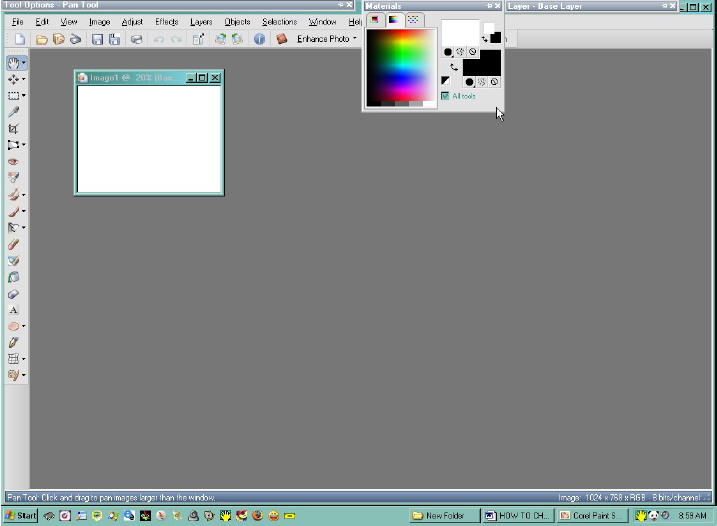
This is your Materials pallet this is where you will do most of your color changing.
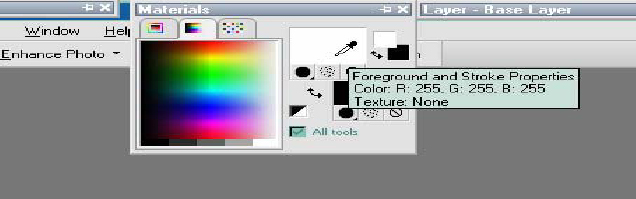
A close up of the materials pallet.
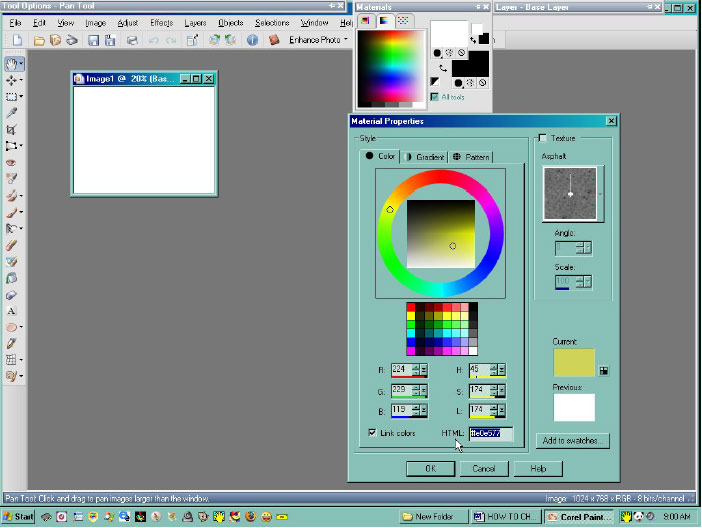
This is your materials properties pallet note the highlighted box with HTML in front of it, this is the color code box, so if you have a color you want to use, or someone else does, they can send you the HTML code to use that particular color very cool item.
For example lets say I want to use a particular color blue for the fuse lodge of a Bf109 that I am painting, this is how I did the painting of the Bf109 located at the top of this tutorial.
For example lets say I want to use a particular color blue for the fuse lodge of a Bf109
that I am painting, this is how I did the painting of the Bf109 located at the top of this
tutorial
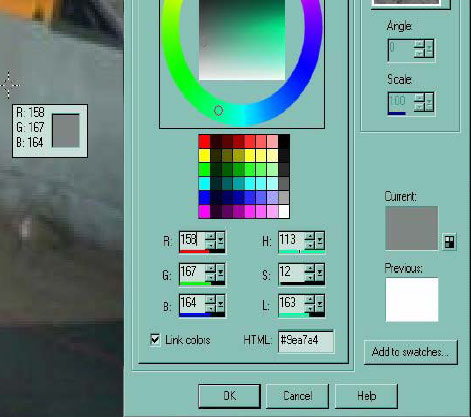
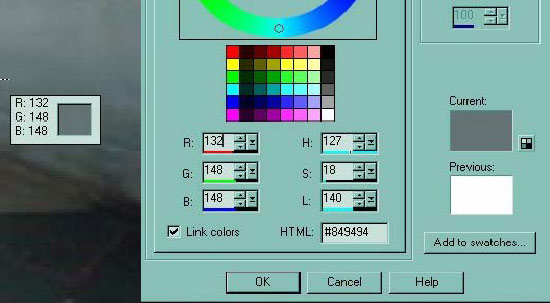
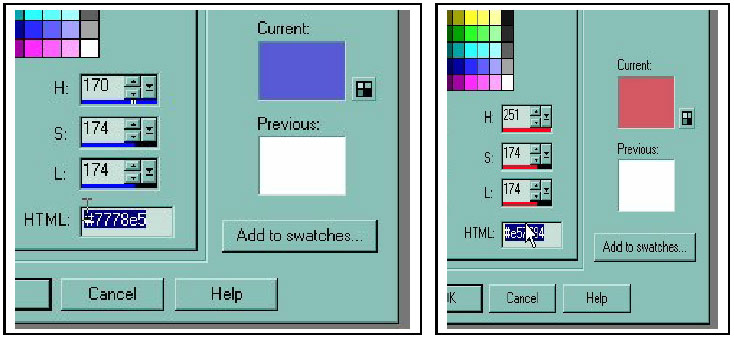
These are close ups of the color picker properties utility boxes, note how the HTML text changed in the field when the RGB color picker was located on a different portion of the photograph.
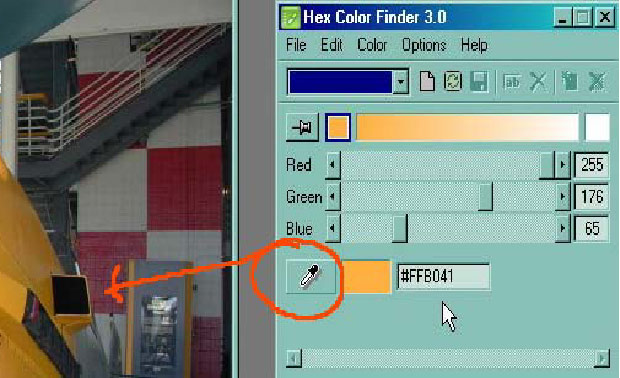
This is a close up of the Hex color picker, by Clicking the eye dropper button with your left mouse and while holding the button down you can drag an eye dropper over the Photograph until you get the correct color you are searching for, the color change is in real time and you can actually watch it change in the little box as you move the dropper. As you move the dropper across the photograph, the HTML text code will change as well until you let go of your mouse button which locks the color into the tool along with the correct HTML code.
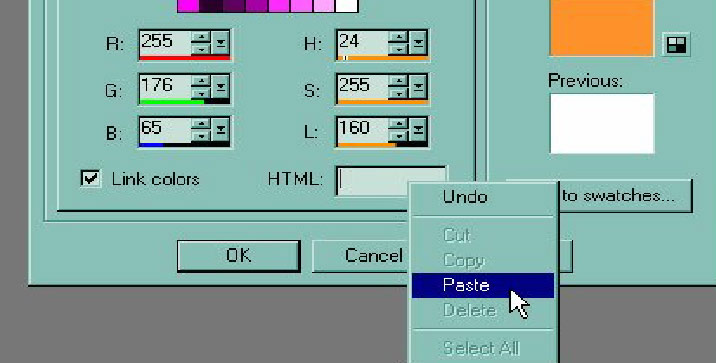
Here you see the HTML field has been cleared in preparation for the new HTML code to be inserted.
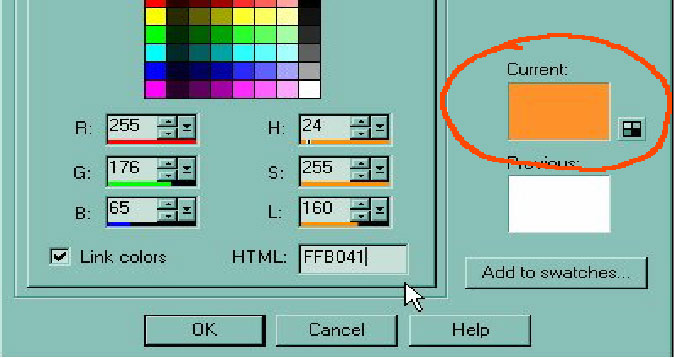
Now the new HTML code has been inserted and as you can see the color box has changed from white to an orange yellow as you wanted.
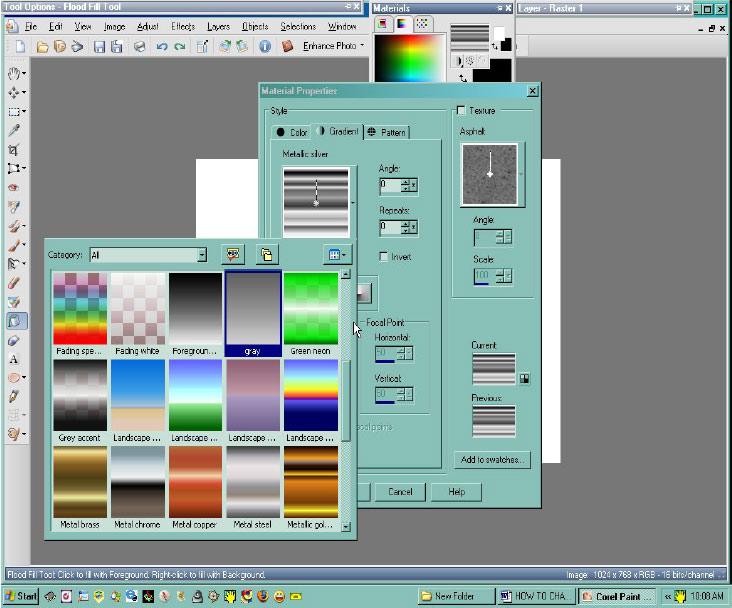
Here you see some of the options of the Materials Properties tool, this lets you insert gradients into your work if you so desire.
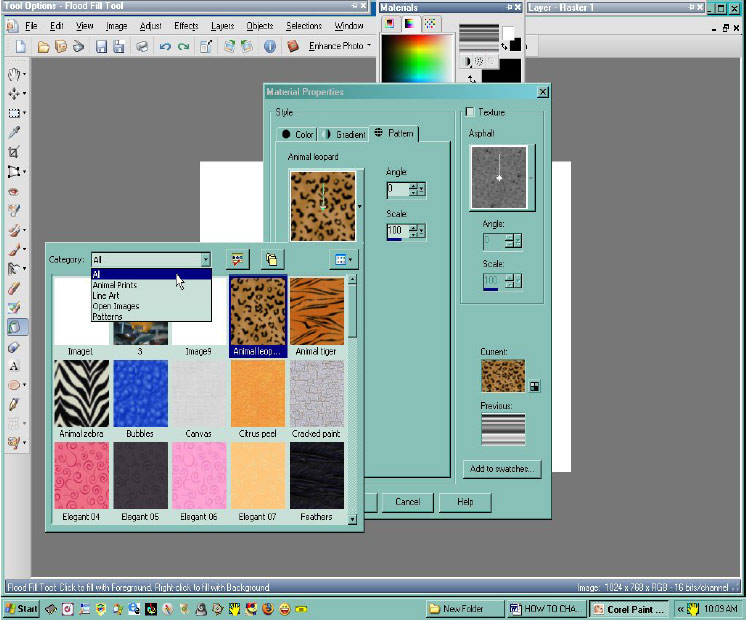
Here under the pattern tab you can see some animal patterns for some exotic skin making.
Changing colors is not difficult, you can do anything in Paint Shop Pro that your mind and eye can think of. The way I do it is simple, there are literally hundreds of ways to accomplish the same thing by other means, this here will give you A simple foot hold until your ready to
experiment on your own. I encourage you to experiment because that's how interesting designs are created often by mistake or accident. Anything you can imagine can be done with graphic art, I have seen some really unusual creations by professionals who were just sitting and doodling at their desks between projects, something they and their colleagues would consider every day seem spectacular to us laymen. So by all means, open up your program and play, that's what it is all about occupying time of day to make us happy and healthy.
Enjoy
 Section Widget
