


 Reply With Quote
Great tutorial love it will help me a lot with X-Plsne painting!

 Forum Guy

Adding Markings in Gimp
by adlabs6
March 25th, 2007
For this same article in reference to Photoshop please see the link below. -adlabs6
http://www.simmerspaintshop.com/foru...ead.php?t=1105
One of the first skin projects that people will want to try is adding a marking to a skin. This article will cover the basics on how to take a marking from a template and get it into position in your project.
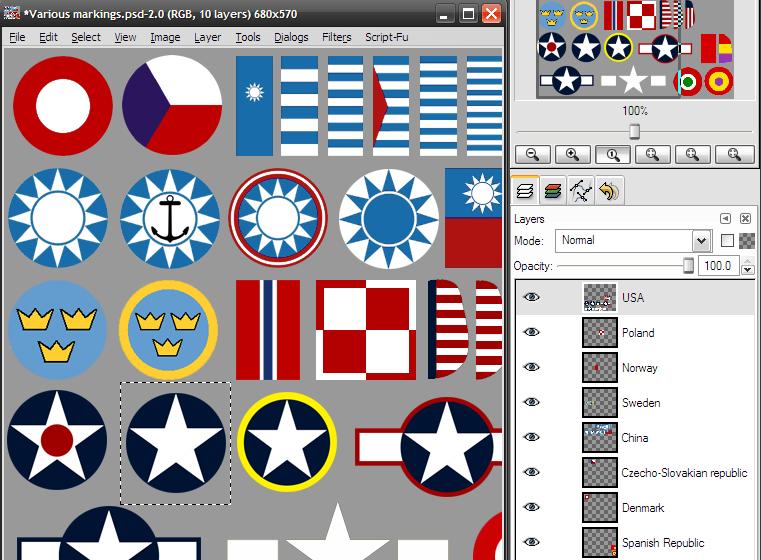
First up you'll need a marking, and the best type to get started with is one from a layered template. There are a number of these avaliable here which will work easily. These templates provide the advantage of having the markings on transparent layers that make selecting them a breeze.
Now just pick the layer that the desired marking is on, then select the marking. I'll use a rectangular marquee tool for this.
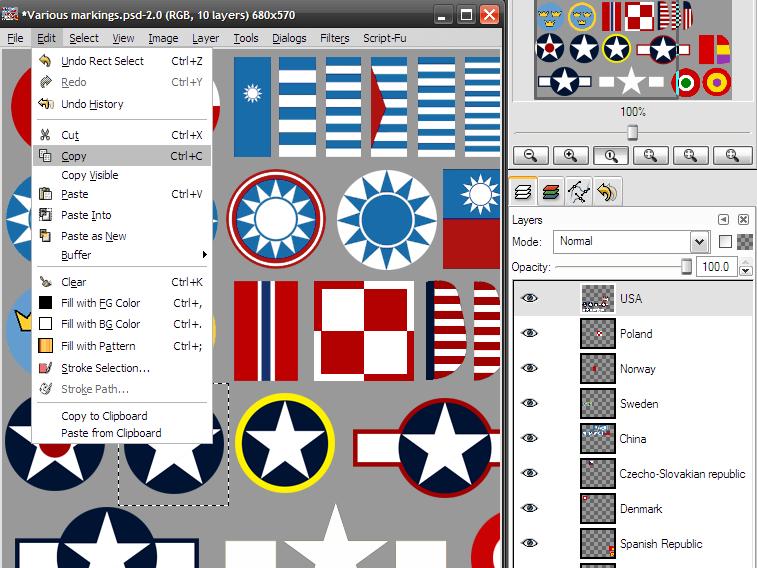
Now we'll copy that marking using Edit:Copy or CTRL+C, then move to our skin where we wish to paste it.
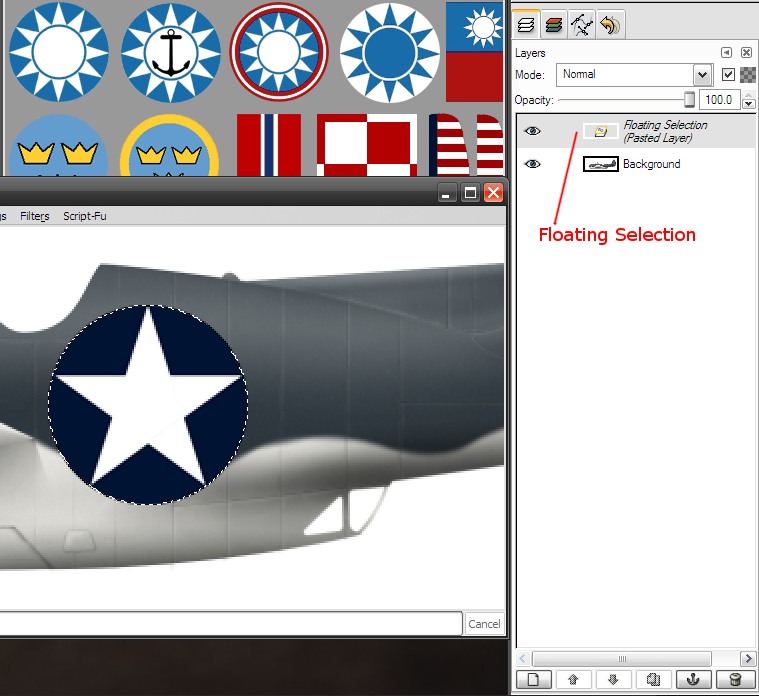
Now we can paste the marking into our project. I'll begin by deciding where I'd like to have the new marking in my layer stack. I'll select the layer that I'd like to have the marking appear above, then paste by Edit:Paste or CTRL+V. This will place the marking into the layer stack as a floating selection, as shown below.
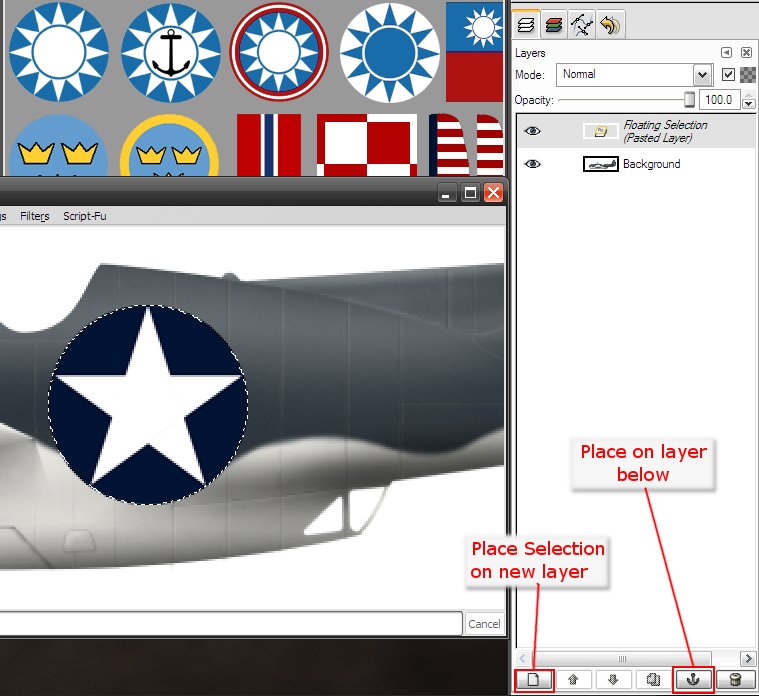
Taking a close look at the icon for the newly pasted layer, you'll notice that it's different from the other layer icons. What is happening is that Gimp is expecting a decision on how this layer should be treated in the layer stack. If the 'new layer' button is pressed, then the pasted element will become a new layer. If the 'anchor' button is pressed, then the pasted element will be merged into the layer directly below. For this example, I'll want to paste as a new layer to preserve the other layers.
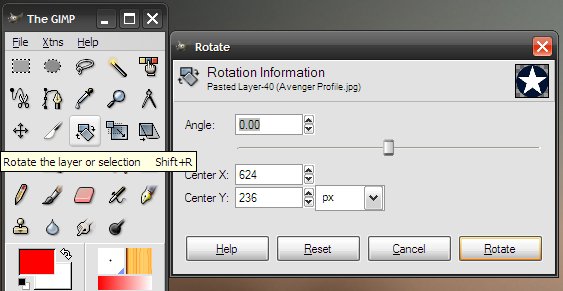
Now that our new marking layer is in place, we can do any rotation and scaling that might need to be done. First rotation, the image below shows both the tool palette with the button selected, as well as the dialog box for the tool. Notice in the upper right of the dialog box you can see the star marking, this is because it's the only thing on the layer right now, and since that layer was active when I clicked the rotation tool, it is the layer that will be edited.
If there are several markings on the same layer, then it's best to select each marking individually, then do the rotation. Rotation will be limited to the area within a selection.
Clicking on the rotation tool's button and dragging on the image area will bring up the dialog box, and begin rotating the layer or selection. The center point can also be set in the dialog box if needed.
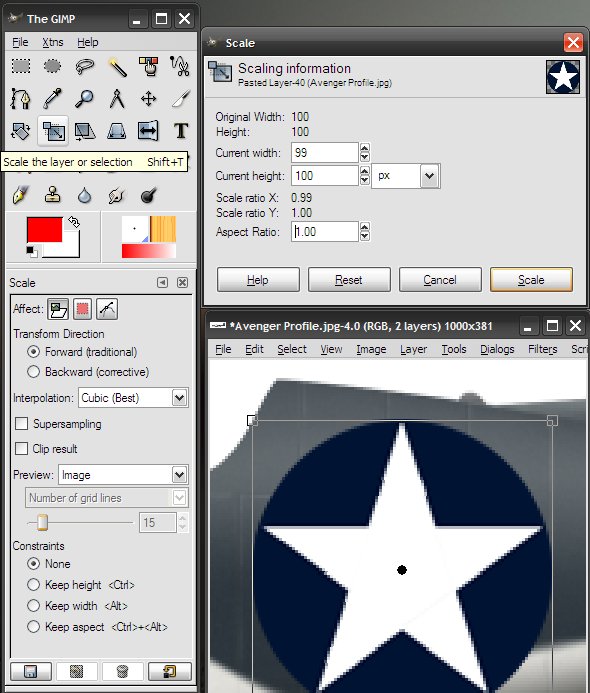
Lastly we'll look at scaling the marking to the appropriate size for our artwork. Again the image below shows both the tool button and it's dialog box. Click the tool button, then click in the image are to load the dialog box, as well as begin scaling.
It's important to notice that some of the scaling tool's options are in the tool palette. Here you'll find controls for some advanced settings, and most importantly the options to retain the aspect during the scaling, holding CTRL+ALT will keep it in perfect shape during the size adjustment.
Last edited by Serval; 18th November 2015 at 14:57.
Junior Member
Great tutorial love it will help me a lot with X-Plsne painting!
 Posting Permissions

