


 Reply With Quote
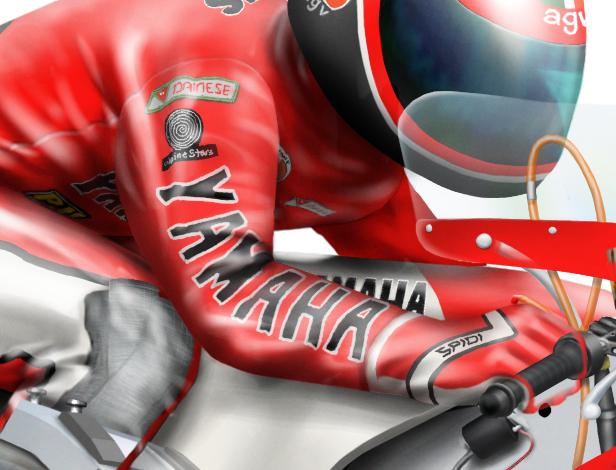
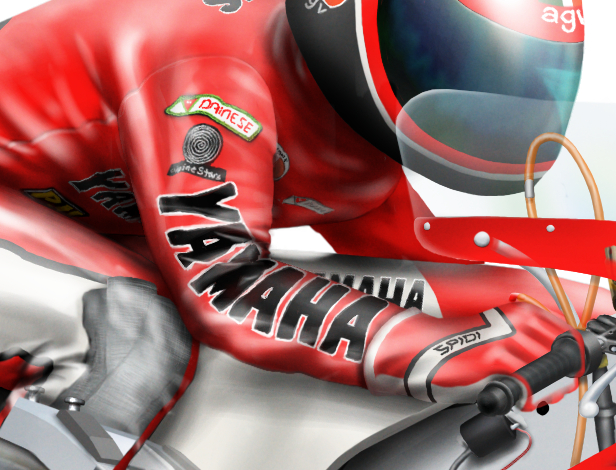
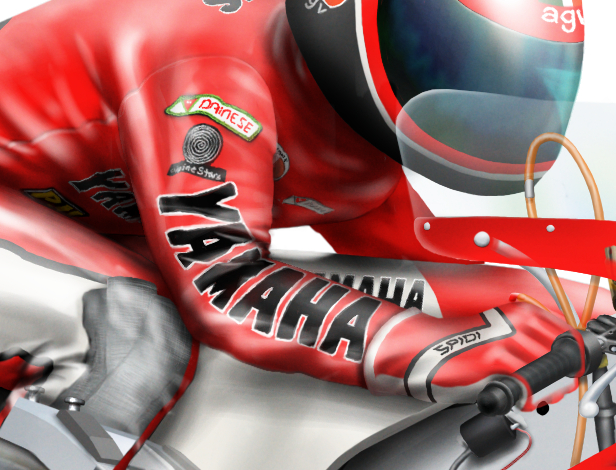
And a few more touches. I cut away the large, baggy trailing edge of the sleeve. Also improved the leather wrinkles on the Yamaha lettering, and tightened the leather crunch inside the elbow and behind the knee.

 Forum Guy

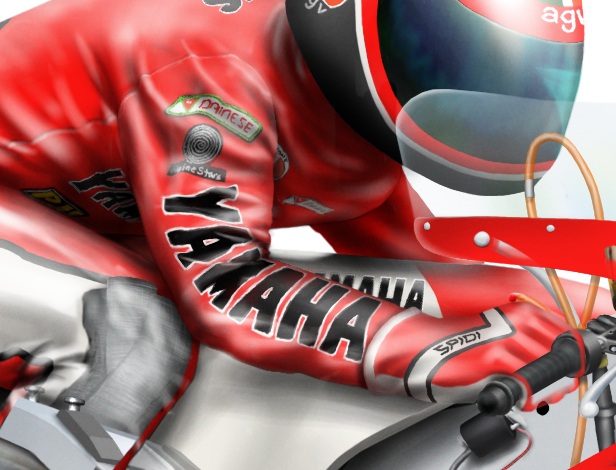
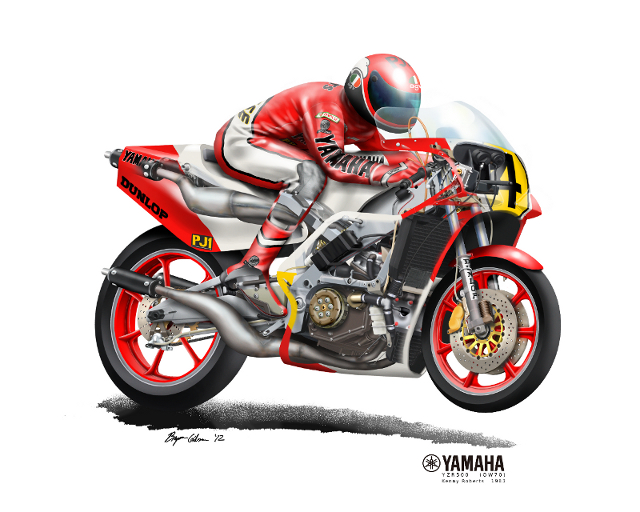
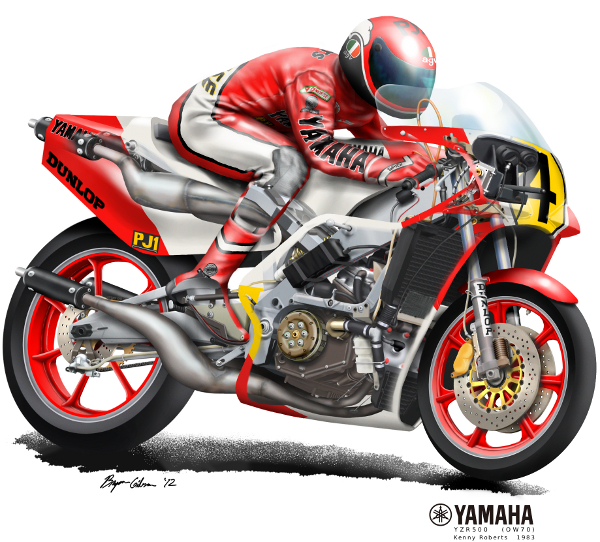
A couple days back I was staring at this, imagining the workflow required to create such an image using a real airbrush.
And I spotted a problem! If the rider were to put his arm down at his side, the top most sponsor patch would not be parallel to the ground, as it should be. A crop here:
So I reworked the sponsor patches. Also took a few moments to redo the Yamaha lettering, using a more accurate typeface and weight. A few smaller touches like shadows and adding a slight flare to the open end of the glove were added too.
Forum Guy
And a few more touches. I cut away the large, baggy trailing edge of the sleeve. Also improved the leather wrinkles on the Yamaha lettering, and tightened the leather crunch inside the elbow and behind the knee.
Grand Wazoo
Looking even better.
FAST AND BULBOUS!
Forum Guy
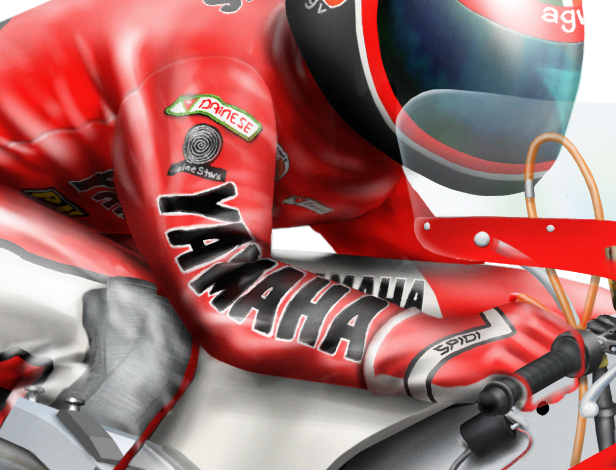
Good point there BH. I bet I can manipulate the outside uprights on the M to create a bit of roundness.
Forum Guy
Here's a repaint on the M, plus a bit of geometry trimming on a couple of the other letters, too... Aiming to reinforce a roundness.
Grand Wazoo
Much better, now he's got a full looking arm. What is next? Will you do another?
FAST AND BULBOUS!
Forum Guy
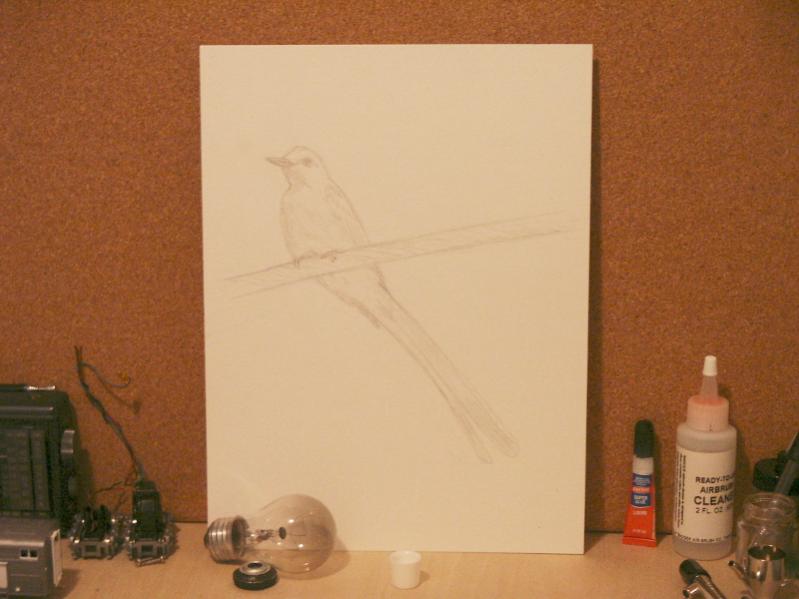
Thanks. I will certainly do another painting. But this one will be attempted with the real airbrush. I've got the sketch done on some heavy art paper, a scissor tail sitting on a wire against the sky. Based on a photo my brother took, I'll be using the photo as my shading reference.
No idea when I'll actually start on this, but I fully intend to try it.
Forum Guy
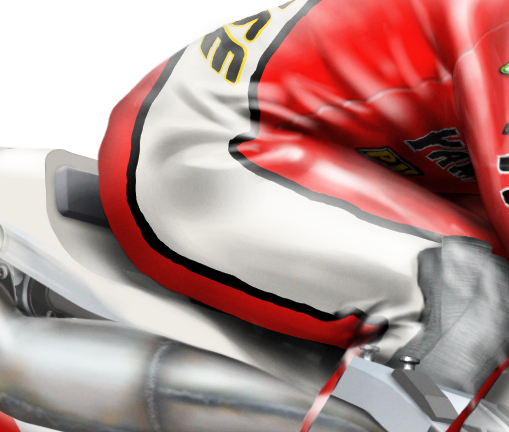
Trying out a completely new set of wrinkles on the shoulder. This should better capture the feeling the material being bent upward from a standing position.
EDIT: Also tightened up the suit striping in the hip folds.
Before:
After:

Last edited by adlabs6; 4th November 2012 at 05:53.
Forum Guy
I looked at that latest shoulder repaint for a couple of days and didn't like it at all. Repainted it again. This time, more emphasis on the seam and the fullness of the shape.
Here's a shot of it all together. I think I'm going back with the wheel on the ground for the final print. Somehow it just looks *faster* that way.
Grand Wazoo
I like the refinements!
FAST AND BULBOUS!
 Posting Permissions