

If you have remove white in your plug-ins folder, you simply double click the selection for remove white in the dropdown and it deletes the white portions of the selected layer. This leaves you with a layer of only rivets & lines. You can then reduce the opacity to make the lines "fade" so they look correct. Black rivets on a light gray background would look a little odd. Dark gray on the other hand looks better.
The reason you need a second layer taken from the void with rivets & panel lines erased is so you can leave it on top at 100% opacity for wheels, cockpit, etc but reduce the darkness of the rivets seperately.
Here is a visual....
You have the void as your 2nd layer (renamed rivets);
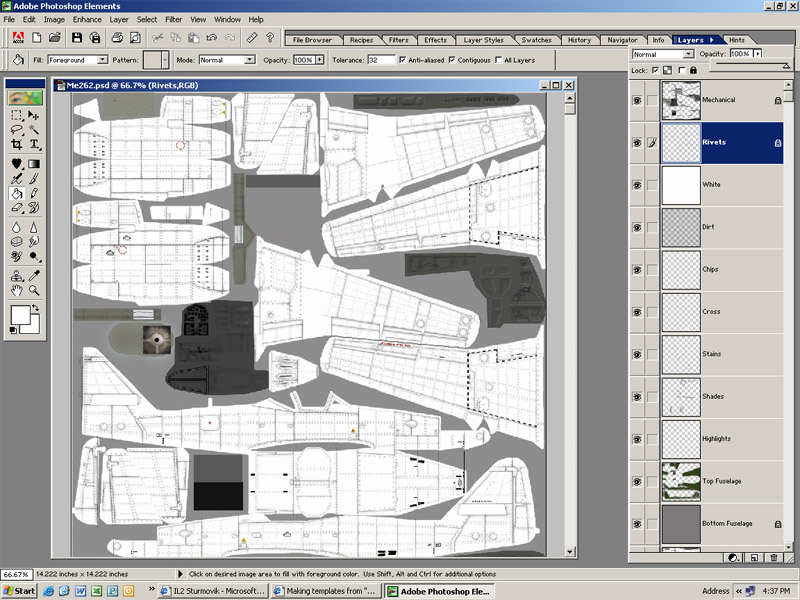
You select it and run remove white from your plug-ins;

You now have a transparent void file at 100% opacity and you can see the background colors beneath it;

Then you reduce the opacity to fade the rivets until they look natural. In this case, about 50%. Usually it is more like 75%.
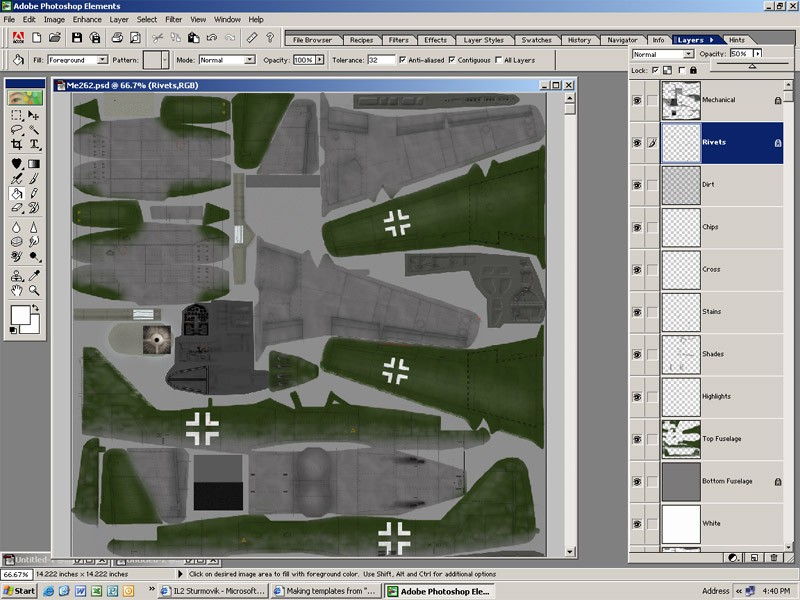
The better the void file is done, the less you have to mess with it. On the Gladiator/J8A, you can leave it at 100%. The Me262 here had filler over the rivets & seams so they should be almost invisible. Depends on the plane.
 Section Widget
