


 Reply With Quote
It's getting better looking all the time!

 Forum Guy

Some more progress this week. Part of my time was drawn away from the plastic model to laying the wooden rail ties. And my Badger 155 airbrush arrived, so a few hours were spent doing setup and playing with it.
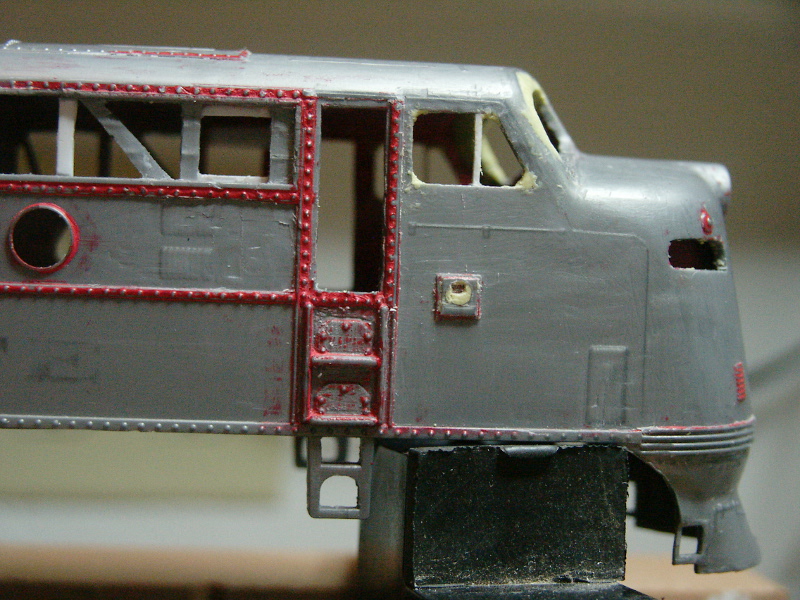
A few details of what was done. First, converting the round sand fillers to square handle cutouts. Rounds filled with Milliput, then carved to shape.
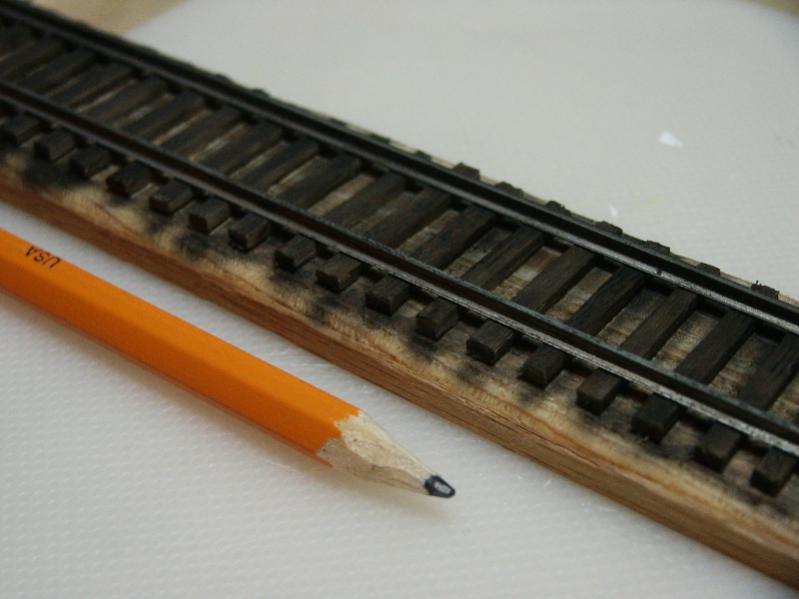
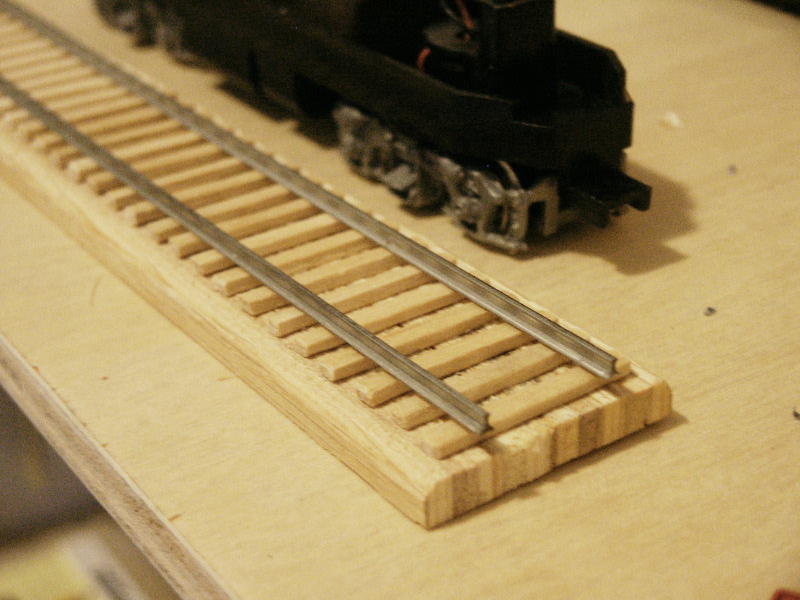
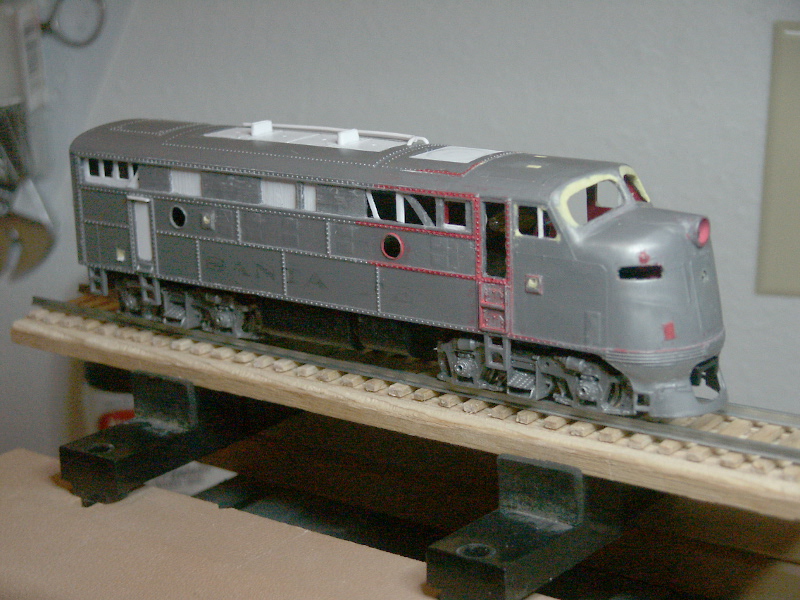
Here is a close up of the plywood road bed and popsicle stick railroad ties. Rails were taken from a Bachman straight track section.
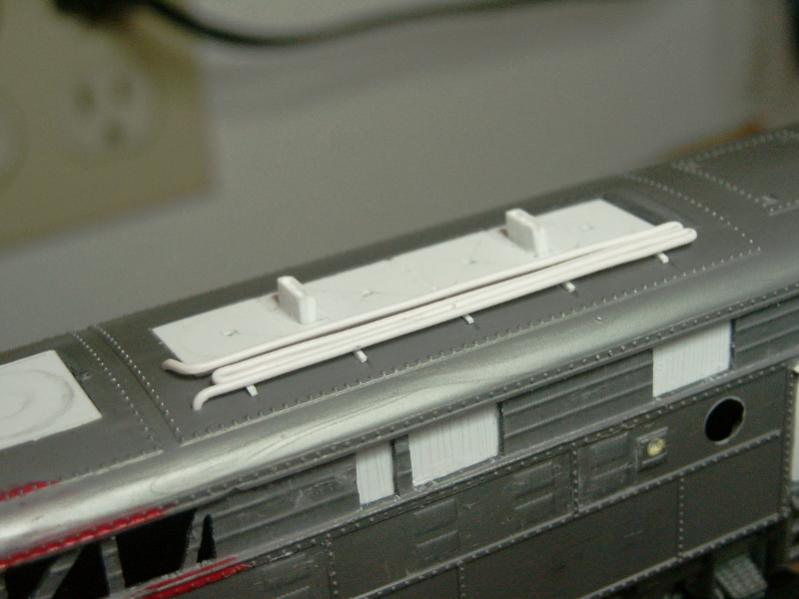
A closeup of the roof, where there are some hole drilled for fan centering, exhaust stacks are shaped and installed. There are also about 10 service hook points drilled for later. There's also a rooftop cooling pipe test piece sitting there. It'll be glued up in better shape, of course.
And everything sitting together.
Grand Wazoo
It's getting better looking all the time!
FAST AND BULBOUS!
Forum Guy
Some more progress.
Up first, the I airbrushed the railroad ties. I didn't want to go full stop black, but instead left them with a bit of a dusty look. I also hit the metal rails separately with a round of black, followed by a round of a rusty color. The tops of the rails may be cleaned a bit.
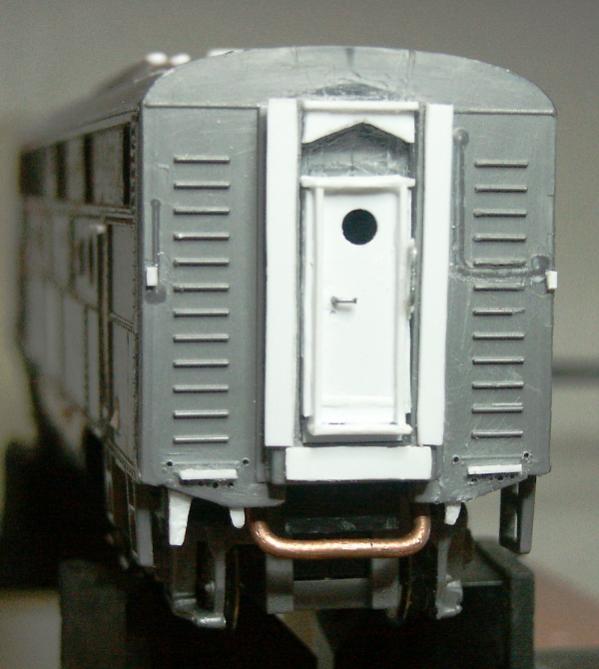
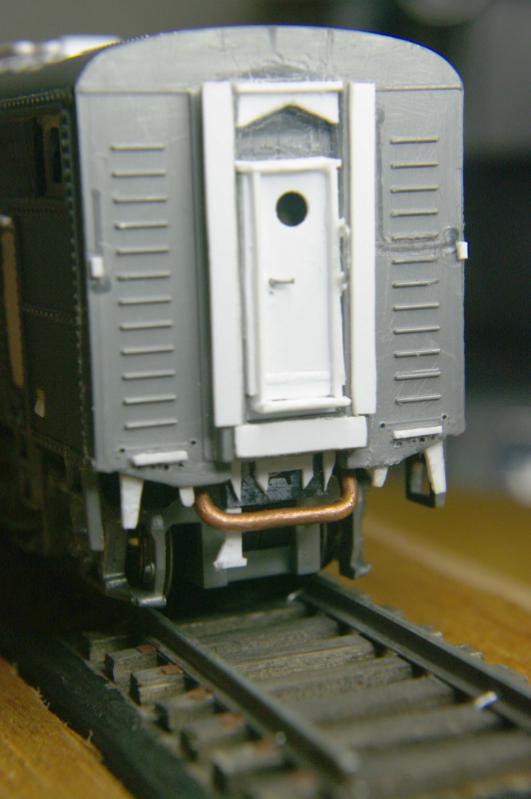
Then some work on the details near the rear coupler. The lower bar part is copper. And yes, the long tail on the right was not installed at the time of this photo (but soon shall be). Note the small holes on the lower part of the car body. The lower four are for the hydraulic hoses (to be simulated with fine wire), and the upper two the mount points for a grab bar there (same as beside the rear door).
These were drilled with a piece of the wire itself, sharpened to a chisel with a file, then clamped in the pin vise for the work. Again, same as the grab bar, door handle, and keyhole above.
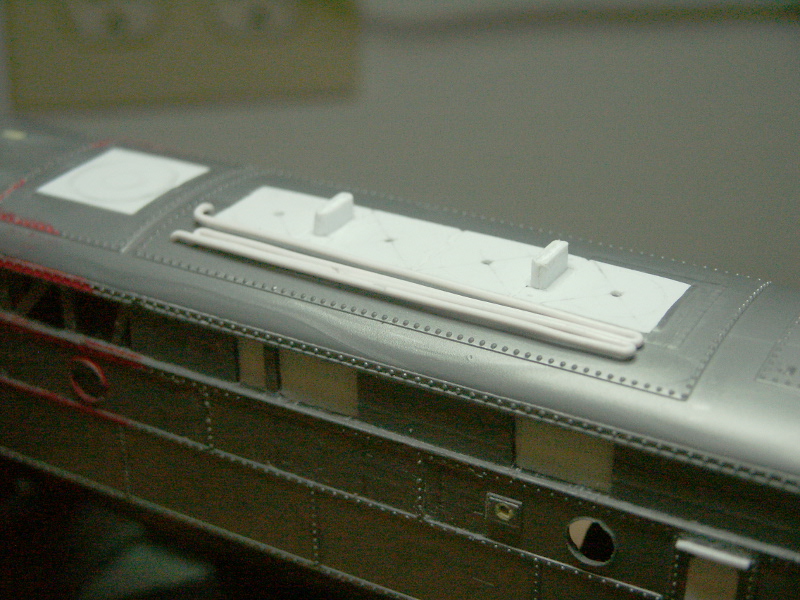
Then I installed the five mounting brackets for the external cooling pipe on the roof. The pipe is still only in test fit, hence the rough squaring.
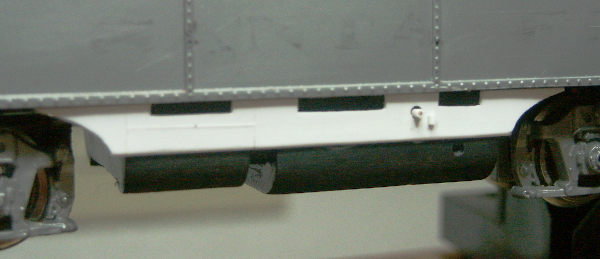
Up next are the fuel tank skirts. Compare these to the stock parts from earlier in the thread. Much better appearance. The small fitting is a piece of insulated copper wire in a hole drilled at slightly larger diameter.
Finally, a second session with the Milliput. I'm quite satisfied with how this has product has worked. Sculpting it to shape while still pliable, and after it has set, has been quite easy.
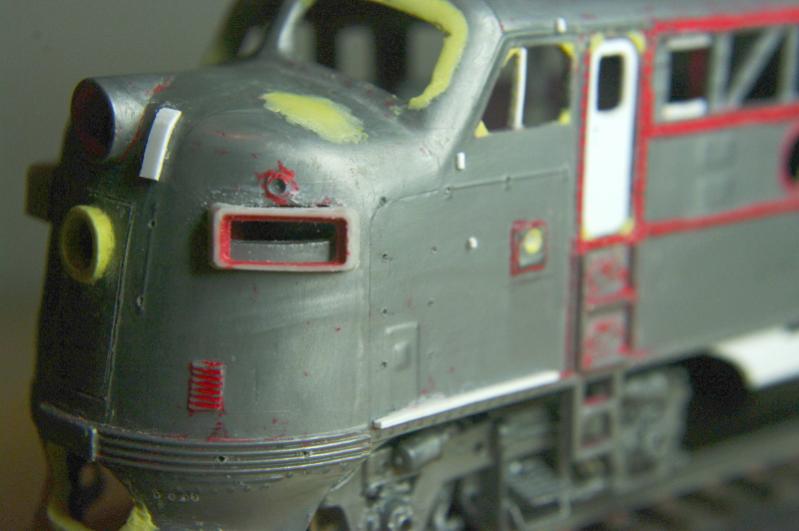
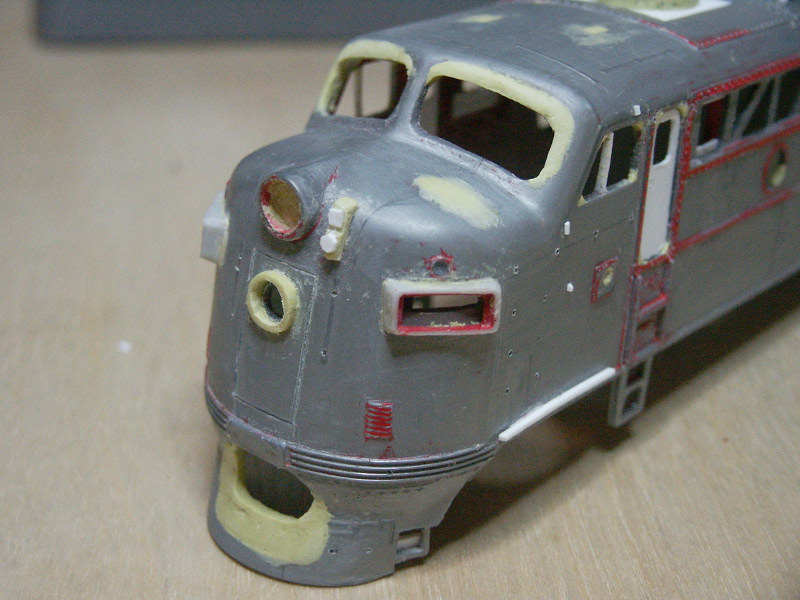
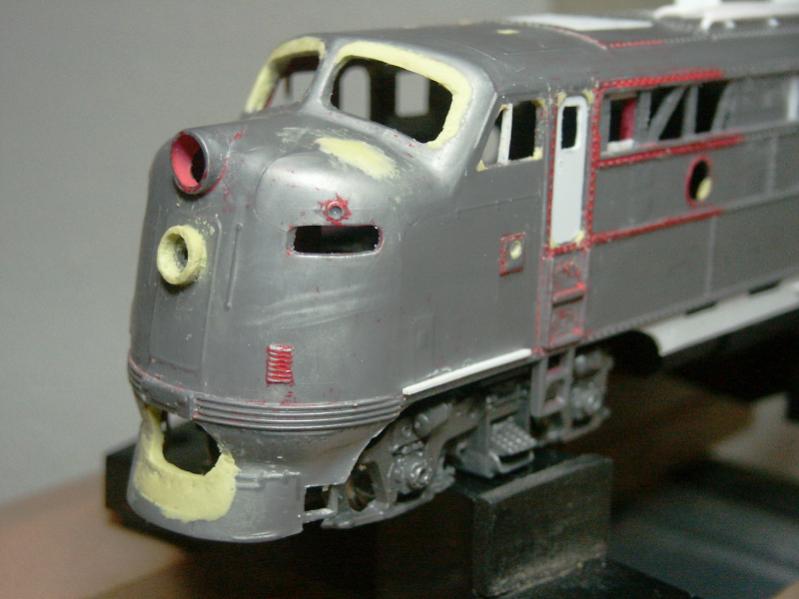
In this session I further refined the front cab windows, rounded the cab side door openings (and you can see the new door test fitted too), created the nose light case, and reshaped the previously large and simple hole in the pilot to something better matching my photos.
The patch on the upper nose is a repair job. While trying to remove the red paint early on, I tried using a soft plastic brush on a Dremel. Through 10k RPM, it didn't touch the paint. By 15k, it removed not only the paint, but the plastic too! The Milliput filled and smoothed the divot out fine.
Oh, the small lights above the number cutouts were drilled to size.
Last edited by adlabs6; 28th October 2012 at 23:54.
Member
Love the engine and I am following this thread with baited breath.
Forum Guy
Weekend update. Mostly very tiny things going on. First on the nose, I've super glued many detail parts. Little fittings on the nose, the number plaque, and done some shaping on the new nose light housing. I also scored the nose door line, replacing the incorrect and raised default molding.
All over the nose you'll see tiny holes. These were drilled to receive grab bars and detail hoses, done with a piece of wire in a pin vise. I probably drilled out 20 or so.
On the rear, I've continued detailing the lower chassis area. Lots of little parts here, the step and such.
You can also see tracks here. The little rusty plates by the rails are cut from adhesive vinyl. You can barely make out a couple of wire rail spikes that are holding the rails to the ties, too. Drilled the ties using a straightened staple in the pin vise, then crafted the spikes from steel wire and seated them every 5th tie.
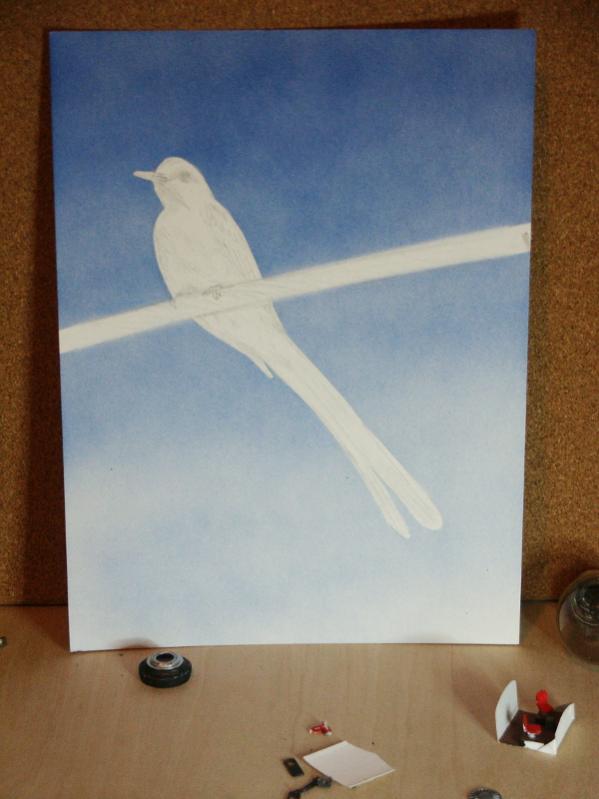
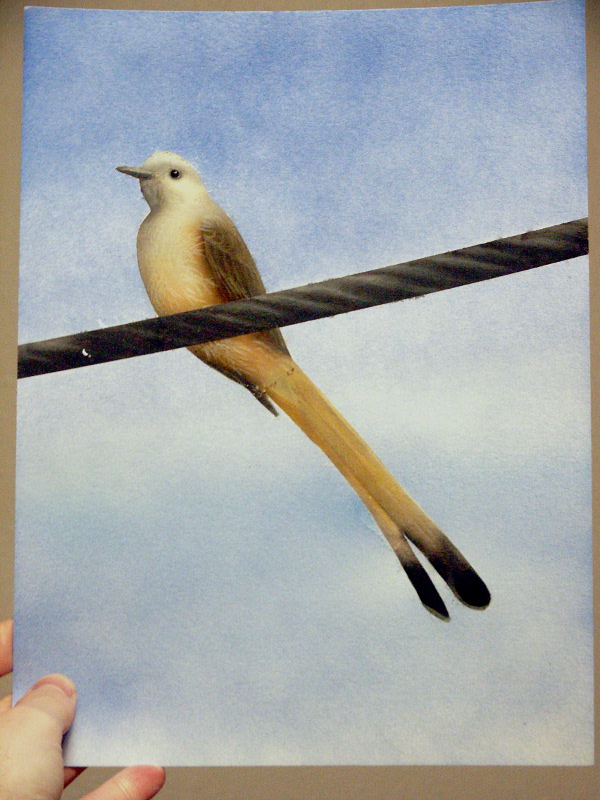
And some time was spent with the airbrush again. I practiced some broad even coverage strokes, with some satisfying results on plastic bottles. Then I practiced some more varied broad strokes on that painting of the bird to create the background sky. Bird and wire were masked with just tape and paper, proper frisket is in the mail.
PS... Note the early work on the cockpit of the locomotive, lower right. More on this later.
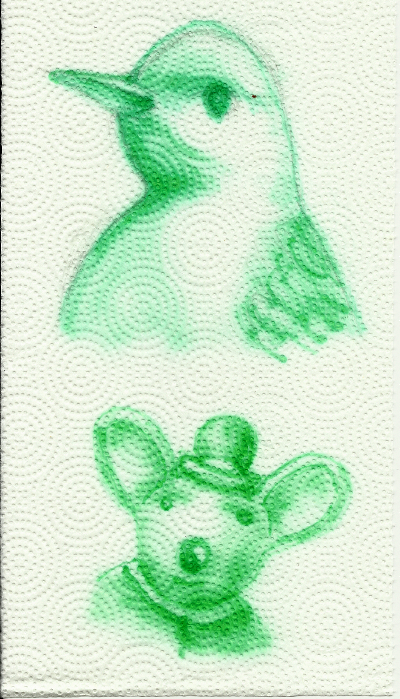
And then goofing off, shooting with food coloring on paper towels, freehand.
Grand Wazoo
GREAT! I'm too addicted to command z but I remember having fun doing lots of painting with airbrushes
FAST AND BULBOUS!
Forum Guy
Yep, it's so easy to "undo" after a stroke repeatedly until you get it perfect! And layers, I am a layers madman. Hundreds upon hundreds of them!
I'm eager to explore a real airbrush as an artistic tool. Just doodling it's been fun, who knows it might grow on me.
Member
Hmmmm! Layers, layers good.Originally Posted by adlabs6


Forum Guy
I had a pretty busy week, so progress was slow. But there was some critical work done.
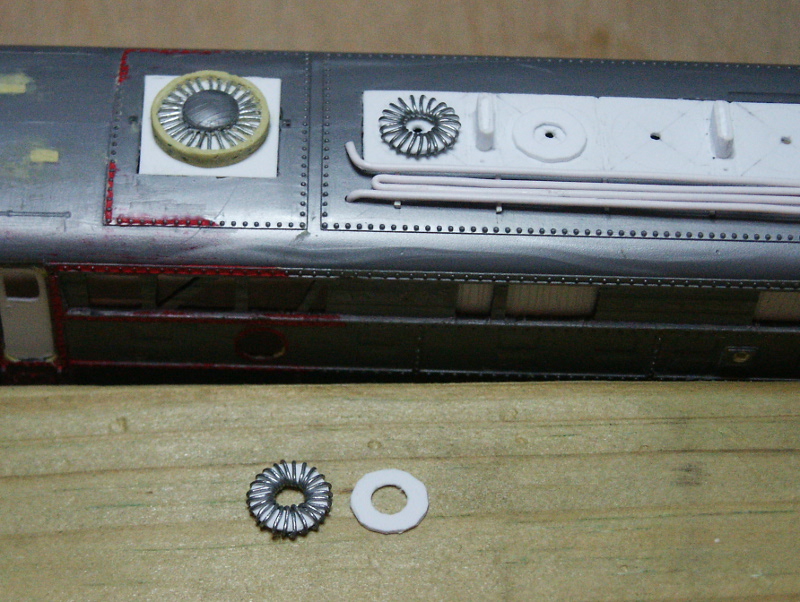
The root top fans have been a problem. Not in building them, but with scratch building, the trouble was deciding HOW to build what I wanted. I had thought that a decent approach would be to build a single mold of steel wire for the grille, then use it to emboss each Milliput disk.
But while building the mold, I realized that I could just wrap the steel wire around a styrene "washer" and then use Milliput just for the edge and center dome.
Here is the 48" fan done, and the beginnings of the the 36" fans. You can see the washers I made, then the wrappings on the 36" fans in progress. The dome on the 48" was salvaged from the original molding. After wrapping the wire, I use tweezers and/or a blade to fine tune the wires to the proper angle (not done on the 36" yet). This seems to work OK.
Then I added a few more detail elements on the nose.
Of course, some more wasted time painting...
Grand Wazoo
Great fan solution!
Nice bird painting too! Pretty good for your first (?) try!!! EXCELLENT!!!
FAST AND BULBOUS!
 Posting Permissions