Reply With Quote
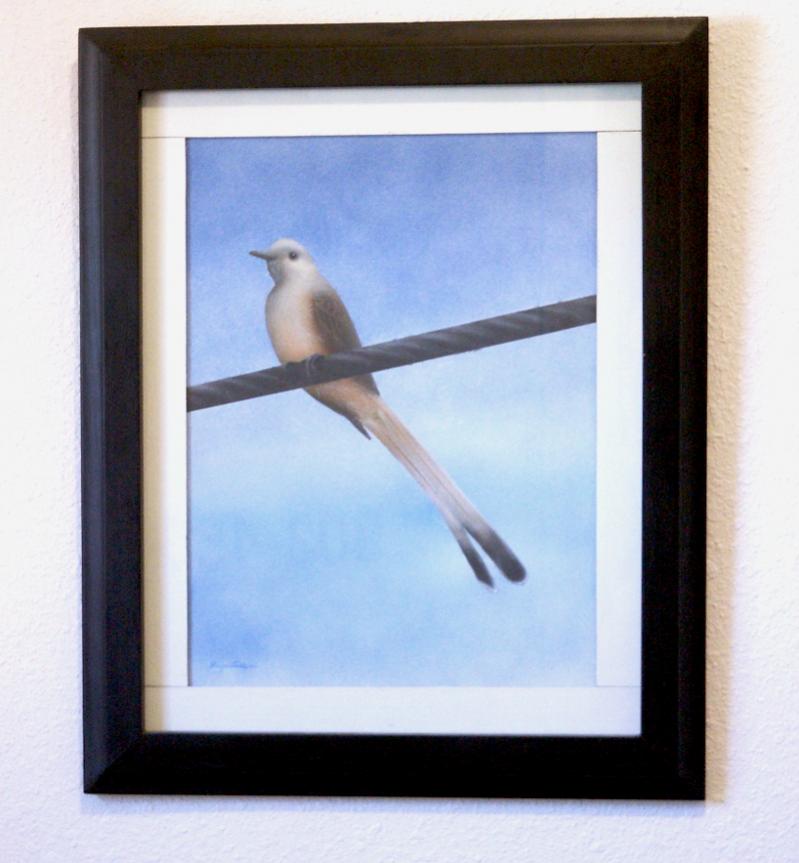
Just a quick post to close out this side project. The scissor tail is done, just a few additions to better render the tail feathers and feet, a slight rework of the wire, and the signature.
Whatever I paint next will be in a separate thread.

 Forum Guy

Hey thanks. Yep that's my first "real" painting outside of shooting food coloring on paper towels.
Forum Guy
Just a quick post to close out this side project. The scissor tail is done, just a few additions to better render the tail feathers and feet, a slight rework of the wire, and the signature.
Whatever I paint next will be in a separate thread.
Forum Guy
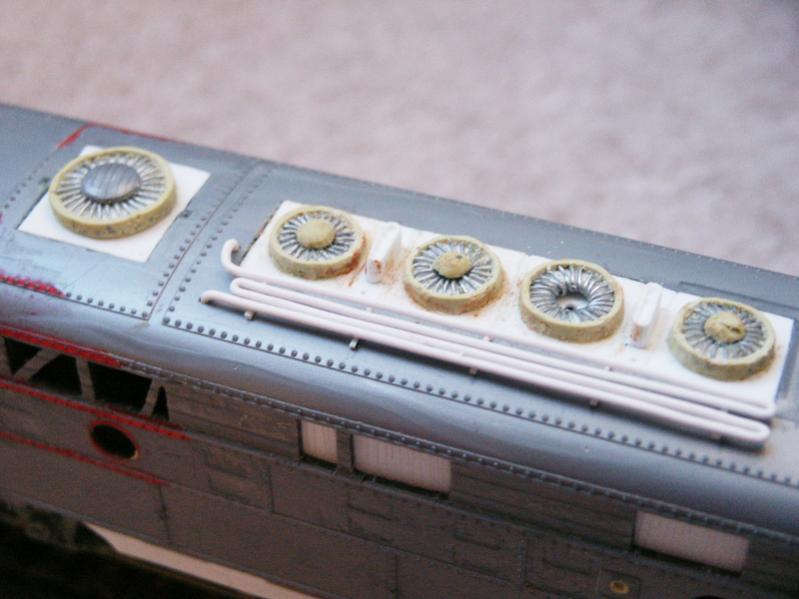
Progress has been slow on this project. Mostly due to the time and tedium involved in winding the fan grilles. Two assemblies were broken while being wound, causing more delays. But they are all complete and awaiting putty work now.
Also some ideas on the display base going on. The flanking wood strips will serve as runoff for the gravel and possible foliage. The plinth itself is one of two candidates. This is the smoother, the other is somewhat more heavy and rough grained.

Grand Wazoo
This looks really nice! Lots of great looking detail work
Do check out good surface filling primer if you haven't already. It works great for getting those small scratches and pits out.
FAST AND BULBOUS!
Forum Guy
BH, a surface filling primer is something I had wondered about. Shoot, then fine sand before the color goes on. That would seem ideal for this project, where there is stubborn paint remnants. I'll check out some of the products available.
Grand Wazoo
On top of what you mention, you can get thick versions of filling primer for tough areas too. For you sanding coats, it's important to spray it pretty wet so you don't end up with a "sandpaper" bumpy finish. If it goes on nice and smooth the areas you can't get into with your fine sanding will still look good. I like the 500 and 1000 versions of Gunze Mr Surfacer and I usually use Alclad's Microfiller primer for the overall final coat.
Here are a few good links I just found.
Mr Surfacer:
Mr Surfacer
Gap Filling with Mr. Surfacer
If you lay it on really smooth with a brush all you need to do is feather out the edges.
Alclad Primer:
Alclad Primer - Tools & Paint Reviews - Britmodeller.com
This is lacquer, mind you, but if you spray it on right it will be smoother than anything you've ever seen and dead flat tooDo note they make a gloss black primer which isn't too good for what you want, it's made for use under shiny chrome and silver finishes.
FAST AND BULBOUS!
Senior Member
I just use some old paint in big blobs and fine wet and dry, sure some people will frown but it gets results and doesn't show once painted up.Originally Posted by BLOWHARD

Harriers...uppy downy things.
Grand Wazoo
Same thing Chris, only the Mr Surfacer sands really nice, fills better and feathers in much better. But the same thing and cheaper than buying the good stuff
FAST AND BULBOUS!
Forum Guy
This update, more Milliput being used to sculpt the cooling fan shrouds around the grille windings. Most of the shape is there, but still some refinements remain. The center domes are just exploratory, still have to work on those in my next putty session. Then it's going to be a serious bit of sanding!
I also purchased a plastic display case. So I'll work on getting the wood base to integrate with the clear top from the case.
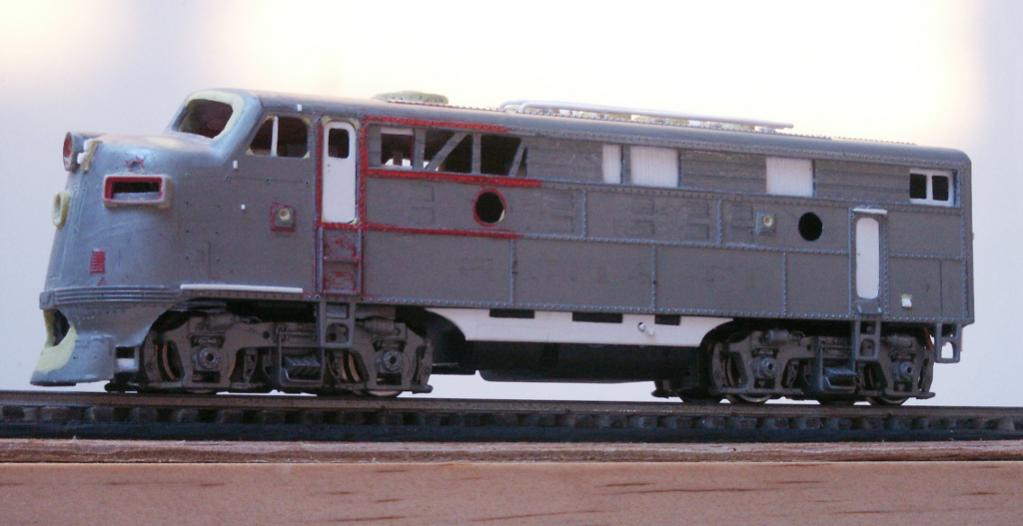
And here's a low angle shot.
Last edited by adlabs6; 3rd December 2012 at 01:46.
Senior Member
Can't you just heat some soft thin strips of plasticard for the cooling fan shrouds, would allow for them to be thinner and even? Just a thought but still looking like a real labour of love.
Harriers...uppy downy things.
 Posting Permissions