Reply With Quote
It's too late to think of it now, but in this same place, I think I would have spent a lot of time doing one fan and then casting it in resin to make several identical one.
I'm still enjoying watching this a lot

 Forum Guy

That had been my first thought, but look at my grilles in the photo. Each vane terminates directly into the shroud. This is what I wanted.Originally Posted by inkworm

Using a bent plastic sheet, I'd have to cut each grille vane individually on an end angle and then glue each in place individually to have them butt to the shroud.
The putty pressed against the one piece grill winding solves the long work of cutting and placing each vane individually within the shroud. Of course it comes with it's own problems, but somehow they seemed less.
Perhaps there could be another, easier way. But I was unable to think of it!
Grand Wazoo
It's too late to think of it now, but in this same place, I think I would have spent a lot of time doing one fan and then casting it in resin to make several identical one.
I'm still enjoying watching this a lot
FAST AND BULBOUS!
Senior Member
Ow I wish I had seen this months ago! The silver bullet of paint strippers is regular old Dawn dishwashing liquid. Get the big bottle and submerge the object to be stripped in an appropriate contained full of Dawn. Usually one day will do it, but I recently removed all the paint from a mini that I have been trying to strip for *years* by giving it a one-week soak.
Love the F9, bud! I lived within rock-throwing distance of the Grand Trunk line in Chicago and I have very fond memories of the Canadian National F9's with the green/cream paint and the big maple leaf logo on the nose.
Forum Guy
Hey Vig,
Ah Dawn! I use it for other cleaning jobs (it's super stuff), but never thought of removing paint with it! I'll have to keep this in mine next time I've got such a job.
Re: The cooling fans. I'm not sure where this will go. Sanding them went excellently, they were thinned to about 0.02" (IIRC) or so, and smoothed up great. Next I moved to preparing the "doming" effect on the grillework. Test samples had done OK, but these finished pieces are not working to my satisfaction. I suspect the plastic washer in the winding core is limiting the shaping.
So we'll see. It's a hobby. It's supposed to take lots of time. And these fans are!
Forum Guy
Nearly 8 months time, and I've not touched this project for more than 2 minutes. Several new "real life" projects have take most of my attention.
But due to some down time the last couple days, I revisited the model. Today I used Milliput to sculpt a new fan shroud for the one I destroyed in experimenting with a few other ideas. I'm going to finish their construction as I intended, wound plastic washers, Milliput shrouds and domes.
Also did some sculpting/filler work on the nose lighting housings, all four of the 36" fan domes, crafted two blanks for possible use as couplers, and two blanks for possible refinement into new horns.
Senior Member
Looking good! Can't wait to see what it looks like all primered up!
I've restarted some years-old modeling projects myself, will post pics if I make any progress.
Forum Guy
I'm looking forward to the primer, too. I've decided I'll add all the grab bars first, though. Even if a few of them may need to be removed and replaced to make way for sanding after the primer coat, it'll likely be less work than having to redrill all the grab bar holes if they are filled with primer.
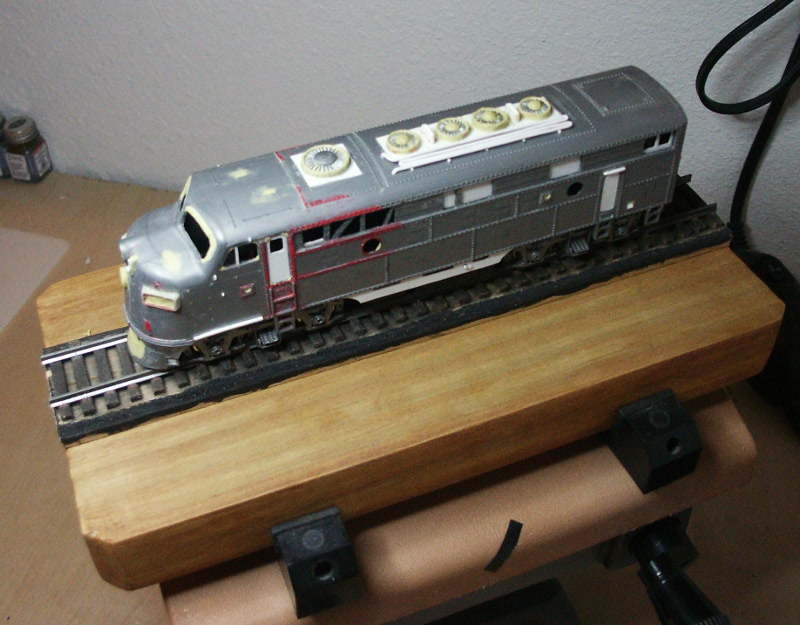
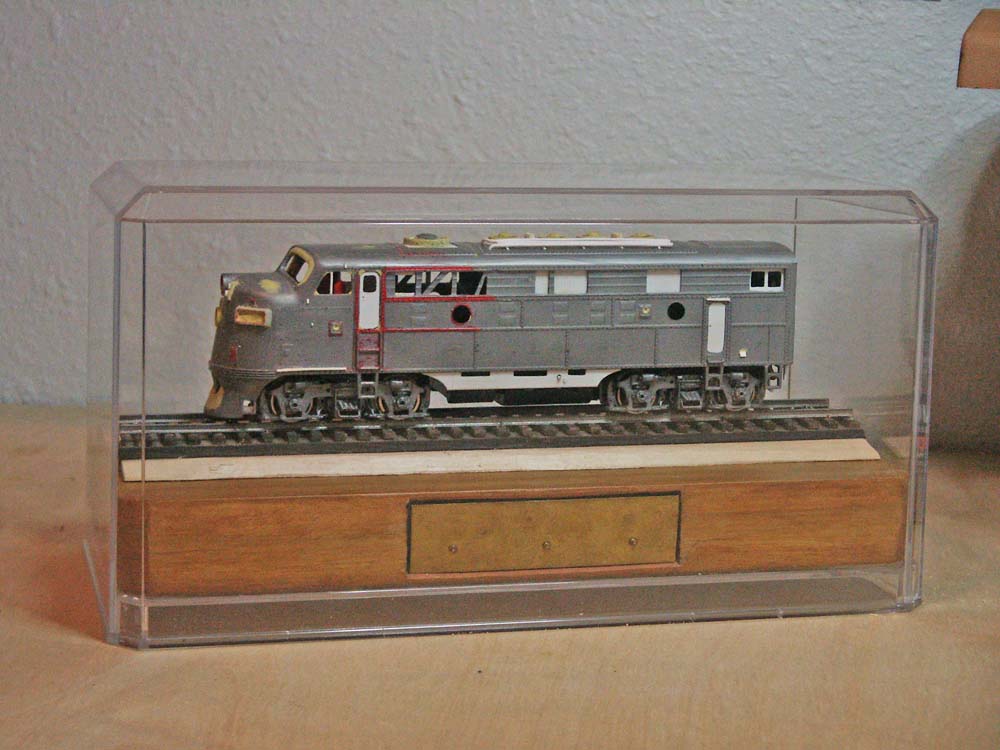
A test fitting today. An experimental brass nameplate, roadbed tacked down, new roadbed edging materials carved from paint stir sticks. All test fitted into it's plastic display case.
Forum Guy
Primer today. I cheaped out... Used Krylon multi-surface primer. Adhesion has seemed great so far.
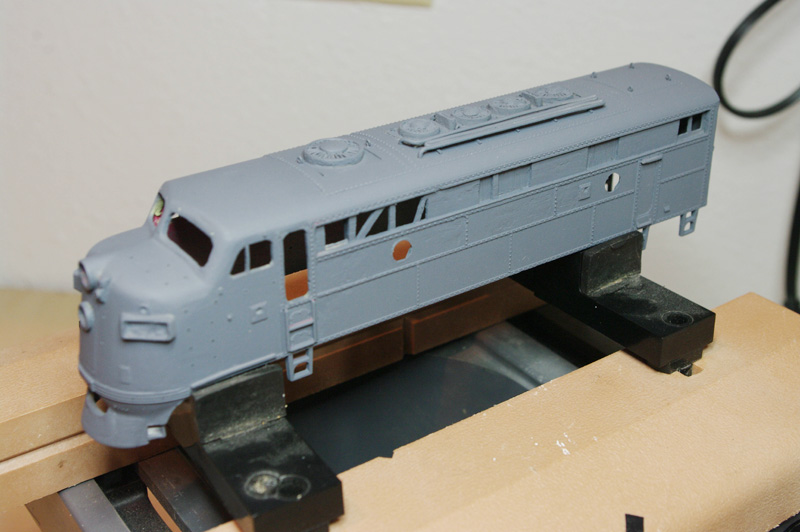
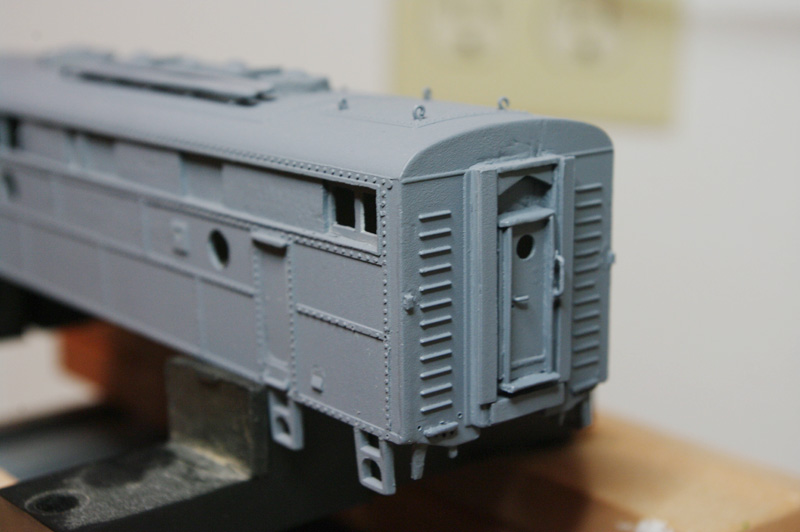
Instead of mounting the grab bars, I decided to drill their holes all the way through. Worked great. I did install the small service rings on the roof, and some grab bars on the chassis. The group of 4 fans and the cooling pipe are only sitting in place. Sanding will follow, then gluing in grab bars and possibly the fan subassembly. Then another primer coat.
I'm very happy that 99% of the old louvers are completely gone after even the first primer coat.
Also primed the chassis and the trucks/wheels. I airbrushed a mat/dusty black over the trucks and wheels, and they look fantastic. Unfortunately, I forgot to take a photo of them!
EDIT: And here's another that shows some of the roof details, small bolts and service rings on the fan assemblies (which again, are only sitting in place for the photo). You can also see where louvers used to be.

Last edited by adlabs6; 30th August 2013 at 03:52.
Grand Wazoo
It's nice to see it in primer. It's looking really good especially all the added details!
FAST AND BULBOUS!
Senior Member
Amazing what a bit of primer does to even out everything. Does Krlyon give a smooth finish even as a primer?
Harriers...uppy downy things.
 Posting Permissions