
-
1st April 2014, 03:18
#11
Re: AMT Shelby GT350 build
FUN! I love the detail, brake lines and all 
 FAST AND BULBOUS!
-
7th April 2014, 23:34
#12
Re: AMT Shelby GT350 build
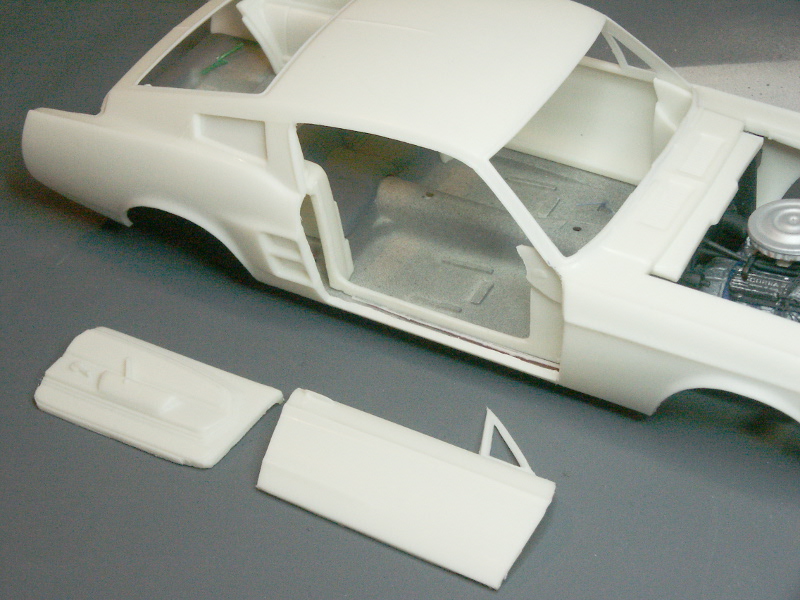
I've been getting a bit adventuresome this last week.
First up, why not make the doors open? Both interior and one exterior done:
Next, the radiator cap area. It's molded as only half a cap, and a bit small/low. As well, this kit includes no shroud.
Cut down to receive the new scratch built parts:
Final product, all sheet styrene buildup.
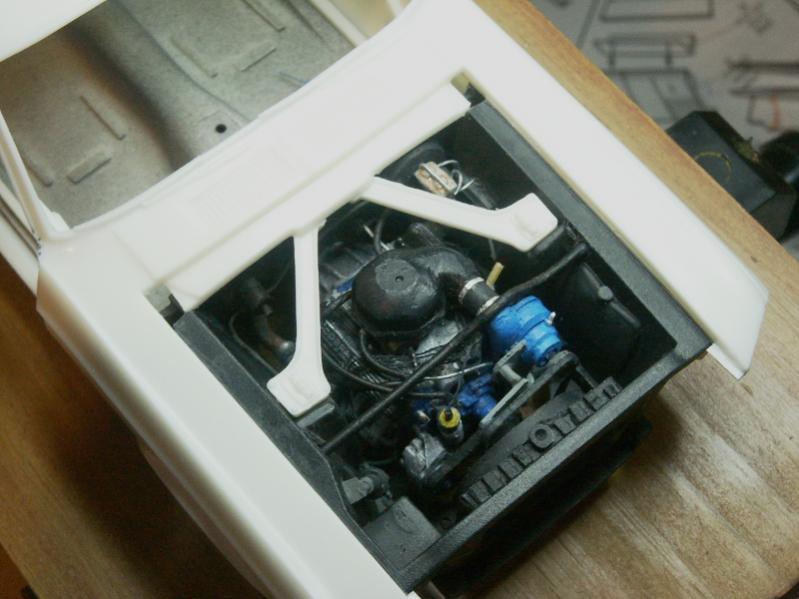
After some base color airbrushed on, brake system detailing, adding the throttle linkages, and adding a Monte Carlo bar made from some steel wire, it's about done:
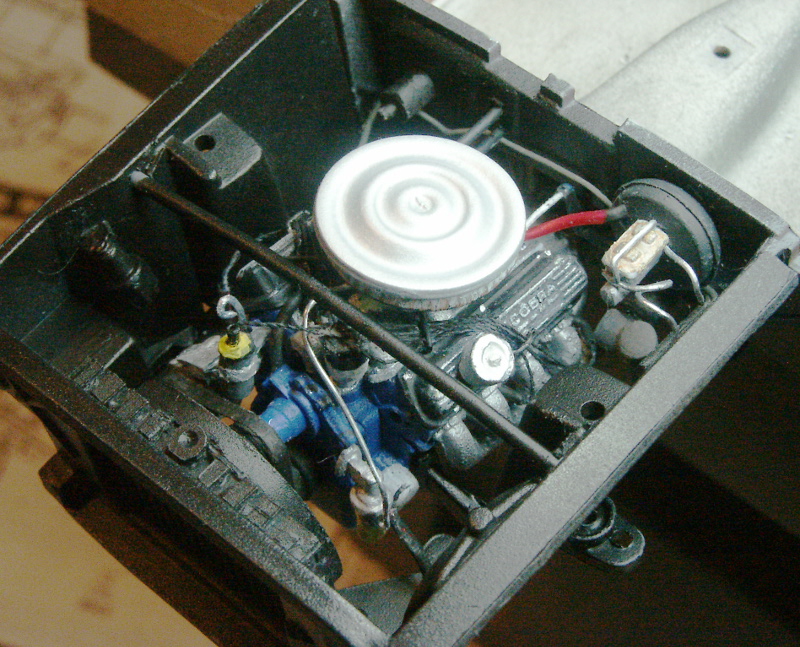
Or is it...
I became a bit interested in the optional factory Paxton supercharger. Very few were ordered this way, but still adding a 40%+ Horsepower boost is so fun! But it will require ripping out some of the details completed thus far.
A test with a piece of paper modeling the general parts requirement.
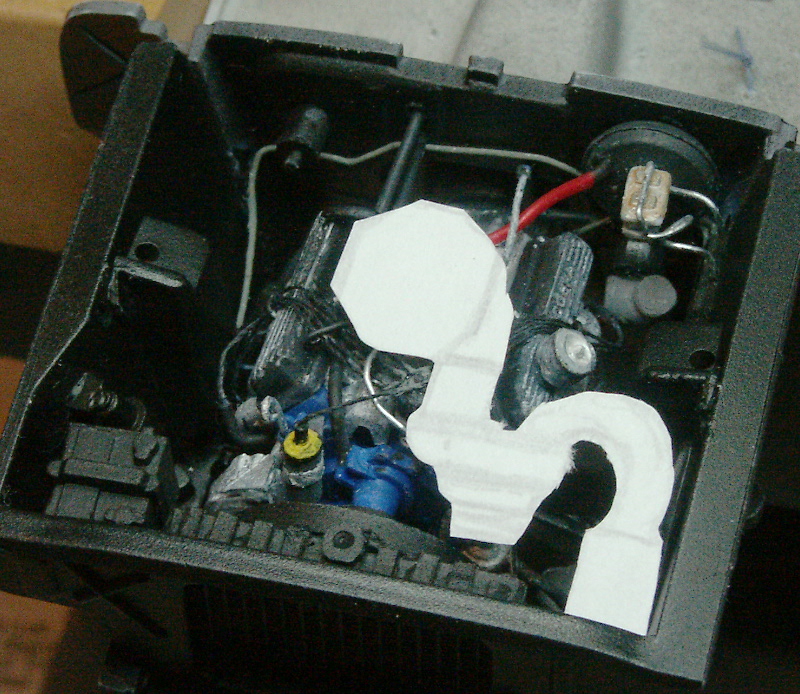
After cutting up an old ballpoint pen, and gluing some sheet styrene the form is there. Intake box, compressor, and the tube back to the (missing) airbox. The white ring laying on the left side is the accessory drive pully for the supercharger. Will glue on the front of the crankshaft pully.
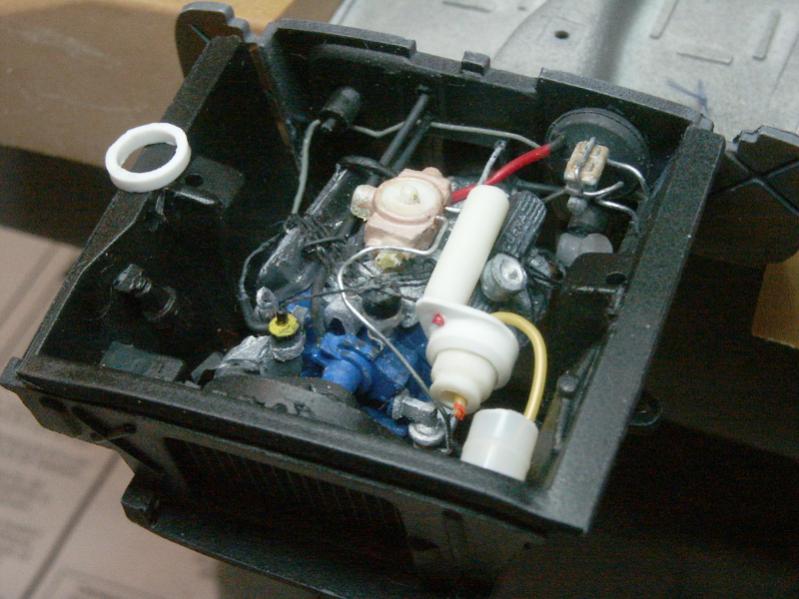
A quickie carved wooden guestimate of the airbox. Easy to see how to adjust from here while building the plastic part. Also note the tensioner pully and arm reaching above and across the fan pully.
And a full test fit. The airbox will be trimmed with a knife, and then used as an armature for Milliput to get the final smooth shaping.
Note the heater hoses have been removed from their original "clean" straight back installation, and routed outboard of the engine, to allow the airbox to seat more tightly against the intake manifold. Probably more correct than the straight run was, too. I also had to remove the metal fuel line, and route it along the same path as the heater hoses, and it makes a change from metal tubing to rubber hose for the final seal into the airbox. Brake boost vacuum line was also re-routed above the now lowered throttle linkages.
Everything seems to have decent clearance beneath when test fitted under hood, too. Monte Carlo bar was reshaped as shown.
Up next, Milliput the airbox! Then wait for a nice (not cold and rainy) day to prime, paint, and fine detail the new parts. In the mean time I will try some detailing on the battery, starter solenoid, and basic electrical detailing. And maybe cut out that other door.
-
14th April 2014, 20:54
#13
Re: AMT Shelby GT350 build
Sooooo, how long have you been mad?
Takes me back a few years to my building days, nothing like the level you have going on here, but its great to see.
-
15th April 2014, 07:43
#14
Re: AMT Shelby GT350 build
Hahah! What really drives me mad is dropping tiny parts I've made. You could probably build an entire model out of the many tiny parts I've dropped while working on my various model projects over the past few years... IF you could find them! 
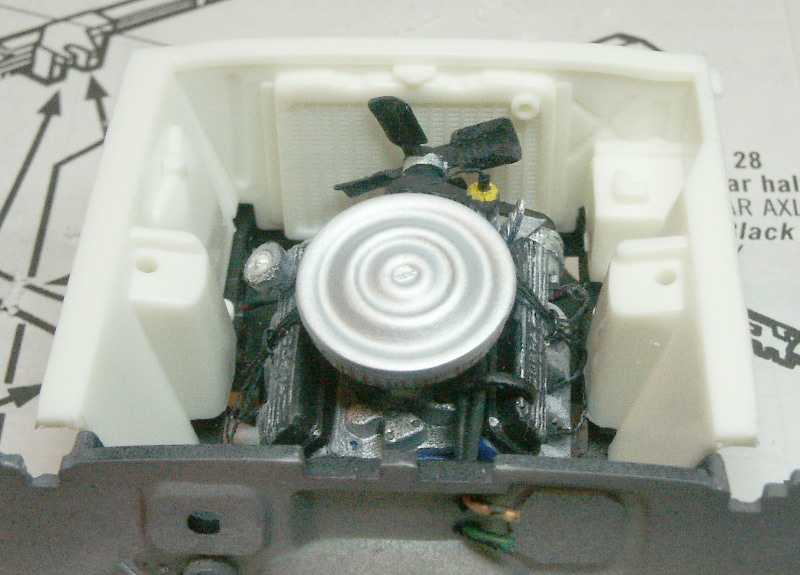
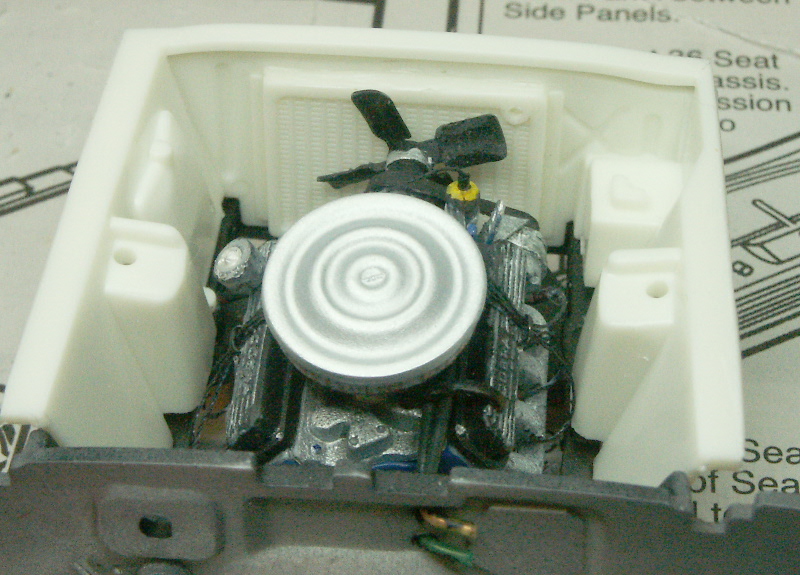
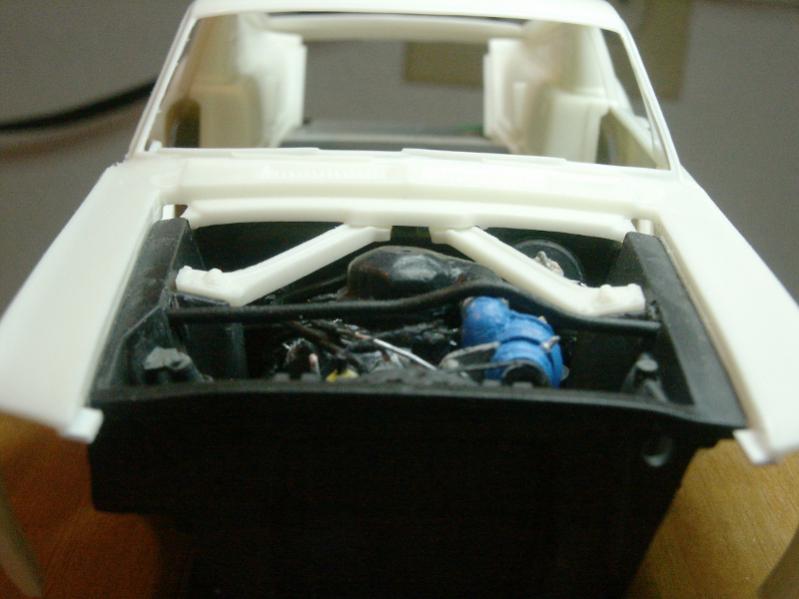
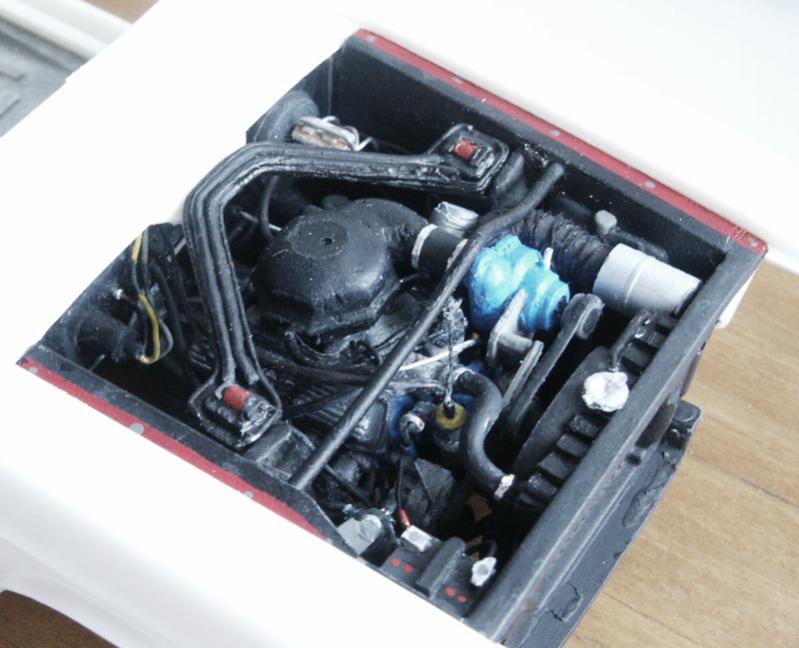
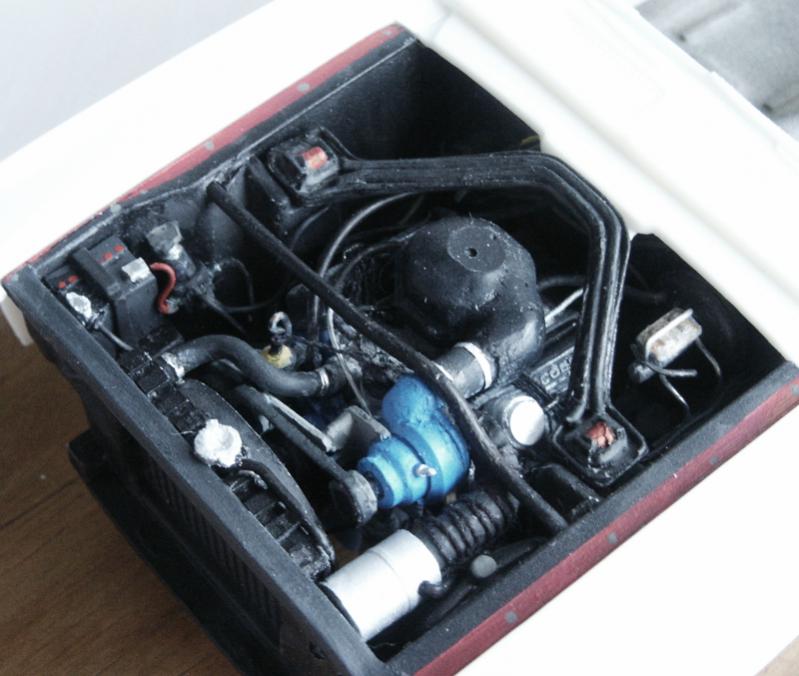
Progress this week was mostly sculpting the supercharger airbox from Milliput, detailing it, plus some work on the fenderwells and bracing.
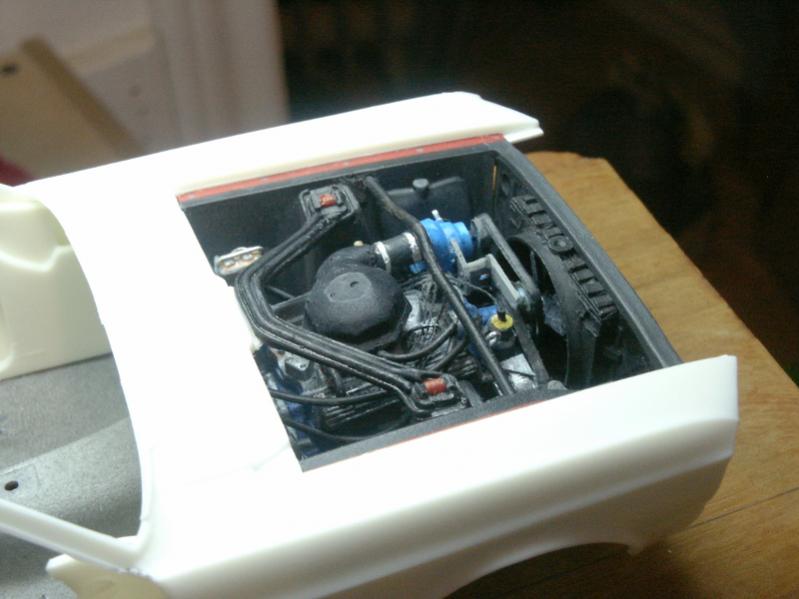
NOTE: The interior of the engine compartment has been drybrushed for some variety and detail. Due to the stretched contrast of some of my photos (so details aren't lost in black/white) the effect may appear excessive. It's actually quite subtle in person. Plus, my fluorescent ring lamp makes everything look flat and crummy compared to reality, IMO. I will have to attempt some better lit shots later.
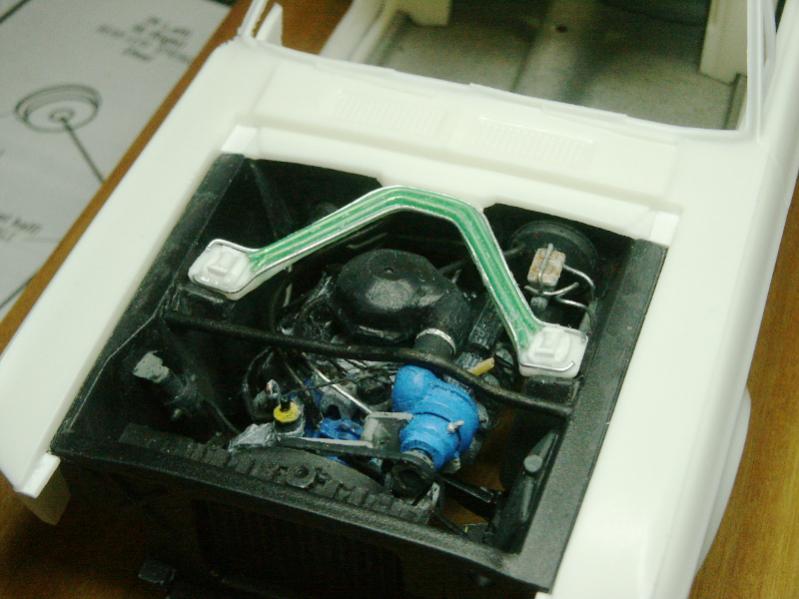
First, the Milliput airbox, ready for sanding.
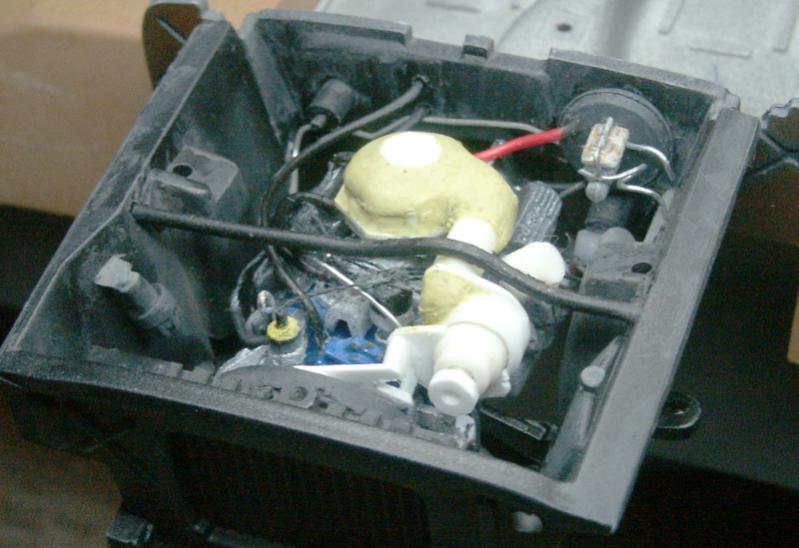
And after sanding, priming, and painting. Accessory belt was created same as the previous, from masking tape soaked in superglue. Also test fitted in this photo are the braces included in the kit. They are the split braces, as found on US Mustangs (or so I read). The Shelby units appear to have been fitted with the "export brace" which is both one piece, and has two folded creases for strength.
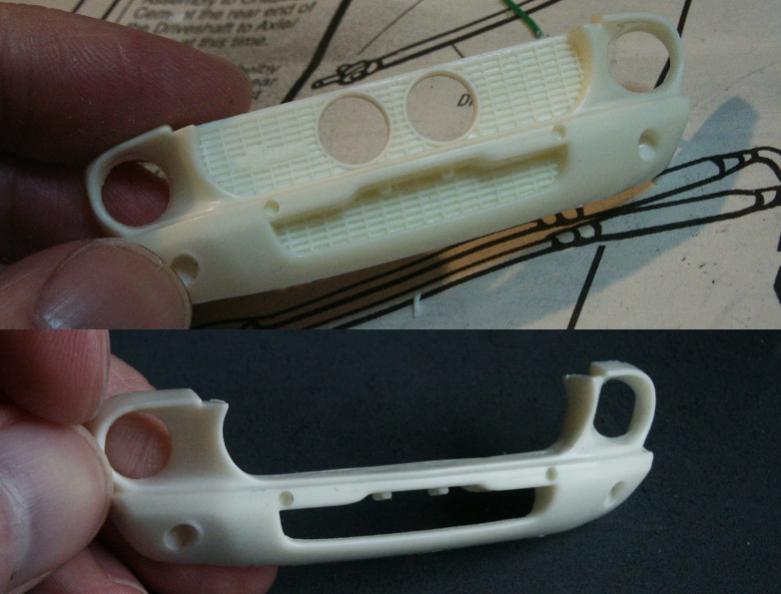
The stock parts are flat and also super thick! See those holes for the useless hood "hinge" pins, those are filled in later photos with sheet styrene, flush with the rest of the fender wells.
My attempt at a scratch re-build of this part. Details are shaped wire of two sizes to recreate the metal pressing, glued on plastic. Also new modeled shock mounts.
And all together, test fitted and detailed. I'm not fully satisfied, but it will work. Note that there is also some painted red metal work from the (still unpainted) fender reaching over under the hood, with it's fasteners.
Also you can see the power cable leaving the starter solenoid, and connecting (out of sight in this photo) to the starter.
Rear aspect shot.
So... the new brace will be glued after the body and chassis are permanently joined. It sits atop both for stability, and I didn't want to cut the rear most hood support away from the body, to ensure easy body/chassis alignment later on. Easy enough.
Next week, I'm hoping to model a few bits of the ignition wiring harness leading to the starter solenoid, blower motor, and alternator.
-
16th April 2014, 05:47
#15
-
16th April 2014, 18:48
#16
Re: AMT Shelby GT350 build
Thanks, Blowhard.
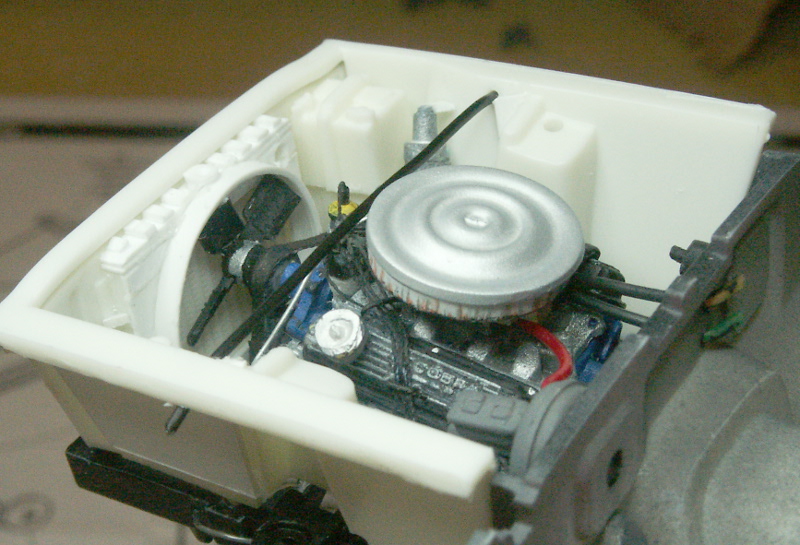
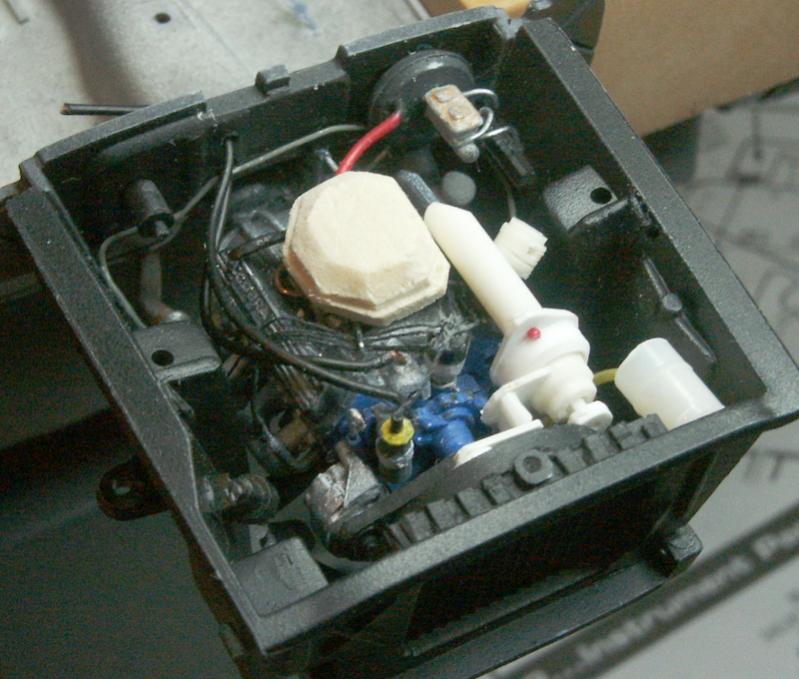
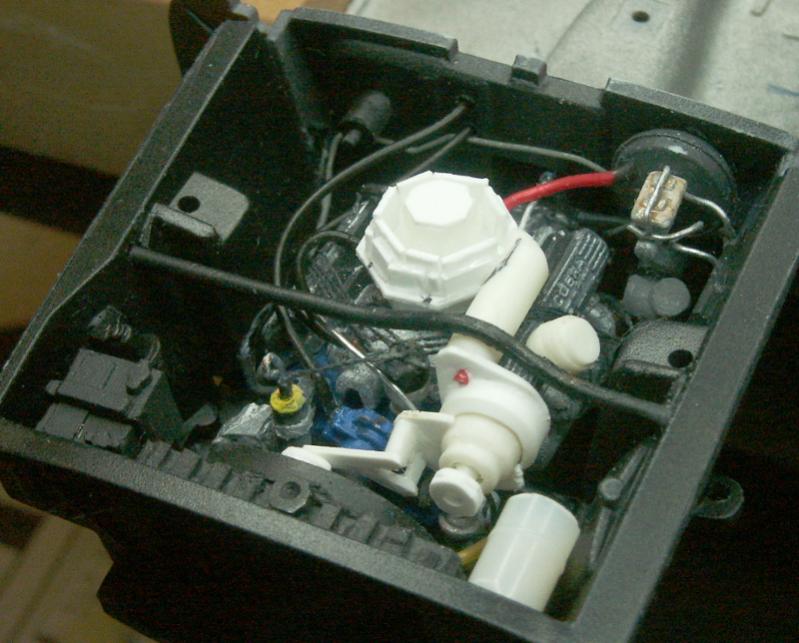
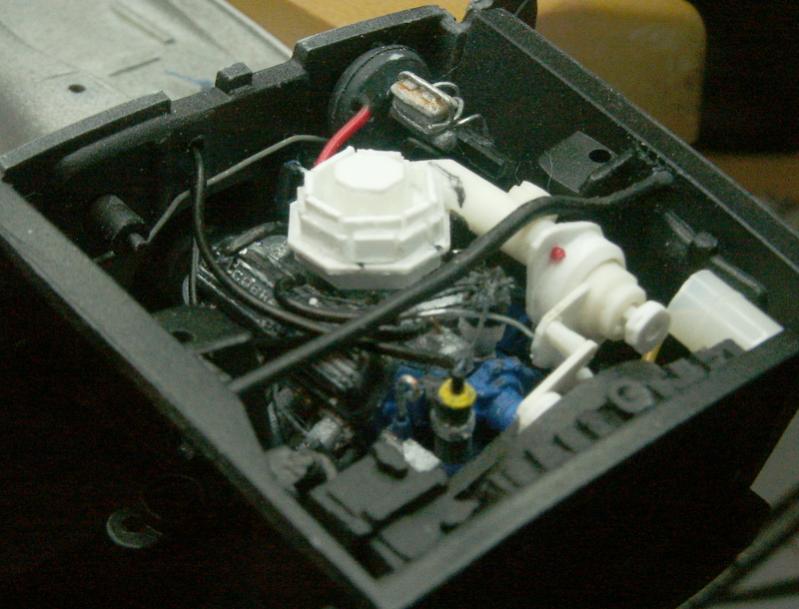
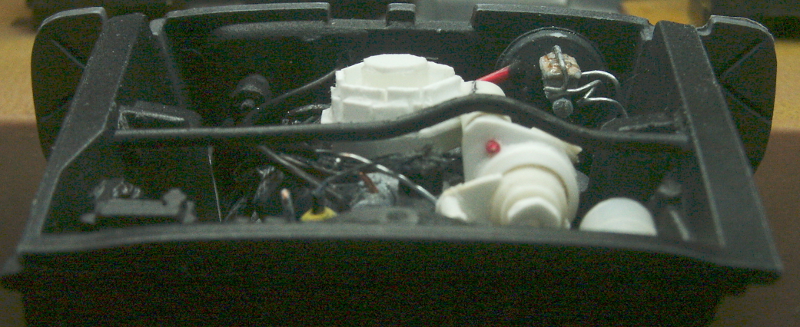
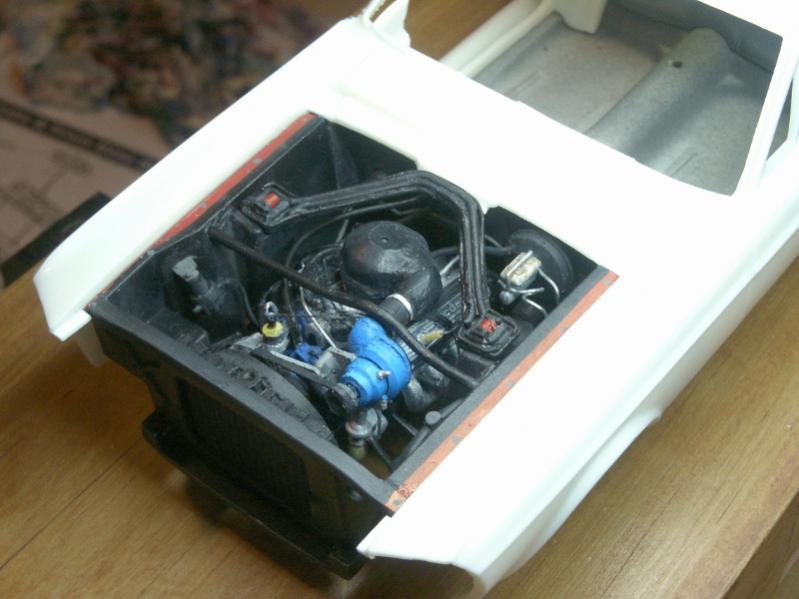
Still a bit more to go under the hood. Some wiring, the battery, starter solenoid stuff. Also had time to install the windshield washer fluid pump and line. Plus the air filter can and flexible hose leading into the supercharger compressor. These are made, but not yet assembled.
I'm also to the point that I need to guarantee a good fit between these parts and a scratch built hood hinge.
Last edited by adlabs6; 16th April 2014 at 18:51.
-
21st April 2014, 19:59
#17
Re: AMT Shelby GT350 build
This past week I've been working on finishing up a few smaller things, and thinking ahead to some problems like making the hinges and such. I've also made a list of things I want to try, and bought the parts/materials to do them. Items purchased include:
1/16th inch K&S Brass rod (for hinges)
1/8th inch Evergreen styrene tubing (for hinges, brass rod will pass through this tubing)
K&S .030 clear plastic sheet (for scratch building new thinner windows)
Testors Contour Putty (lots of body work to get a clean fit)
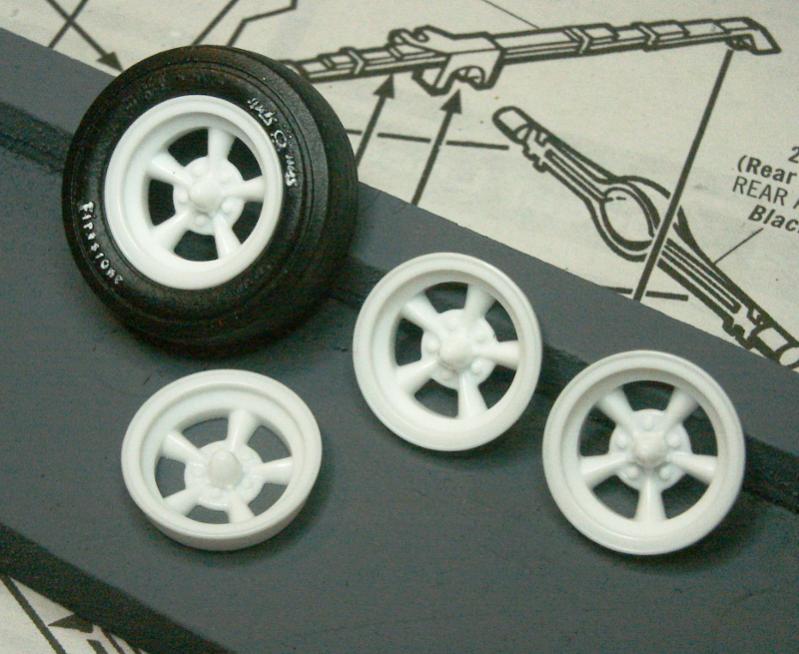
Scenes Unlimited white resin Torque Thrust wheels (my favorite mag wheel, see pics below)
Bare Metal Foil (instead of silver paint on the chrome trim)
Detail Master rectangular photo etch grille (see cutaway pics below)
Detail Master white velour flocking (interior carpeting, to be airbrushed to desired color)
Vallejo satin varnish (to get an even surfacing here and there)
So including the kit and the Vallejo paints I bought to start, I'm right at $100 spent on this one. Not what I had in mind when I started, ouch. 
So now some pics of the last week.
Drivers side fender well details, windshield washer pump and plumbing, plus electrical to the front. All but invisible once installed, but hey...
Here are the unpainted white resin wheels. I was really pleased with the detail on these!
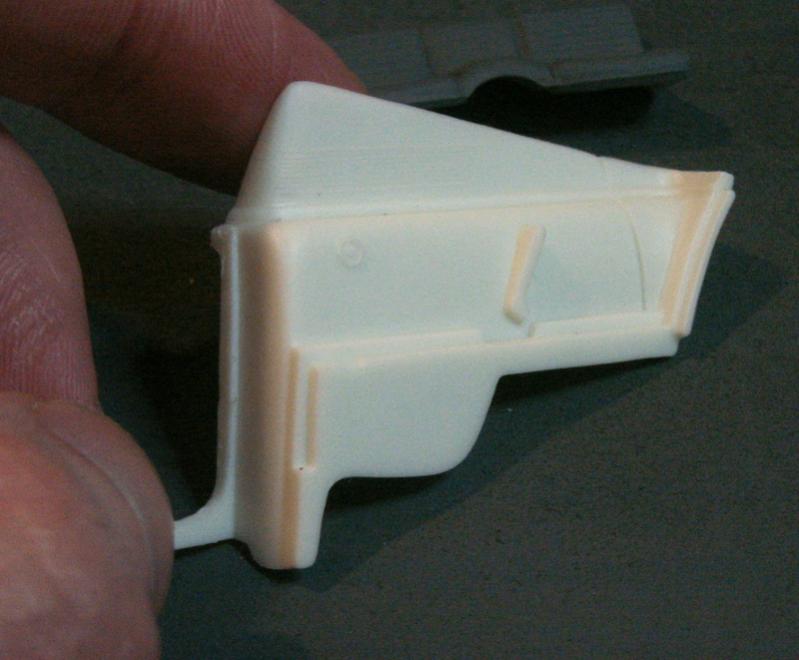
I was not too happy to see how poorly the nose cowl fits to the body molding. Some huge holes (too big to even be called gaps!), hence the filler putty. No idea how the rear cowl will fit yet.
Some final details under the hood. Here you can see the blower motor wiring (and maybe the main electrical leads coming down to the starter solenoid). Also the air filter can and it's flexible hose are in place. Radiator cap and overflow line. Radiator hose and clamps.
From the other side. Just a few paint touch ups left. Yes... I will use the anti-static brush to get rid of the plastic shavings!
Stock grille molded into the cowling. I cut it out (preserving the Shelby badge) and will replace it with the Detail Master rectangular grille.
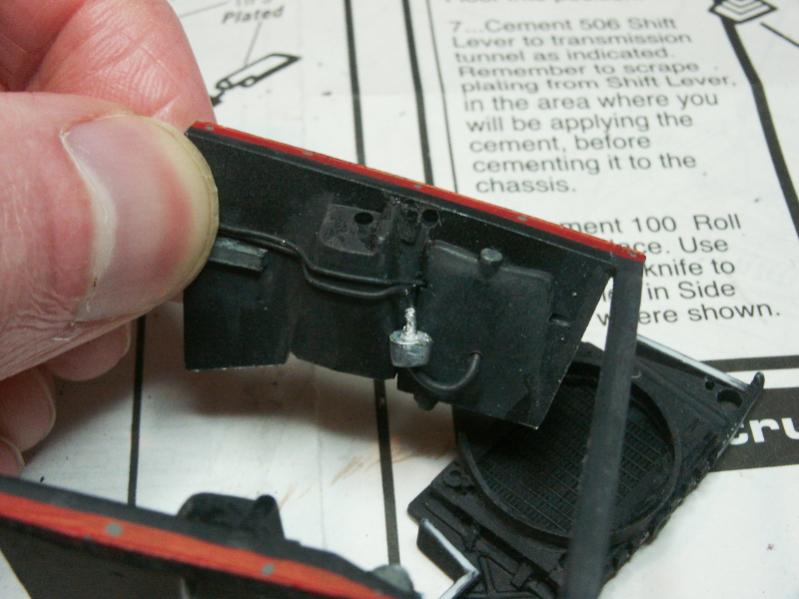
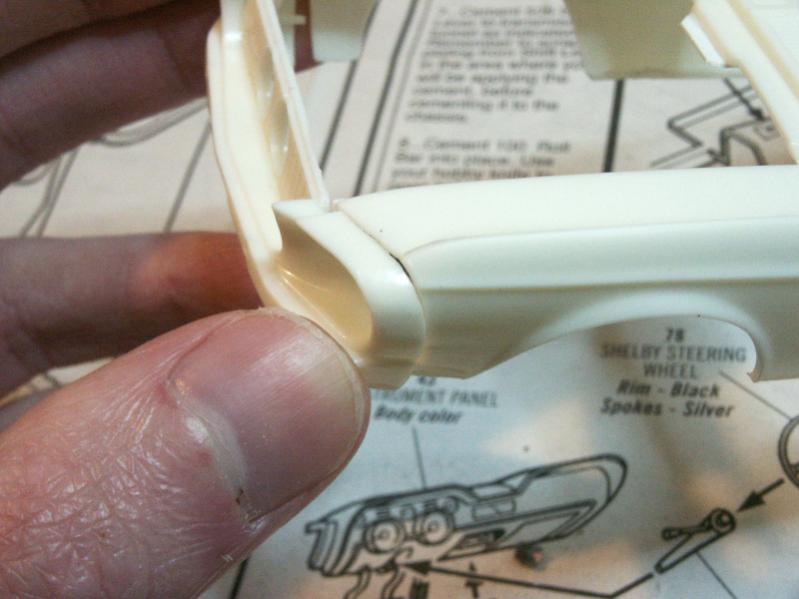
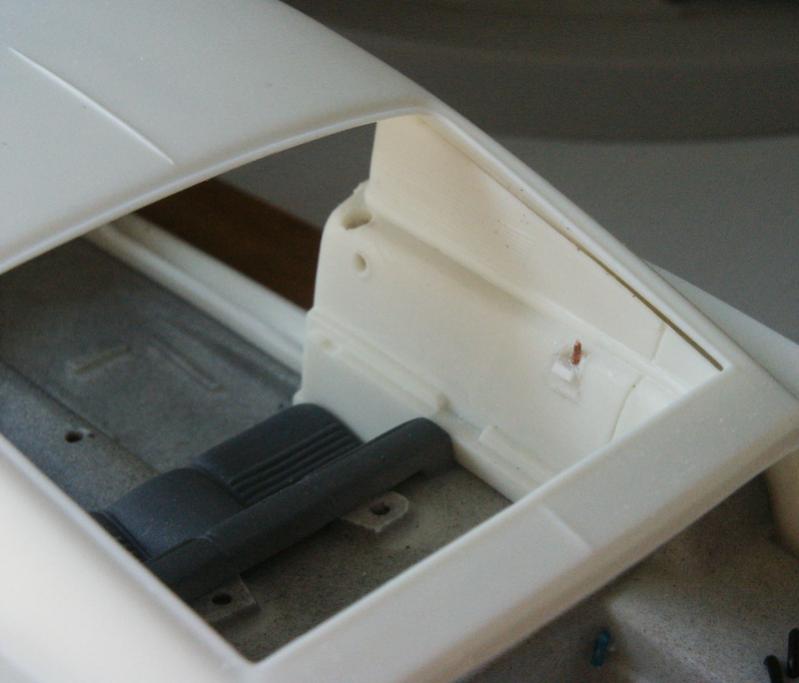
Coming next I must pay attention to the hinges. They play into the engine compartment and the interior, so I need to get them in the right place and finalized, along with door jambs. Here, the stock molding for the interior sidewalls.
I chose to drill out the courtesy lights, drilled a through hole for the roll bar. I've decided to model the "mandatory optional" fold down seat in it's folded position. So I scraped off the molded in supports for the seat back, and crafted the latch mechanism using some styrene and copper wire.
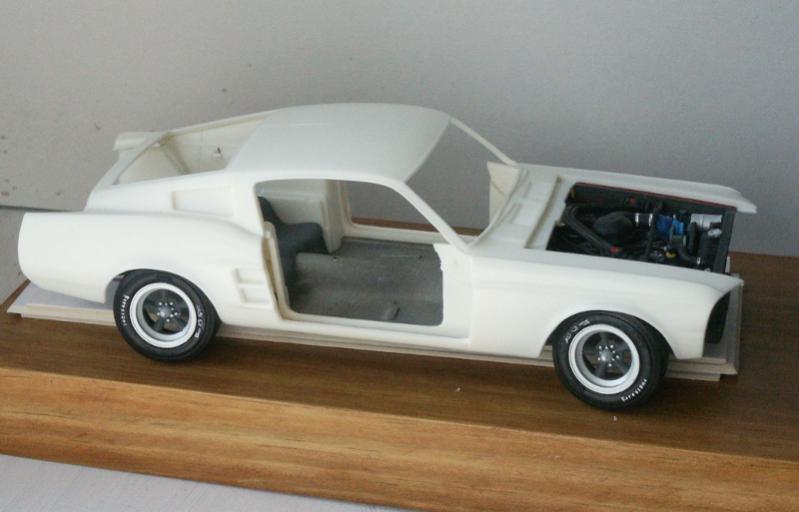
Here is the body with the painted resin wheels in place. I have always liked the Torque Thrusts, I think they'll look great on this car. Also see driver's door is cut out now.
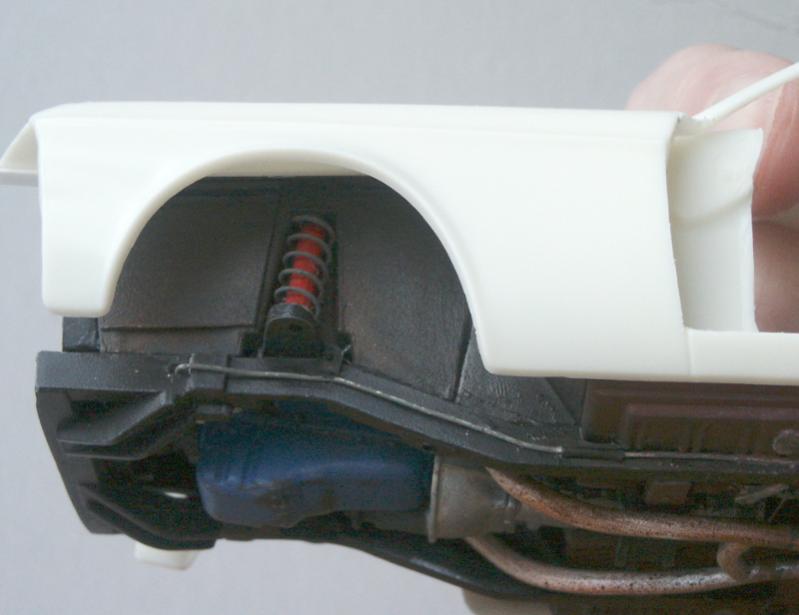
A shot of the coil springs and shocks I made to replace the stock "all in once piece" molded part. Spring is from a junk ballpoint pen.
-
21st April 2014, 23:27
#18
-
22nd April 2014, 19:29
#19
Re: AMT Shelby GT350 build
LOL, well yes... heat has made a bit of the paint has fade from the pipes. But it's a sign of lots of fun, right?

-
24th April 2014, 00:32
#20
Re: AMT Shelby GT350 build
Bloody brilliant to watch the evolution, I love these step by step narrations.
 Posting Permissions
- You may not post new threads
- You may not post replies
- You may not post attachments
- You may not edit your posts
-
Forum Rules


 Reply With Quote


