-
30th October 2014, 06:03
#71
Re: AMT Shelby GT350 build
Yes, you can get or build a small tabletop sized booth with a powered externally vented fan that would do the best job. My work area isn't set up for something like this, however.
Having seen how easily and quickly this can occur, and without even being obvious it's happening, IMO either a quality external vented booth or simply spraying outdoors is all I would trust.
-
5th November 2014, 00:59
#72
-
7th December 2014, 21:29
#73
Re: AMT Shelby GT350 build
Now it's beginning to catch my attention! ;-)
-
8th December 2014, 22:01
#74
Re: AMT Shelby GT350 build
Thanks, gamary. 
A brief update... Many distractions have kept me away from this, but there is some progress. I have done a bit of wet sanding on the red (which will get a thin overcoat of a brighter, richer paint later), and the results look quite smooth.
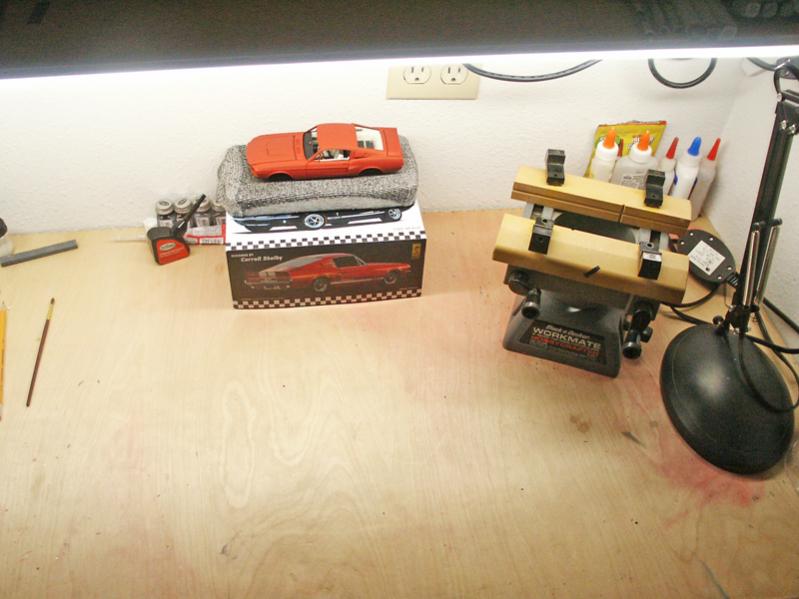
Also some progress on my work area updates, new LED lighting!
-
9th December 2014, 04:54
#75
Re: AMT Shelby GT350 build
NICE!!! How clean is that work bench? Too clean 
 FAST AND BULBOUS!
-
23rd February 2015, 20:15
#76
Re: AMT Shelby GT350 build
Time to catch up this thread on my progress.
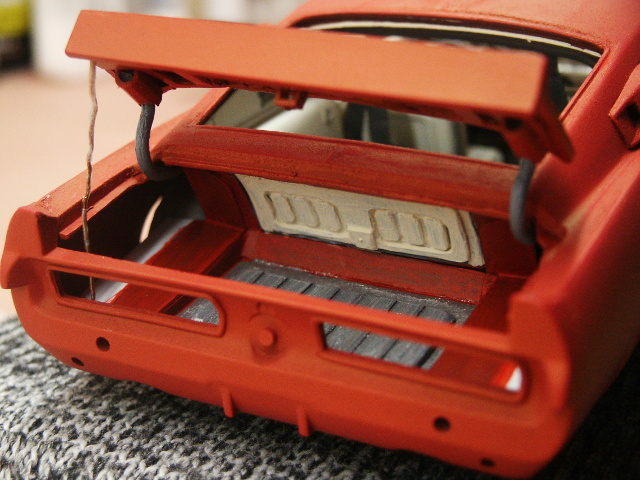
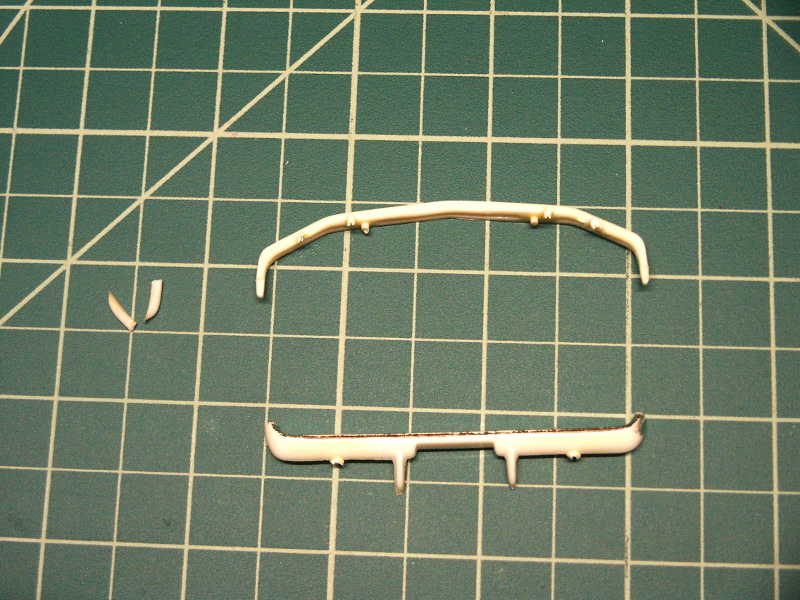
No way to spray enamel primer in these tiny spots, so I brushed the primers on. A bit of dry brushed silver and gray on top of the gas tank.
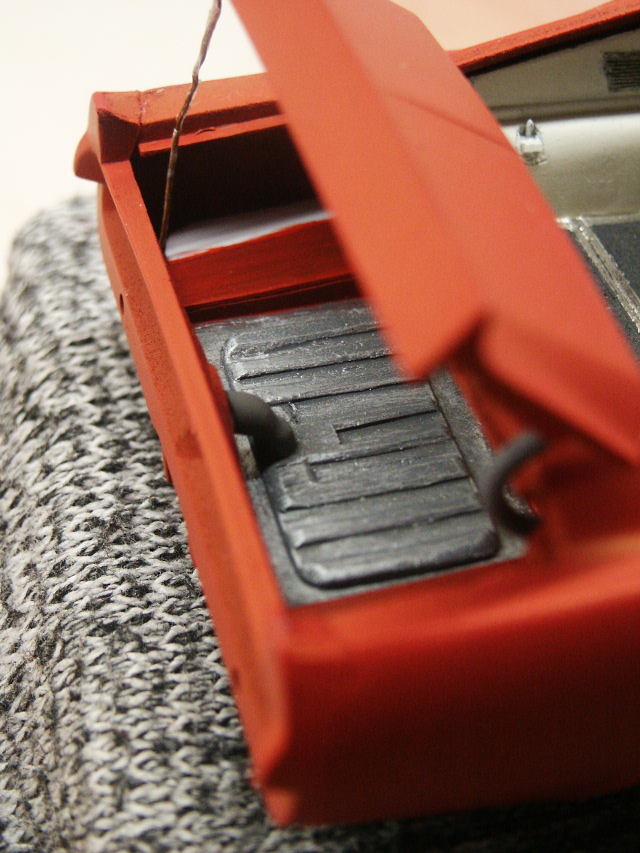
After taking these photos, I applied some Bare Metal foil for the piano hinge on the trunk access door, and for the locking plate in the center. I'll do some dark brown washes in the corners to add some weathering when I next get time to work on it.
The left and right walls of the trunk will be drop-in scratch built parts that are installed after the body is glued to the chassis. This way I can be certain that I don't make the body mounting much harder, and that the trunk hinges clear everything with the final placement.
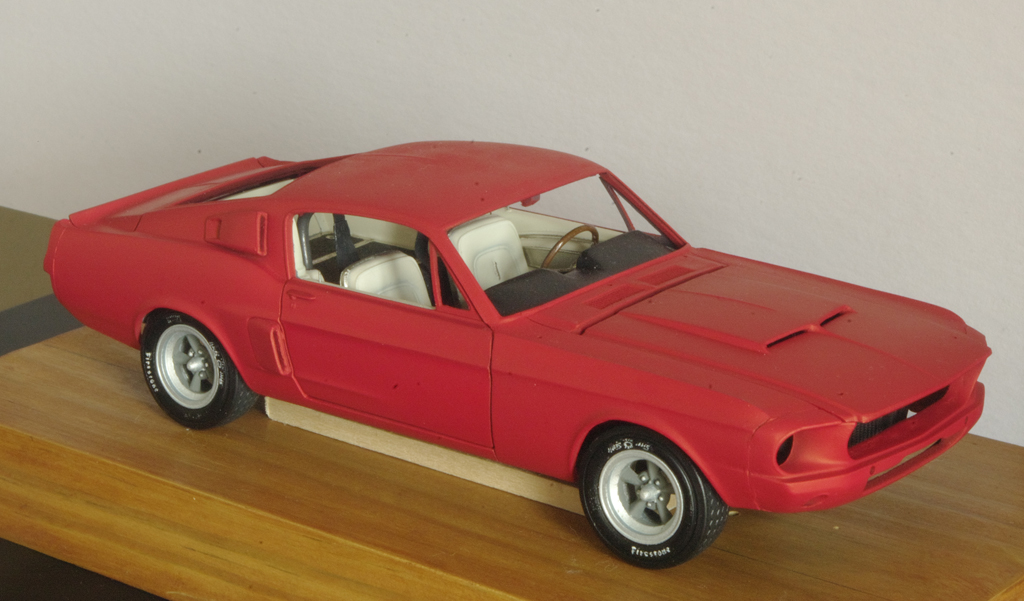
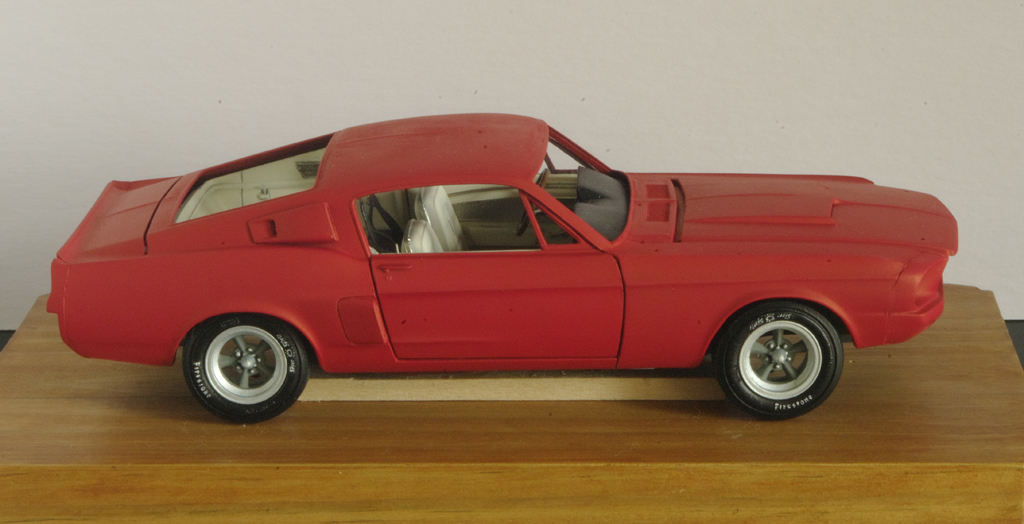
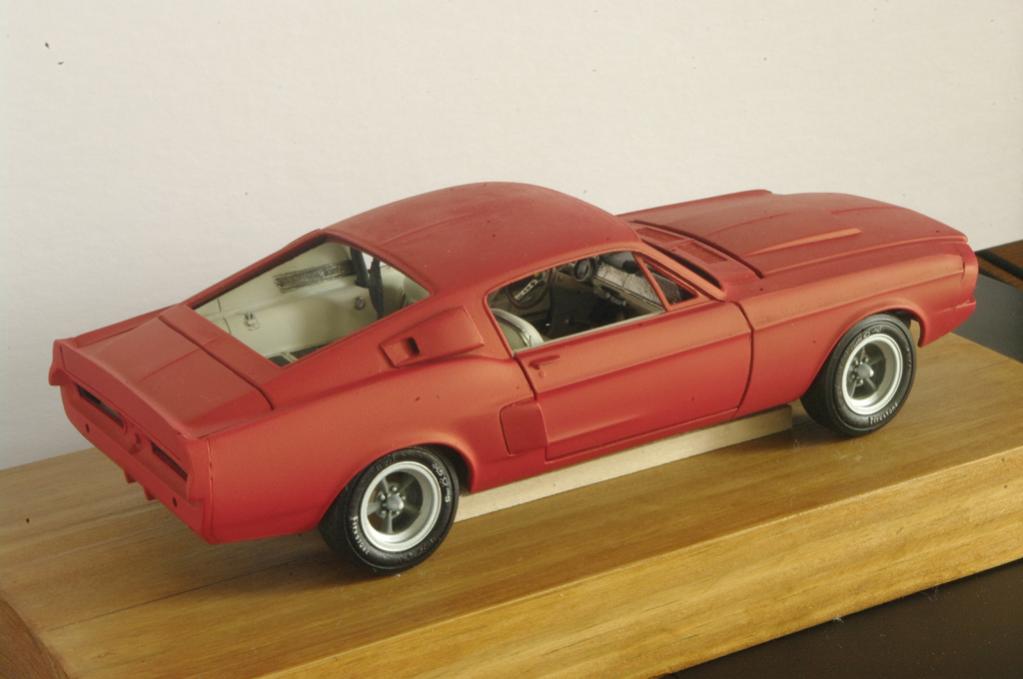
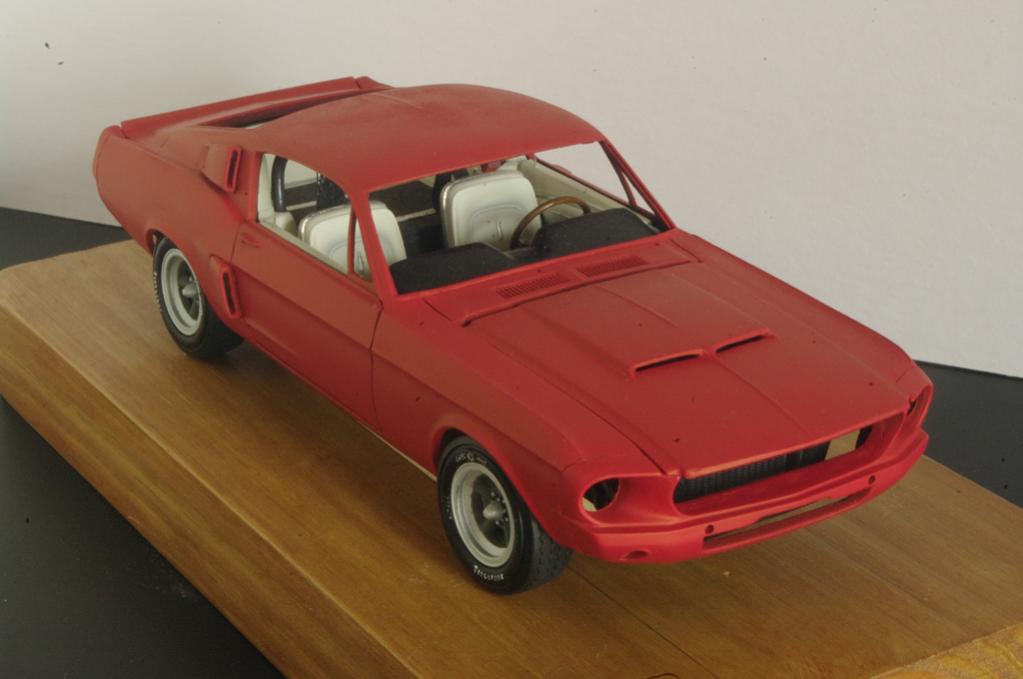
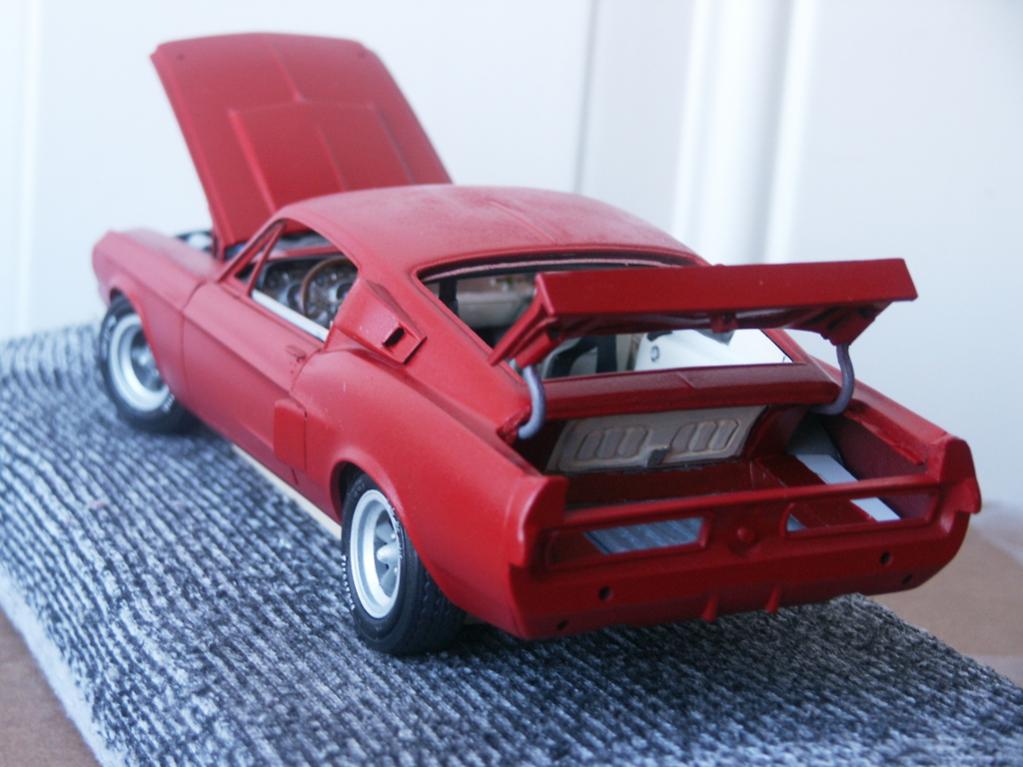
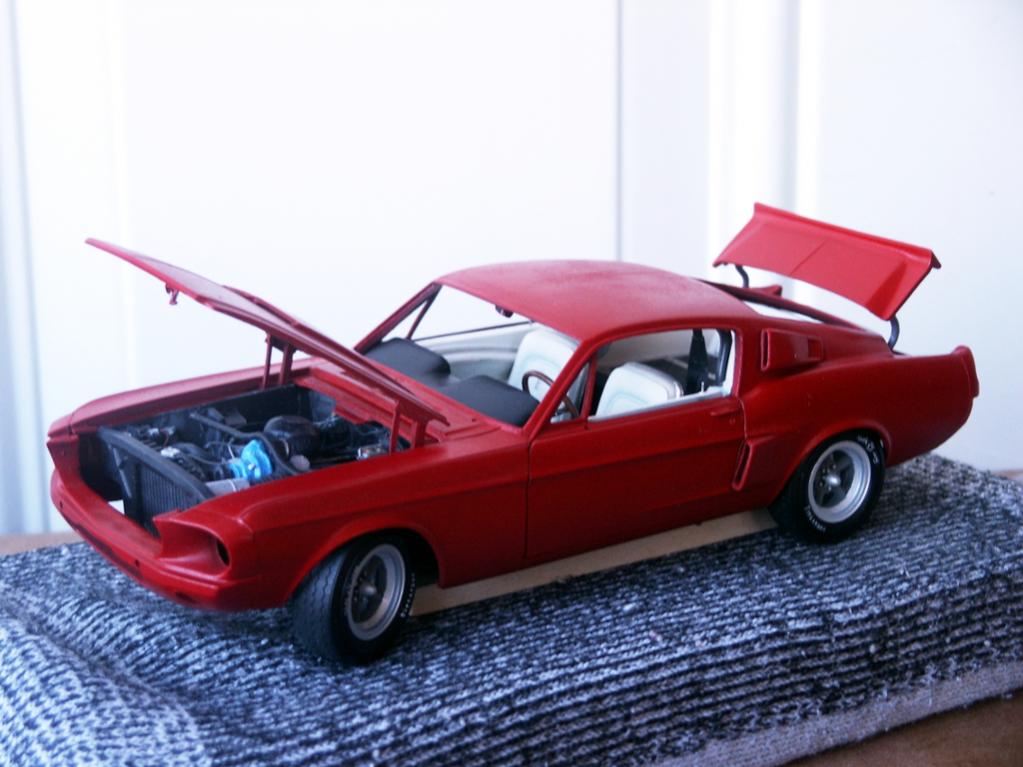
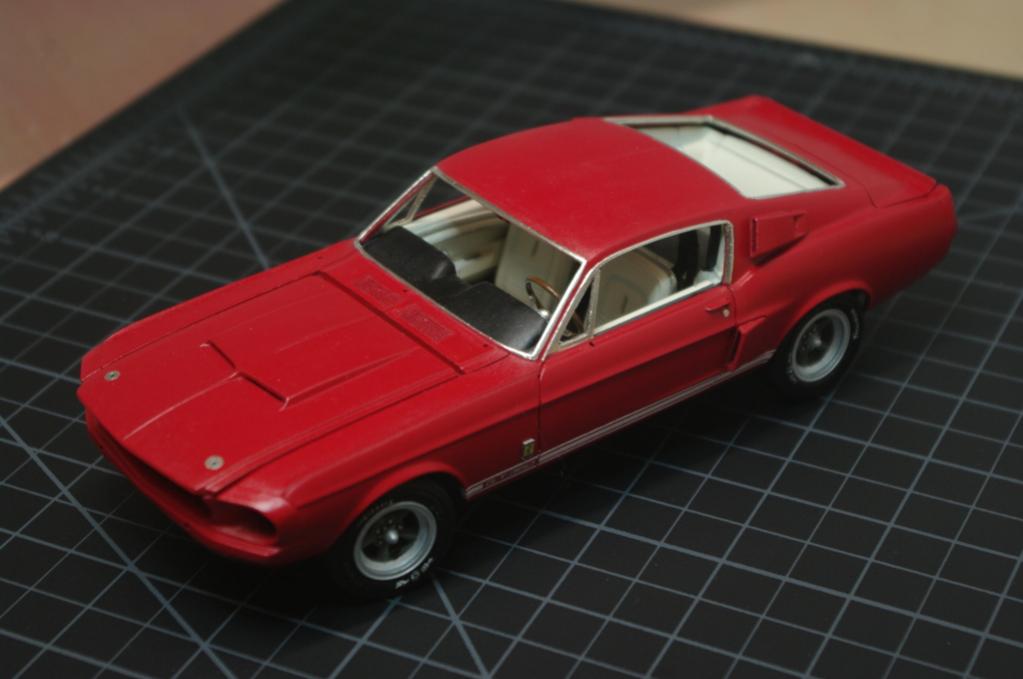
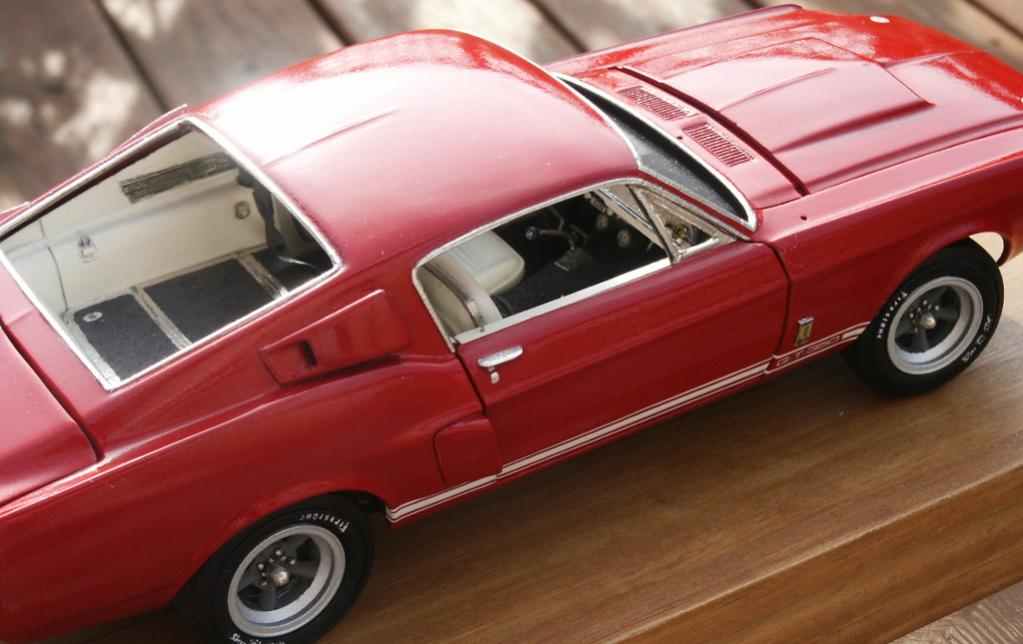
Making use of some of the warm weather this winter, I was able to airbrush a new red over the body. I did the airbrushing outdoors, in pleasant working conditions. The new red is a Badger brand opaque red. To my eye, it's a bit more magenta in the bottle, but dries quite neutral. I have used this paint for many projects in the past few years.
First I removed the body panels, and sprayed their closing/end panel surfaces. After that had dried, I assembled the body, secured it to a plastic bottle, and sprayed the entire thing together to ensure an even coat. This red looks "right" to my eye in person. Deep, tending toward a blacker red in the shadows. Quite neutral, not leaning visibly toward either orange or magenta.
Still a few flaws, but hey, I am a noob at this.
Here it is, with two tires set in place. After some detail elements, come springtime this should be ready for a glossy clear coat.
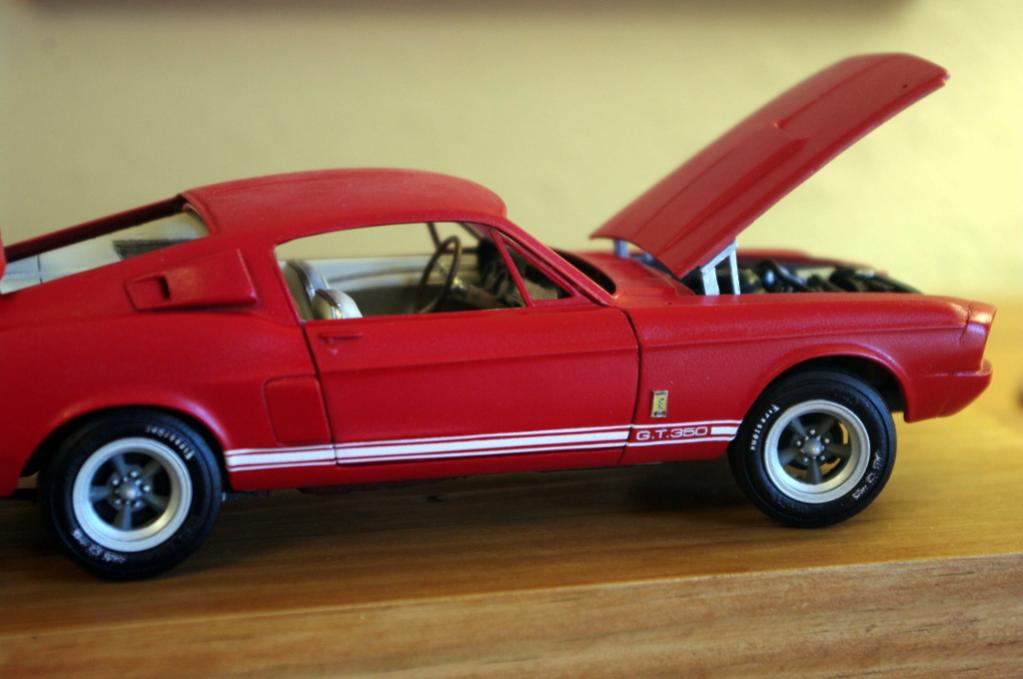
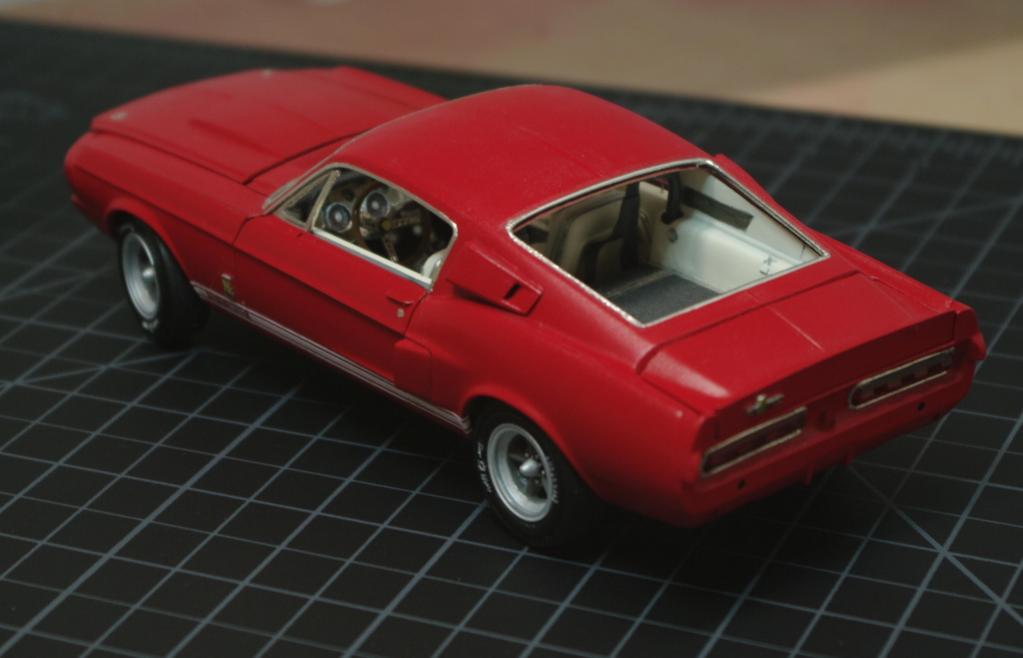
Further preparation for the clear coat... How to apply the side striping? The decal that came with the kit is way too small. Not even long enough to reach from wheel well to wheel well, and part of the lettering fell into the door gap!
First, I bought Tamiya masking tape and did some testing for masking and spraying the stripes, and ultimately didn't want to go down that path.
Instead, I chose some Great Planes Model Striping Tape. I measured, and the "GT 350" logo was 1/16th inch high, so I bought tape that wide. Thus, the center stripe is 1/16th wide, and for the upper and lower narrow stripes, I used a hobby knife to cut the 1/16th strip into 3rds, or about 1/50th of an inch.
Then, eyeballed the alignment using the lower edge of the doors as my starting guide. I left a gap on the front fender for the "GT 350" letters, which I cut from the decal sheet and applied.
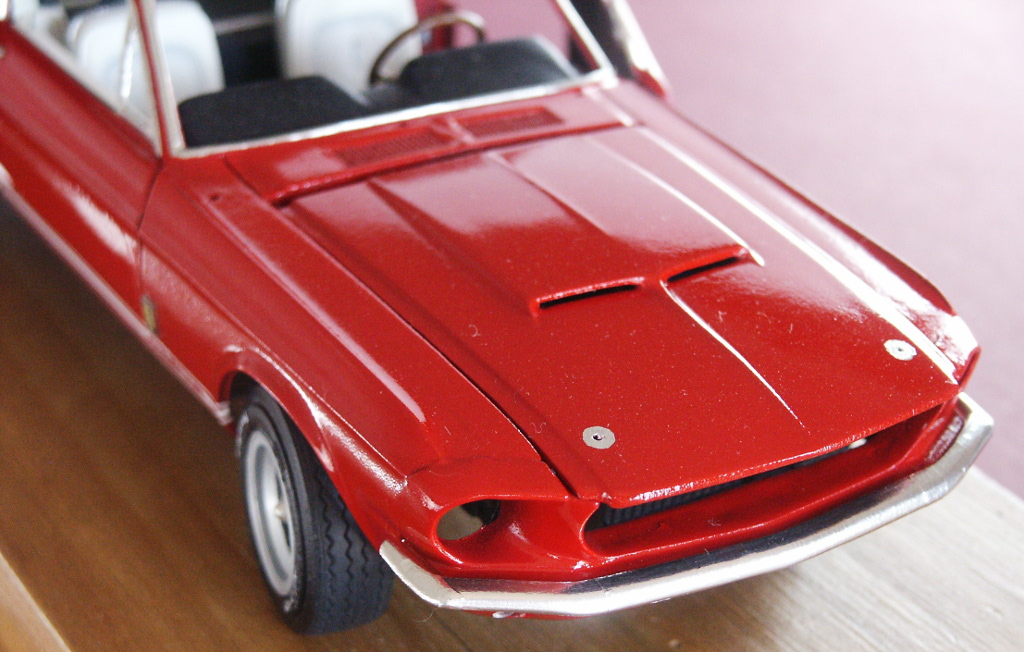
Then the fender emblems. These were made the same as the trunk, grille, and dash emblems shown earlier. A bit of styrene (.020) wrapped in bare metal foil, then used a 00 size brush to paint the details. Coated with a dab of gloss varnish to seal. After deciding on placement, I used a hobby knife to scrape a hole through the body paint and primer, down to the white plastic and use model cement to glue the emblems in place. Did the same on the trunk emblem.
Result is better than I expected the Great Planes Stripe Tape is pretty thin, and has a nice adhesive power on a clean glossy surface. I don't think I could have done as well using masking and spray.
Anyway, a few things left... Need to do a dark wash in the grilles ahead of the windshield. Probably will do the tiny metal foils for the key plates and hood pin latches, too, so the gloss coat protects those tiny parts. Then time for gloss spray overcoat when the weather permits. All details from there will go on top of the gloss coat.
Oh, and I finally used CA glue to attach the wheels to the suspension. Now the car can sit (delicately) on the suspension and wheels with no blocks underneath, while still letting me remove all those parts for easier handling while working. Those will likely be among the last things I do, gluing the suspension/wheel assemblies to the chassis.
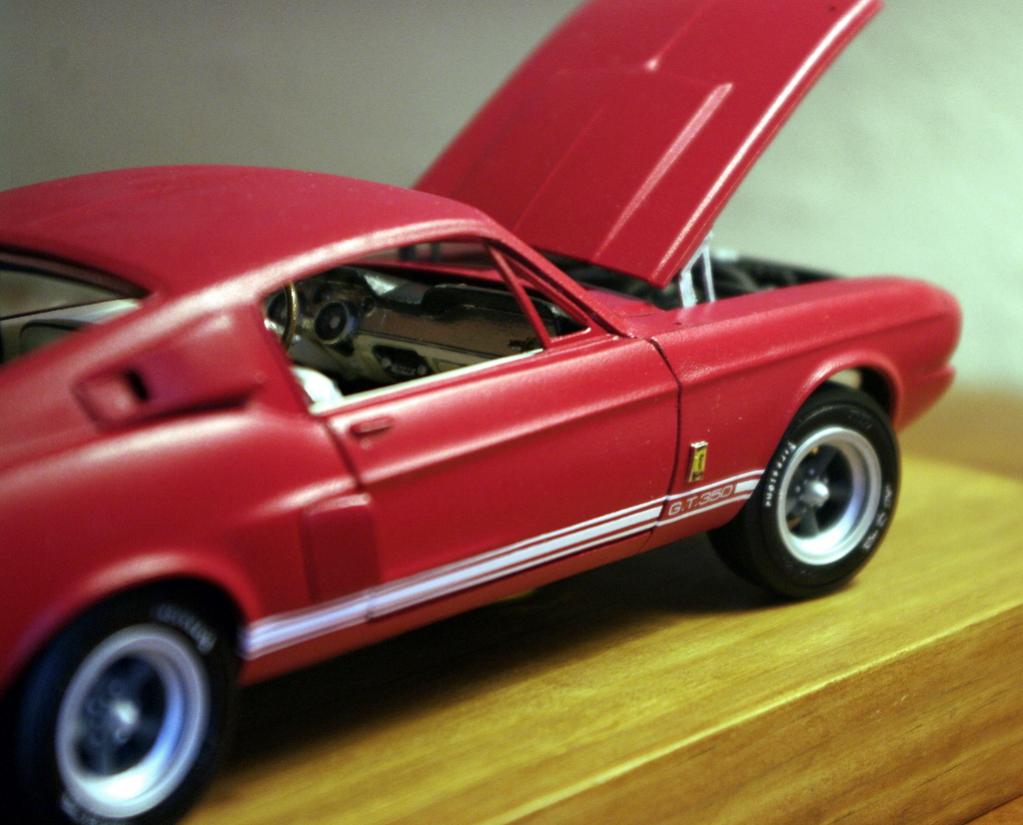
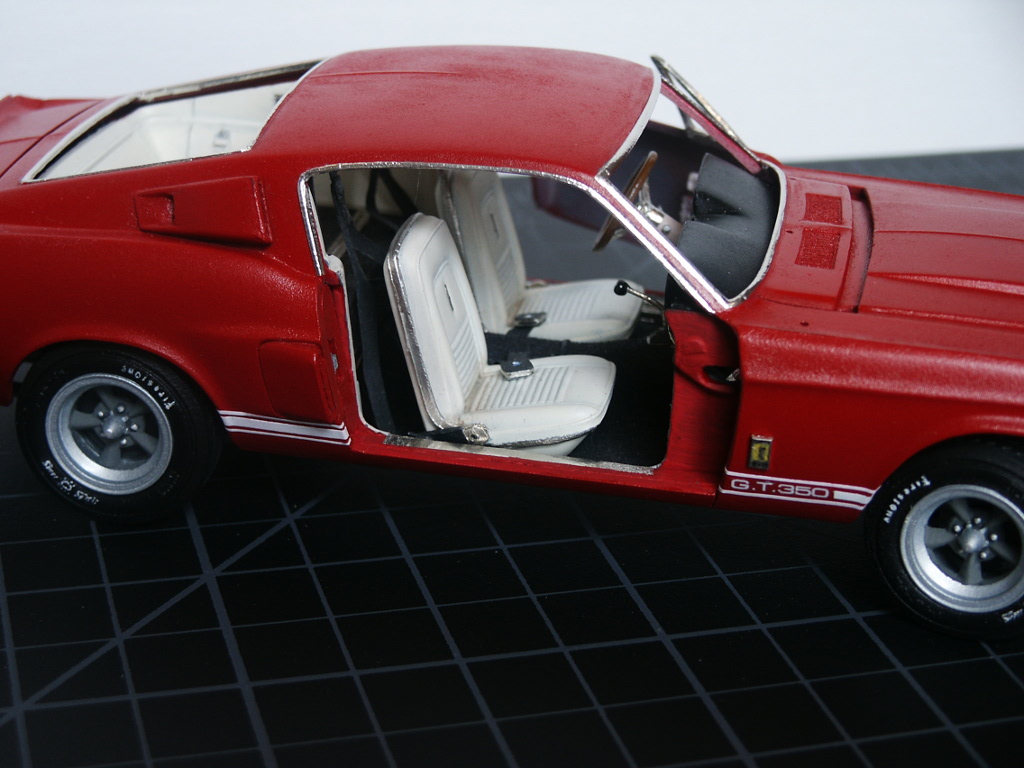
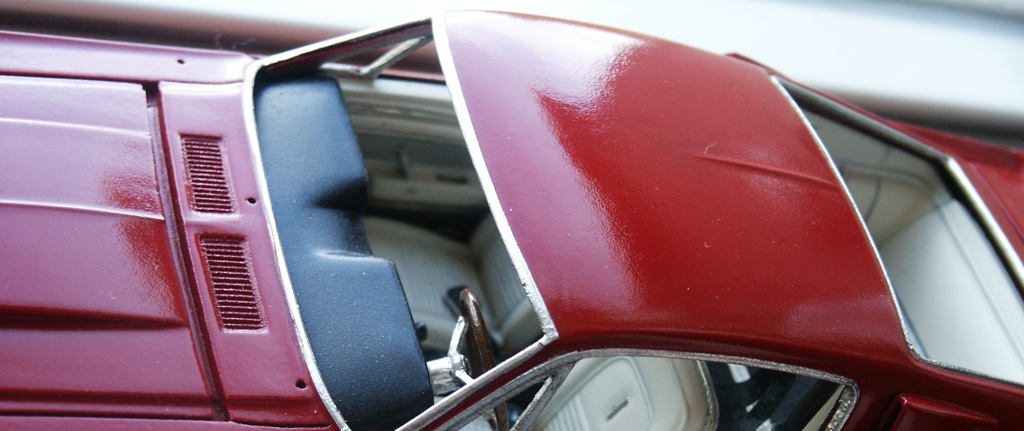
And finally, this weekend I tried some Bare Metal Foil on the window and tail light trim, plus a few little things like the keyholes and the hood pin plates. Most surfaces were sanded at 1000 grit before application to help keep the appearance as smooth as possible. I decided to go ahead and try to use the foil under the gloss coat. Even if the gloss coat slightly subdues the brilliance, it'll only help the scale effect, not to mention help hold the foil in place. The tiny pieces are prone to sliding on the model surface under finger pressure, sometimes.
Still need to do the door handles. I watched a guy on YouTube use the foil on bumpers, which I will try too. Plus I may as well do the gas fill cap, too. Foil went on pretty easily, about 10 to 20 minutes per window.
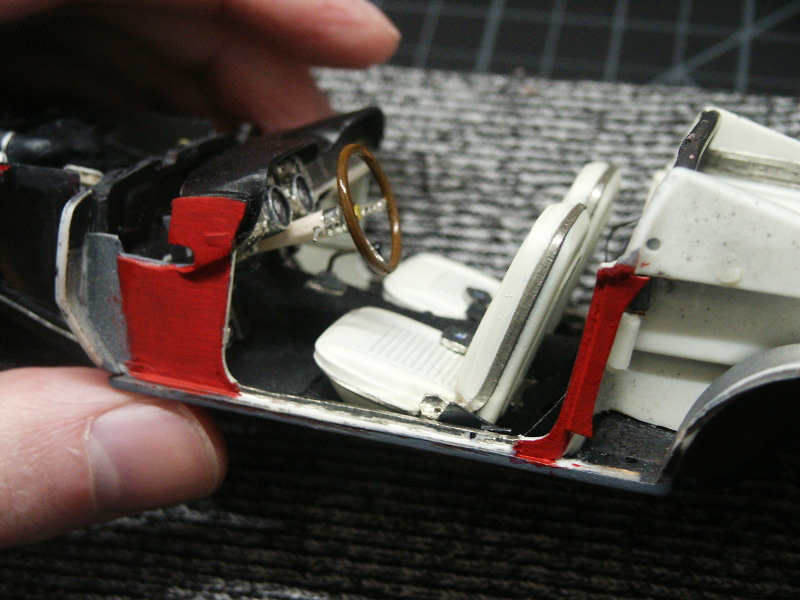
I do not like that big gap between the rear window and the rear interior sidewalls. I'm going to think of some way to close that up.
-
27th February 2015, 07:16
#77
Re: AMT Shelby GT350 build
FAST AND BULBOUS!
-
Re: AMT Shelby GT350 build
Another catch-up post on this build from the last 3 months.
I passed the 1 year anniversary since I started this build... Where does the time go?!
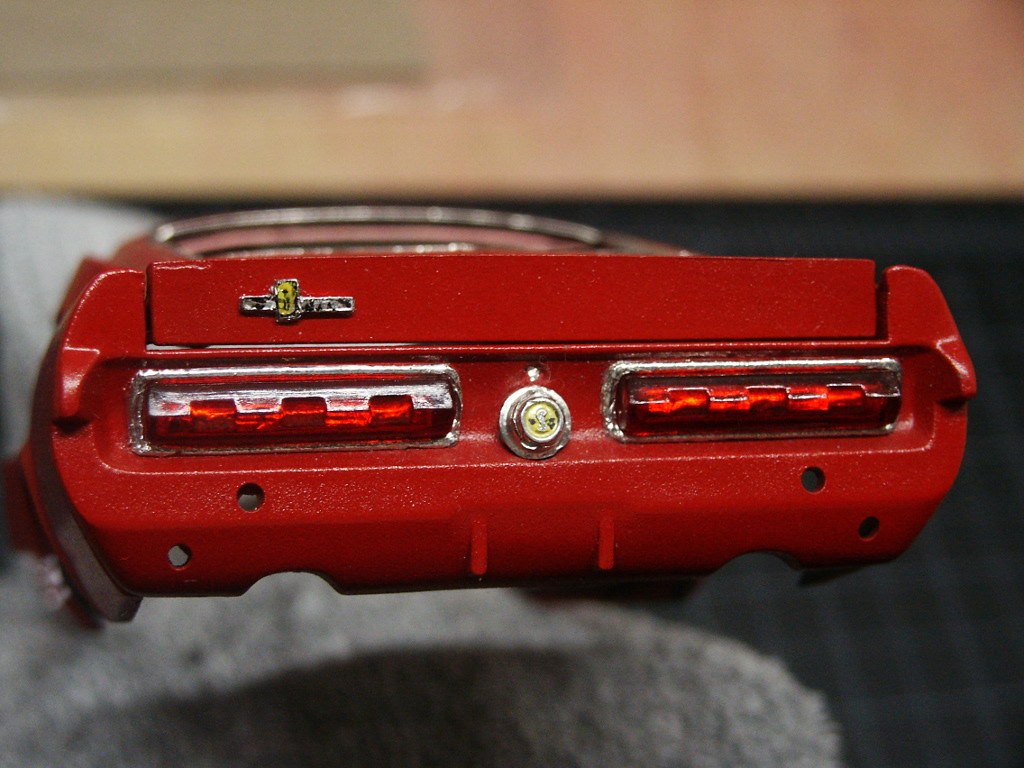
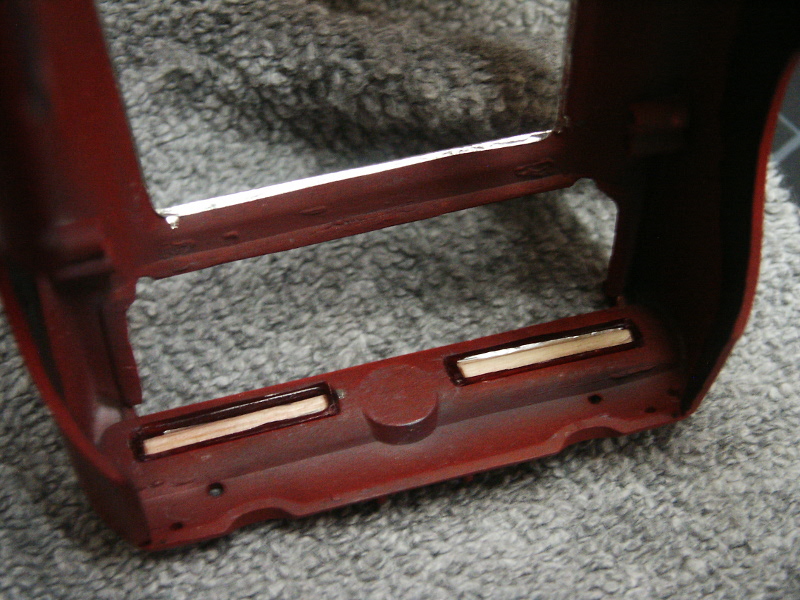
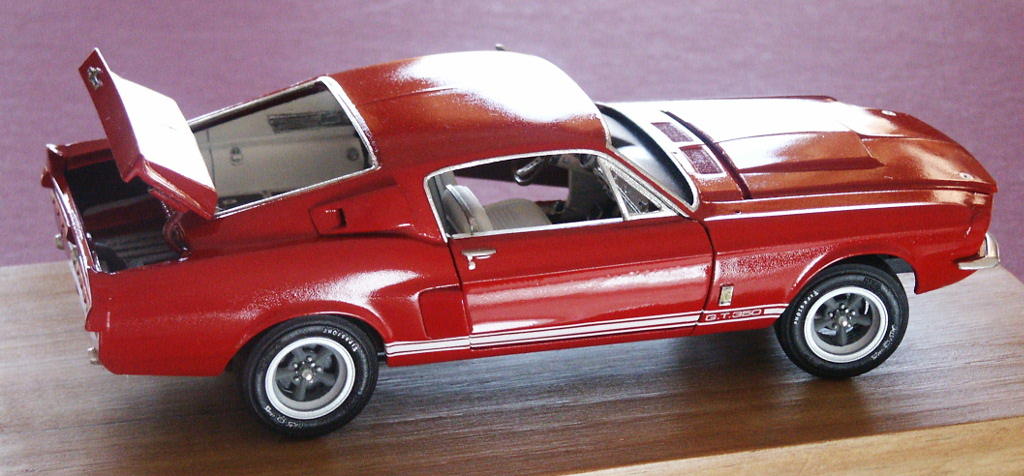
Some working on more chrome details. Did the door handles, key holes, around the tail lights, the gas cap, and the tail lights themselves. For the tail lights, I've lined the inside with plain aluminum foil from the kitchen, and held it in place with a bit of tiny wooden dowel. These will get a sheet of styrene glued to the rear to finalize the form.
The Bare Metal Foil applied easily enough to the gas cap, capturing the embossed snake in the molding. On top of the foil I painted in with yellow around the snake, and added some little dabs of black for the "Shelby Cobra GT350" lettering.
The dowels are visible here:
Here I continue painting the outside of the interior walls red so they look match the bodywork when the doors are open:
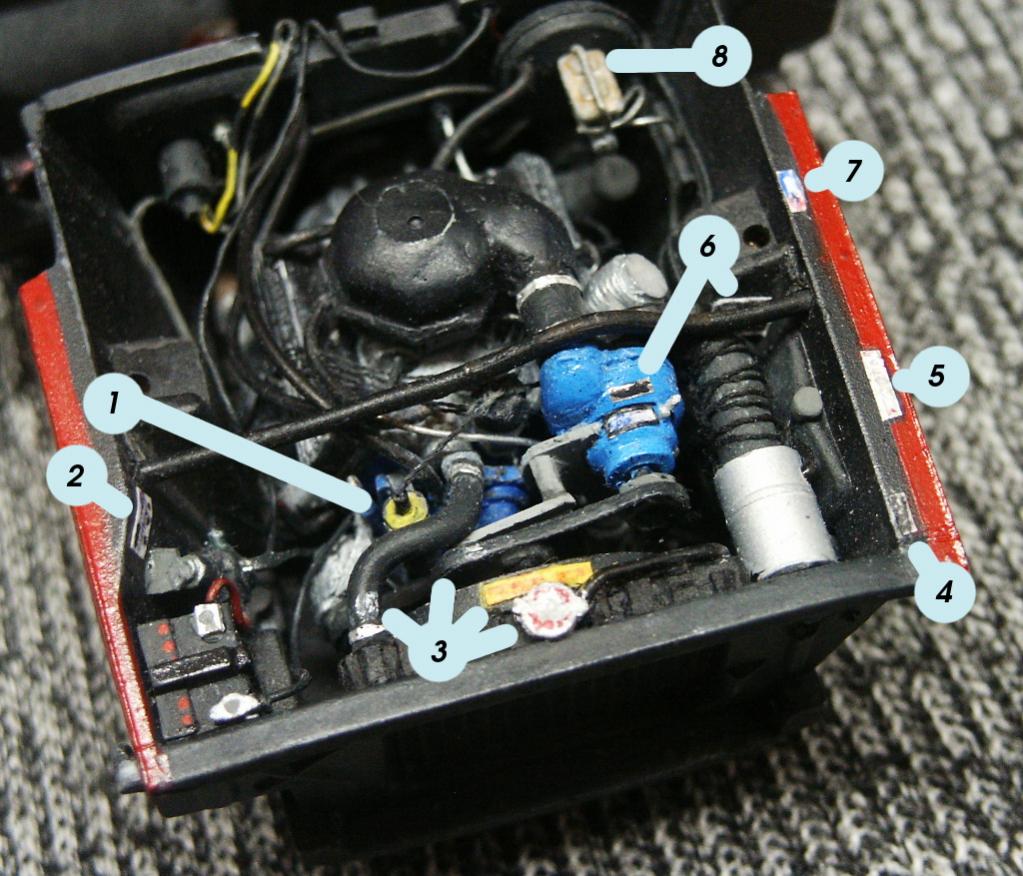
I also made a few labels and stickers for under the hood. These are made from plain paper, marked with acrylics and dots of technical pen, and a few bits of ballpoint pen. Glued in place with white glue and coated with a bit of satin acrylic varnish.
Labels:
1. Part label on side of ignition coil *(invisible in this pic, see it farther down the page)
2. Battery check log sticker.
3. Left to right: Markings on radiator hose, markings on supercharger belt, "Caution Fan" label, and radiator cap warnings.
4. Vehicle spec label.
5. VIN tag (made from Bare Metal Foil)
6. Left: Shelby American labels on Supercharger (still some touchup here), Right, Ford maintenance guide label.
7. Shelby American vehicle tag.
8. Washer fluid label (not there yet!!!)
Here you see the red paint from the interior elements blending with the exterior, plus the Bare Metal Foil threshold plate.
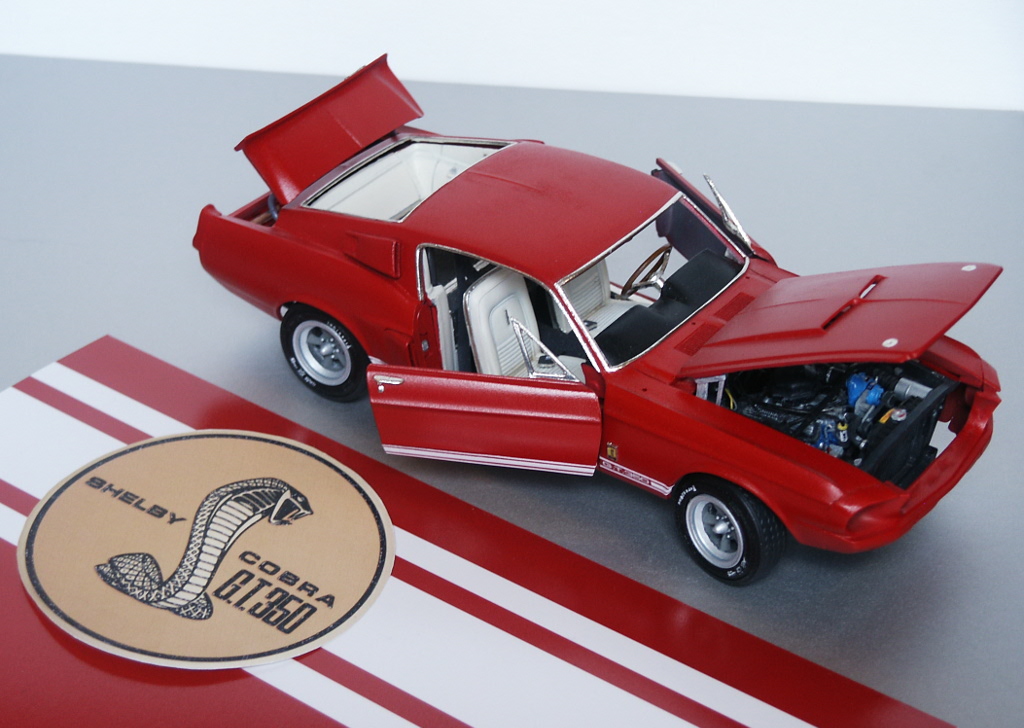
And finally, some early ideas on display. This is a graphic layout of the side stripes, color matched best I could manage to the body. Laid in place is a 1:1 scale print of the graphic from a 1967 GT350 gas cap, to serve as the display label. If I were more nuts I might buy a real gas cap emblem and place it there. Underneath it all would be a mirror (in place of the silvery base shown here). This should all fit inside a 9x9 inch display area.
*And you can see the label on the ignition coil here!
-
Re: AMT Shelby GT350 build
More catching up to present:
A bit of time preparing the bumpers. I had stripped off the plastic chrome plating, and did some research on the bumper guards. The Shelby didn't have the front lower bumper guards that are molded on the kit bumper. you can see them removed and laying to the left. The Shelby did have them on the rear, and are (apparently, most of the time) painted body color. Here the WIP moldings. Finished off the cleanup with hobby knife and sanding to smooth. Then went for the Bare Metal Foil on the front bumper.
Going back to the gloss coat, some good results. After another round of P1200 wet and another coat of clear, everything is looking decent. A nice glossy finish, but it's not really polished looking. I took these photos with some white reflector cards to hopefully reveal the surface a bit better. Sorry about the dust!
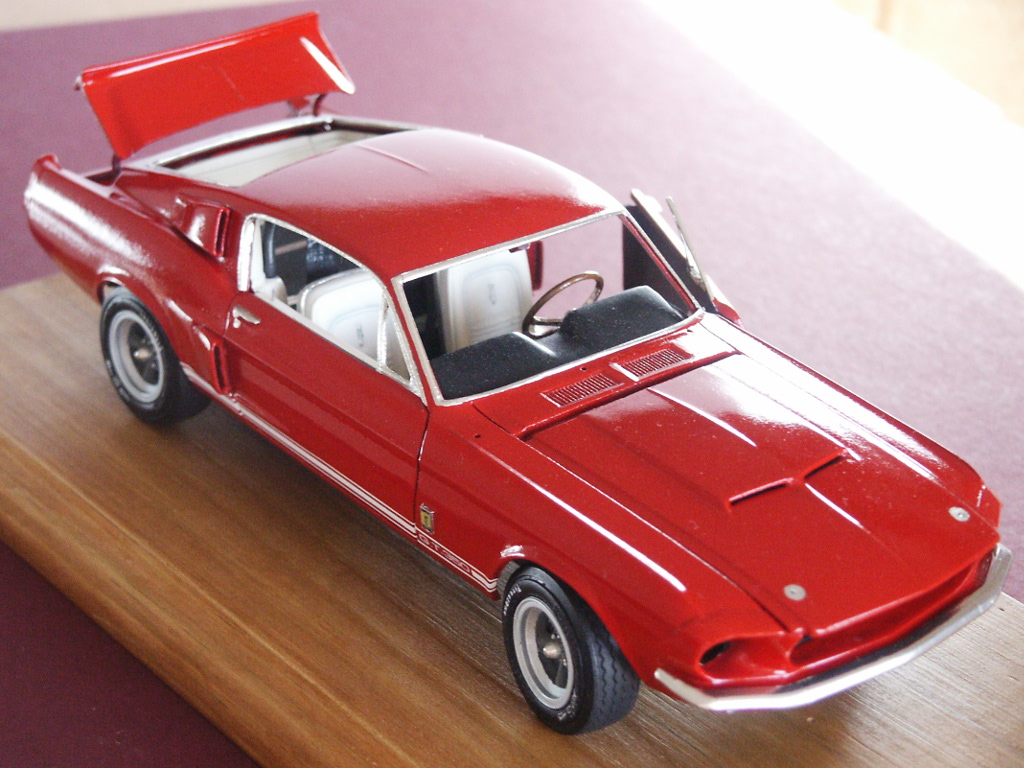
Problem is the finish was just rough, and no amount of polish could save it. Here, after using toothpaste as a fine abrasive, then waxing and polishing with Meguiar's Ultimate Quik Detailer... Still you can see it's better, but rough:
I had actually settled on being pretty happy with this result. Then somebody visiting commented that my paint job sure did come out rough. So I get more agressive... Graded polishing papers. Here is the product I purchased:
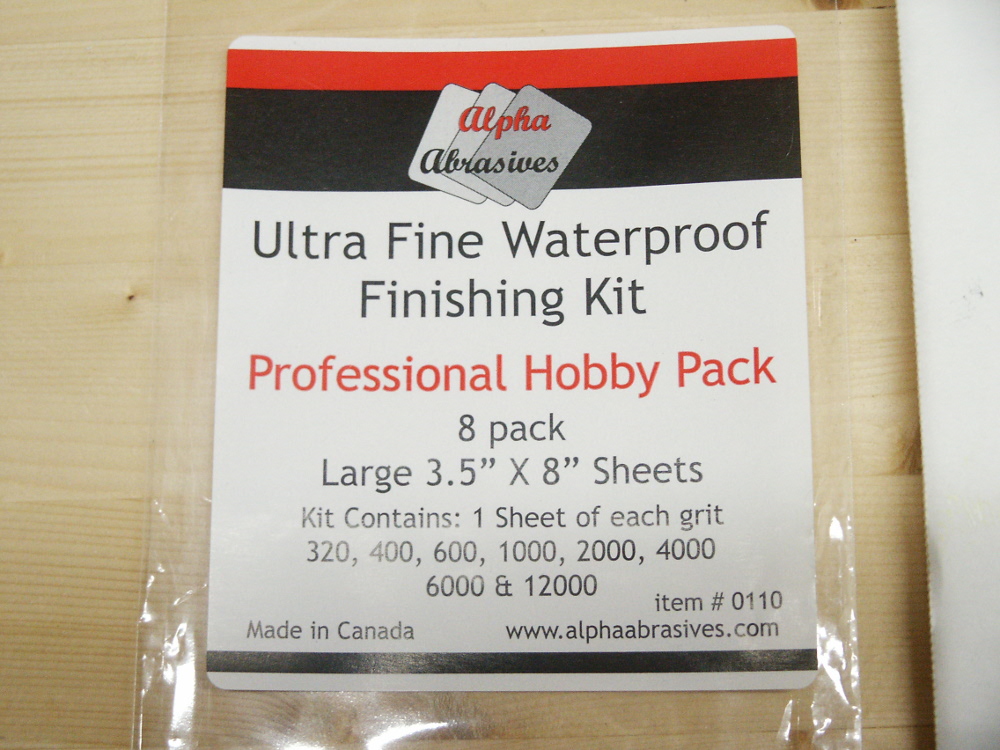
I started at 1000 grit for most body panels, and for a few I backed down to 600 grit, and progressing through 12000. Here is a shot of the results on the roof, which IMO had been the worst area:
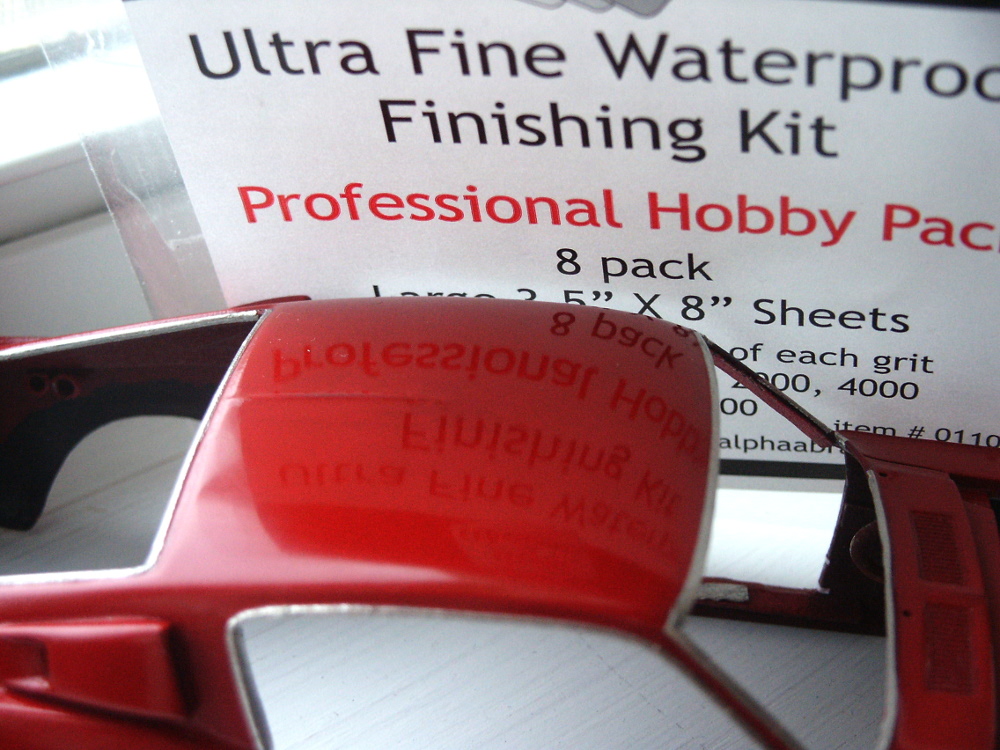
About 6 hours, and all the panels are now done. No mistakes, and it's all pretty evenly smooth. I'll wax it and give it a shot of Meguire's when I'm ready to finally polish it.
-
11th June 2015, 06:33
#80
Re: AMT Shelby GT350 build
Hey! Nice finish!
FAST AND BULBOUS!
 Posting Permissions
- You may not post new threads
- You may not post replies
- You may not post attachments
- You may not edit your posts
-
Forum Rules


 Reply With Quote